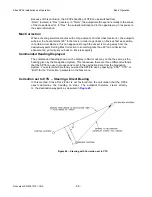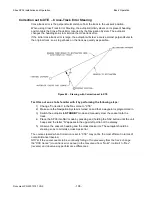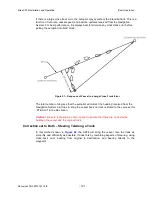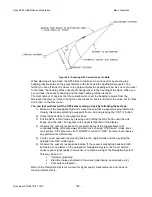
Sitex SP38 Installation and Operation
Advanced Operation
Document PN
29010101
V2r0
- 11
2
-
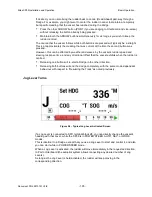
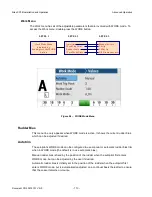
Rudder Bias will be the first line on the list, and will show the current helm bias. You can
change this value to suit, using the COURSE
CHANGE
knob. This feature is useful in order
to accommodate changing load or sea conditions.
As mentioned earlier, WORK
mode will automatically be disengaged if the boat’s speed rises
above the Work Trip Point set by the user. While it is disengaged, all normal features such as
automatic trim and off-course alarm will be operational.
Manual WORK Mode
Even if no NMEA source of speed data is available, WORK
mode can still be used, by
manually initiating it.
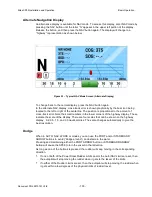
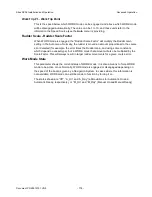
To do so, switch to AUTO
or NAV
mode, and then press the WORK
button for ~1 second
until the letter `A´ or `N´ in the upper left portion of the display stops flashing, and a small
letter `W´ appears beside it.
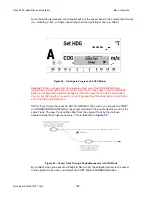
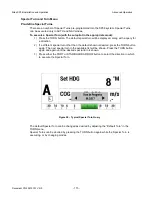
Then, double-press the WORK
button to bring up the Work menu. Highlight “Work Mode
State”. Then use the COURSE
CHANGE
knob to change the selection to “
M_On
” (Manual
On). WORK
mode is now engaged.
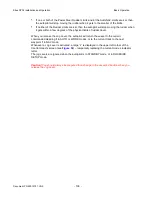
Caution
! When Manual WORK mode is engaged, large rudder movements may occur. If
your boat is traveling too fast, these rudder movements may affect the stability of the boat.
Do not engage Manual WORK mode without first ensuring that it is safe to do so and that
the boat speed is appropriate for using WORK mode.
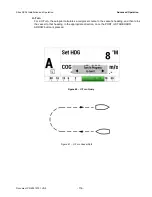
To disengage WORK
mode, again select “Work Mode State” in the Work menu and change it
to “
A_Rdy
” (Automatic Ready).
To cancel WORK
mode completely, press and hold the WORK
button for 1 second, or switch to
STANDBY
or POWER
STEER
mode.
You can also manually disengage WORK
mode, if it has been engaged in the automatic
mode. Double-press the WORK
button to bring up the Work menu. If WORK
mode is
engaged, the “Work Mode State” will show “
A_On
” beside it. Highlight “Work Mode State”,
then use the COURSE
CHANGE
knob to change it to “
M_Rdy
” (Manual Ready).
Summary of Contents for SP38 Autopilot
Page 2: ......
Page 14: ...Sitex SP38 Installation and Operation Document PN 29010101 V2r0 13 ...
Page 15: ...Sitex SP38 Installation and Operation Document PN 29010101 V2r0 14 Introduction ...
Page 16: ...Sitex SP38 Installation and Operation Document PN 29010101 V2r0 15 ...
Page 26: ...Sitex SP38 Installation and Operation Document PN 29010101 V2r0 25 ...
Page 35: ...Sitex SP38 Installation and Operation Document PN 29010101 V2r0 34 Installation ...
Page 36: ...Sitex SP38 Installation and Operation Document PN 29010101 V2r0 35 ...
Page 74: ...Sitex SP38 Installation and Operation Document PN 29010101 V2r0 73 ...
Page 108: ...Sitex SP38 Installation and Operation Document PN 29010101 V2r0 107 ...
Page 109: ...Sitex SP38 Installation and Operation Document PN 29010101 V2r0 108 Advanced Operations ...
Page 110: ...Sitex SP38 Installation and Operation Document PN 29010101 V2r0 109 ...
Page 123: ...Sitex SP38 Installation and Operation Document PN 29010101 V2r0 122 Care and Maintenance ...
Page 124: ...Sitex SP38 Installation and Operation Document PN 29010101 V2r0 123 ...
Page 127: ...Sitex SP38 Installation and Operation Document PN 29010101 V2r0 126 Appendices ...
Page 128: ...Sitex SP38 Installation and Operation Document PN 29010101 V2r0 127 ...
Page 156: ...Sitex SP38 Installation and Operation Document PN 29010101 V2r0 155 Warranty ...
Page 157: ...Sitex SP38 Installation and Operation Document PN 29010101 V2r0 156 User Notes and Settings ...
Page 158: ...Sitex SP38 Installation and Operation Document PN 29010101 V2r0 157 ...

