60 / 176
Siemens
Web server OZW772... V6.0
CE1C5701en
Building Technologies
Operate using a web browser
2015-10-12
Procedure:
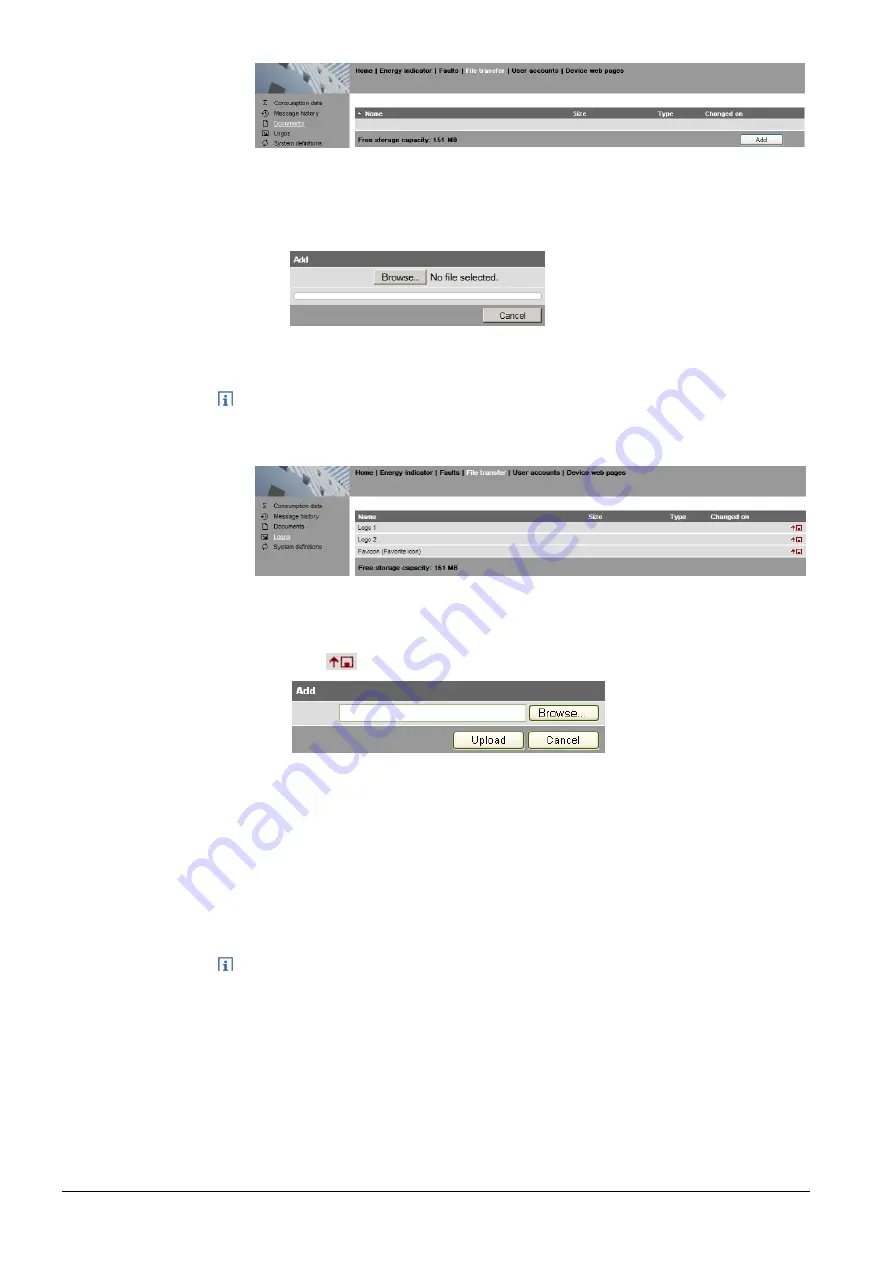
1. Select File transfer in primary navigation.
2. Select documents in secondary navigation
3. Click [ Add ]
4. Click [Browse] and select desired file.
5. The upload starts directly after selecting the desired files and clicking [Open].
·
Make sure there is enough memory for uploading.
·
The Administrator and Service levels allow for uploading documents.
Procedure:
1. Select l from secondary navigation.
2. Save existing logo(s) as needed (see below).
3. Click
4. Select the desired file.
Adhere to maximum dimensions (see Notes).
5. Click [ Upload ]
6. Re-load page content from Web Server (Internet Explorer, Firefox: Ctrl+F5;
i.e. no older data is displayed from the browser cache)
Save logos:
1. Click "Logo 1" or "Logo 2". The browser window opens with the logo.
2. Right-click the log and save to the desired location via "Save Image As".
·
Log file transfer is available to administrator and service user levels.
·
Allowed file formats: PNG, GIF, JPG, BMP.
·
The left logo (Logo 1) has max. 625 x 54 pixels.
·
The right logo (Logo 2) has max. 200 x 54 pixels.
·
The original logos are restored when resetting the Web Server to default.
·
The area belonging to the logo is highlighted in color when the cursor moves
within the display area above the logo line.
Upload
documents
Notes
Upload logos
Notes


