


72
|
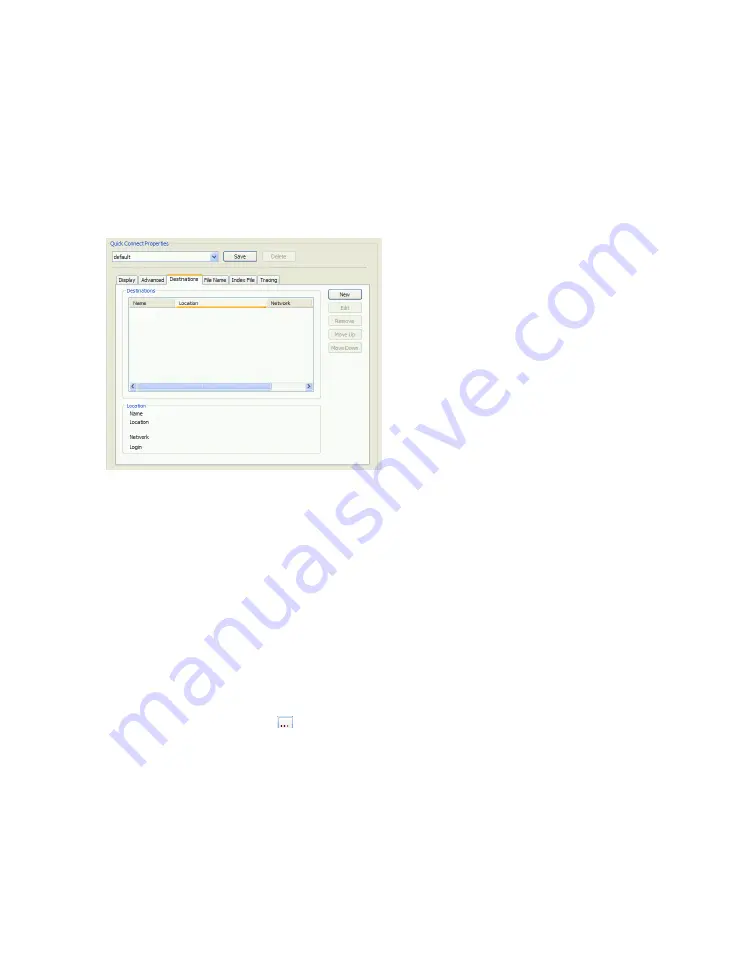
Configuring Quick Connect
Defining a scanning destination
You must define at least one destination. If you define more than one destination, Quick Connect
will prompt the user to select one during the scanning process.
To define a destination:
1
On the
Destinations
tab, click
New
.
2
In the
Name
field, type the name of the new destination.
3
Specify the type of destination and then specify information for the selected type.
> See “Destination type: Windows, Novell NetWare, or FTP Folder” on page 72.
> See “Destination type: SMTP Message” on page 73.
> See “Destination type: Destination List” on page 74.
4
When you have defined the destination, click
OK
.
Destination type: Windows, Novell NetWare, or FTP Folder
Under
Folder Location
, specify destination information for the scanned image files:
■
For Windows or Novell, click
(Browse) and then select an existing folder, or make a new
folder and then select it. For FTP, enter the FTP location, such as “\\ftp01\scans”. (The Browse
button is not available for FTP folders.)
■
Select the
Enable subfolder navigation
check box to allow users to select a subfolder at the
device.
■
In the
Maximum folder levels
field, enter the number of folder levels down that users may
navigate.


