62
|
Configuring Scan to Desktop
5
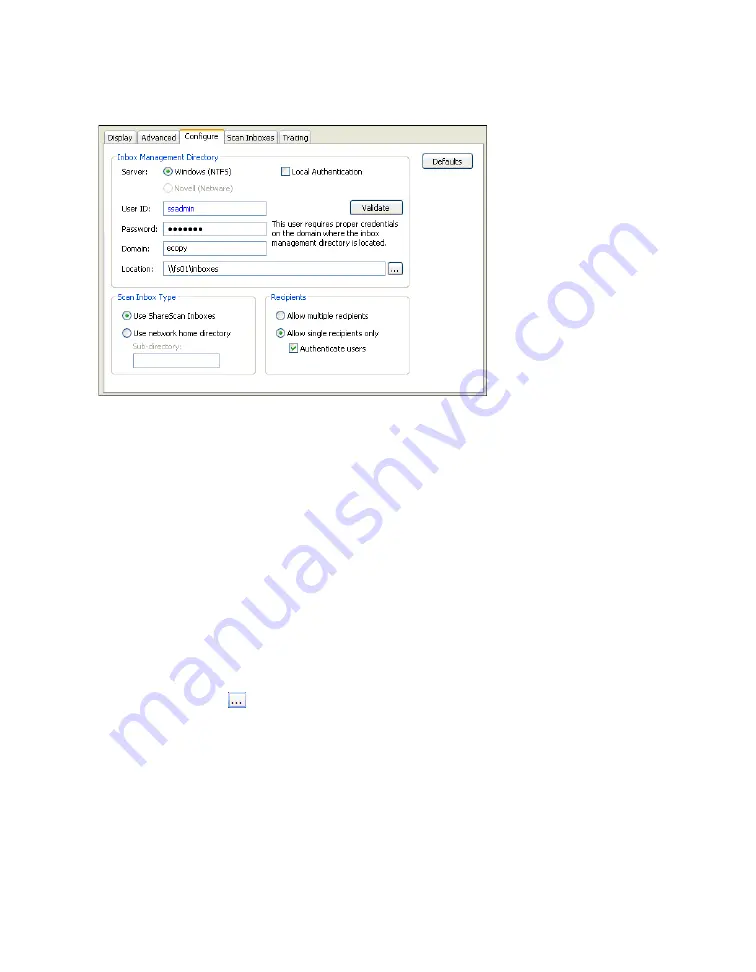
Click the
Configure
tab.
6
Under
Inbox Management Directory
, specify the appropriate settings and validate the
authentication information:
>
Server
— Select
Windows (NTFS)
or
Novell (NetWare)
.
>
Local Authentication
— Select this check box if you do not have a domain controller or
NetWare server on your network, or if you are authenticating in a workgroup. If you select
this option, each Scan to Desktop user must have an account on the local machine.
>
Logon information
— Enter the user ID, password, and domain or tree for the
administrative user account created by your network administrator (see “Setting up folders,
user, and groups” on page 59). If you selected
Local Authentication
, the name of the local
computer appears in the Computer field.
>
Validate
— Click
Validate
to verify the authentication information for the administrative
user account. If validation is successful, the user ID turns blue. If the user ID remains red,
make sure the account is a member of the ShareScanAdmin group.
>
Location
— Click
(Browse) and then specify the path to the Inbox Management
directory. If you are prompted to update permissions, click
Yes
. ShareScan OP creates an
empty userdirs.txt file in the specified directory (unless a file already exists).
7
Under
Scan Inbox Type
, select the desired option for temporary storage of scanned
documents:
> Select
Use ShareScan Inboxes
to use ShareScan inboxes.
> Select
Use network home directory
to use a subdirectory in the user’s network home
directory. Enter the name in the Sub-directory field. (This option is not available when you
select the
Allow multiple recipients
check box.)


