


SATELLINE-EASy Pro 35W
User Guide v.1.4
47
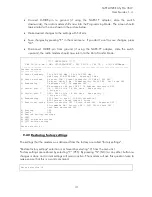
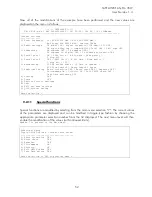
The hardware information can be seen in the main menu
***** SATELLINE *****
FW: 06.18.x.xx / HW: SEPT / PV: 05.00 / IM: 05 / S/N: 30032010
----------------------------------------------------------------------------
FW= Firmware HW=Hardware version PV=Product variant version IM=Interface module
(Voltage range and interface type) S/N= serial number.
9.2.8
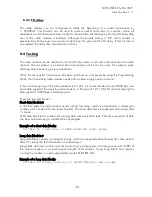
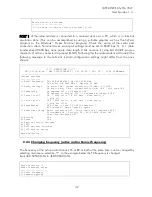
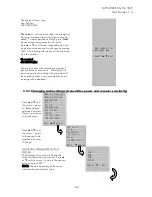
Changing addressing settings (primary and secondary RX- and TX-
addresses)
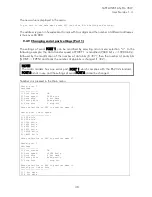
Addressing can be switched ON or OFF with the help of main menu selection ”3”. In the
following example a primary RX-address (receiver address) is switched ON and the corresponding
hexadecimal address value is modified (”0000”
”0020”). The current values of the parameters
are displayed and changed in toggle-type fashion by selecting the appropriate parameter
selection number from the list displayed. The next menu level will then enable the modification of
the values (within allowed limits). Modification of all other primary and secondary transmitter and
receiver addresses is done in similar way.
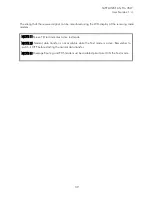
Number 3 is pressed in the Main menu.
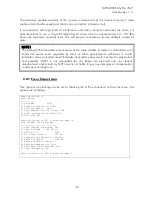
Addressing setup
Toggle ON/OFF values. Current value shown.
------------------------------------------
1) RX address OFF
2) TX address OFF
3) RX address to RS port OFF
4) Change primary RX address
5) Change primary TX address
6) Change secondary RX address
7) Change secondary TX address
8) TX address autoswitch OFF
Enter selection or ESC to previous menu >1
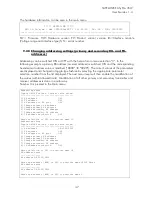
Addressing setup
Toggle ON/OFF values. Current value shown.
------------------------------------------
1) RX address ON 0000/0000
2) TX address OFF
3) RX address to RS port OFF
4) Change primary RX address
5) Change primary TX address
6) Change secondary RX address
7) Change secondary TX address
8) TX address autoswitch OFF
Enter selection or ESC to previous menu >4
RX address setup
----------------
RX address ON 0000/0000
Enter new address (HEX) or ESC to previous menu >0020 Enter
RX address setup
----------------
RX address ON 0020/0000
Enter new address (HEX) or ESC to previous menu >


