1
Use the
/
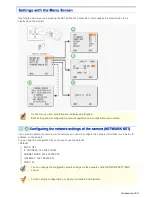
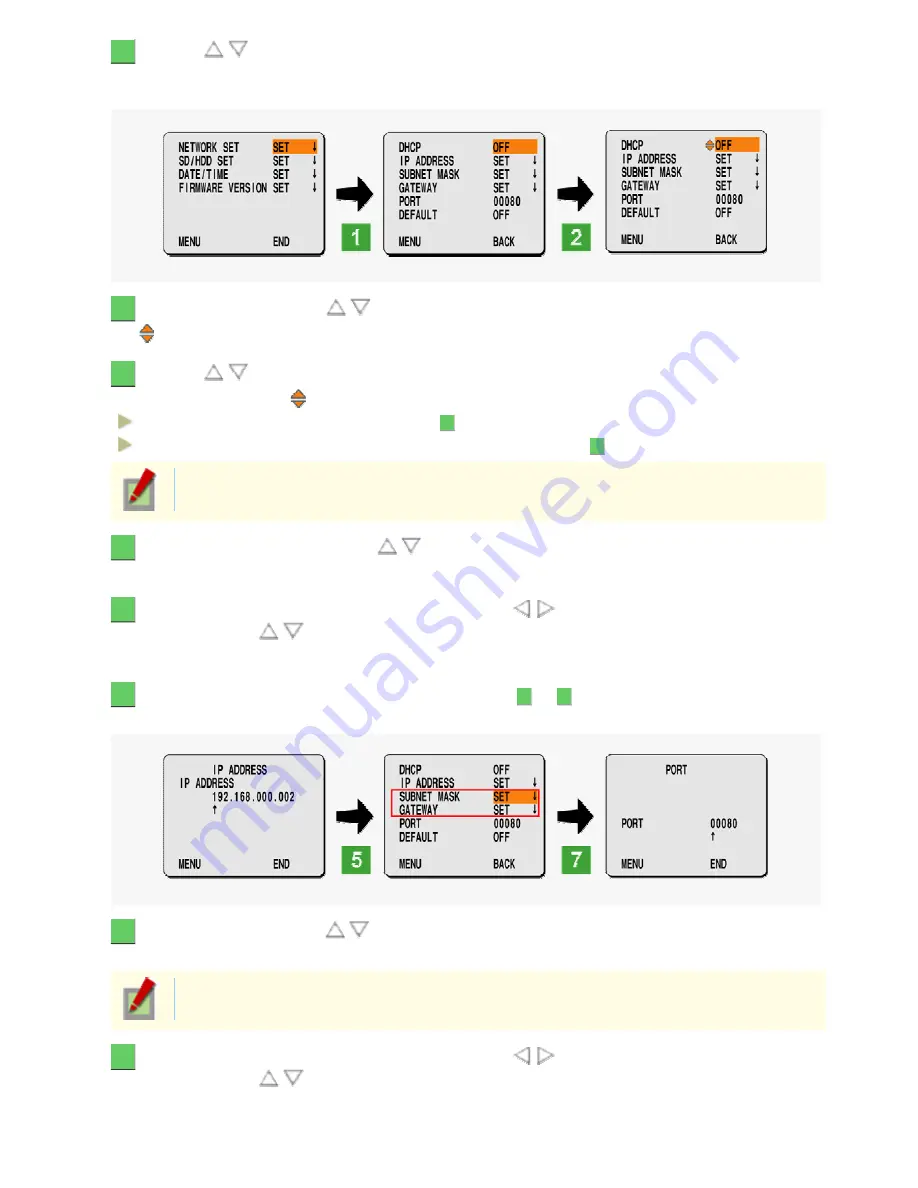
button to select [NETWORK SET] on the menu screen, and press the SET
button.
The network configuration screen appears.
2
Select [DHCP] using the
/
button and press the SET button.
The
symbol appears beside the available option, and you are ready to configure it.
3
Use the
/
button to select “ON” or “OFF” for [DHCP], and press the SET button.
The setting is saved and the
symbol disappears.
OFF: Sets the IP address manually (Go to step
4
.)
ON: Enables automatic address configuration using DHCP. (Go to step
7
.)
Setting [DHCP] to “ON” causes the menu items [IP ADDRESS], [SUBNET MASK], and [GATEWAY]
to disappear.
4
Select [IP ADDRESS] using the
/
button and press the SET button.
The IP ADDRESS screen appears.
5
Move the cursor to the desired position using the
/
button, select a number in each
digit using the
/
button, and then press the SET button.
The configured address setting is saved and you return to the network configuration screen.
6
In the same way as you did in [IP ADDRESS] (step
4
to
5
), configure the settings in
[SUBNET MASK] and [GATEWAY].
7
Select [PORT] using the
/
button and press the SET button.
The PORT screen appears.
When [SSL] is set to “ON” on the NETWORK SETTINGS screen, the screen title appears as [PORT
(SSL)].
8
Move the cursor to the desired position using the
/
button, select a number in each
digit using the
/
button, and then press the SET button.
The configured port number is saved and you return to the network configuration screen.
Introduction 19/23


