5
.10
Printing
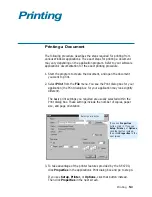
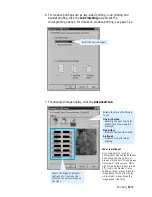
4. The dialog box allows you to access all information necessary for
using your printer.
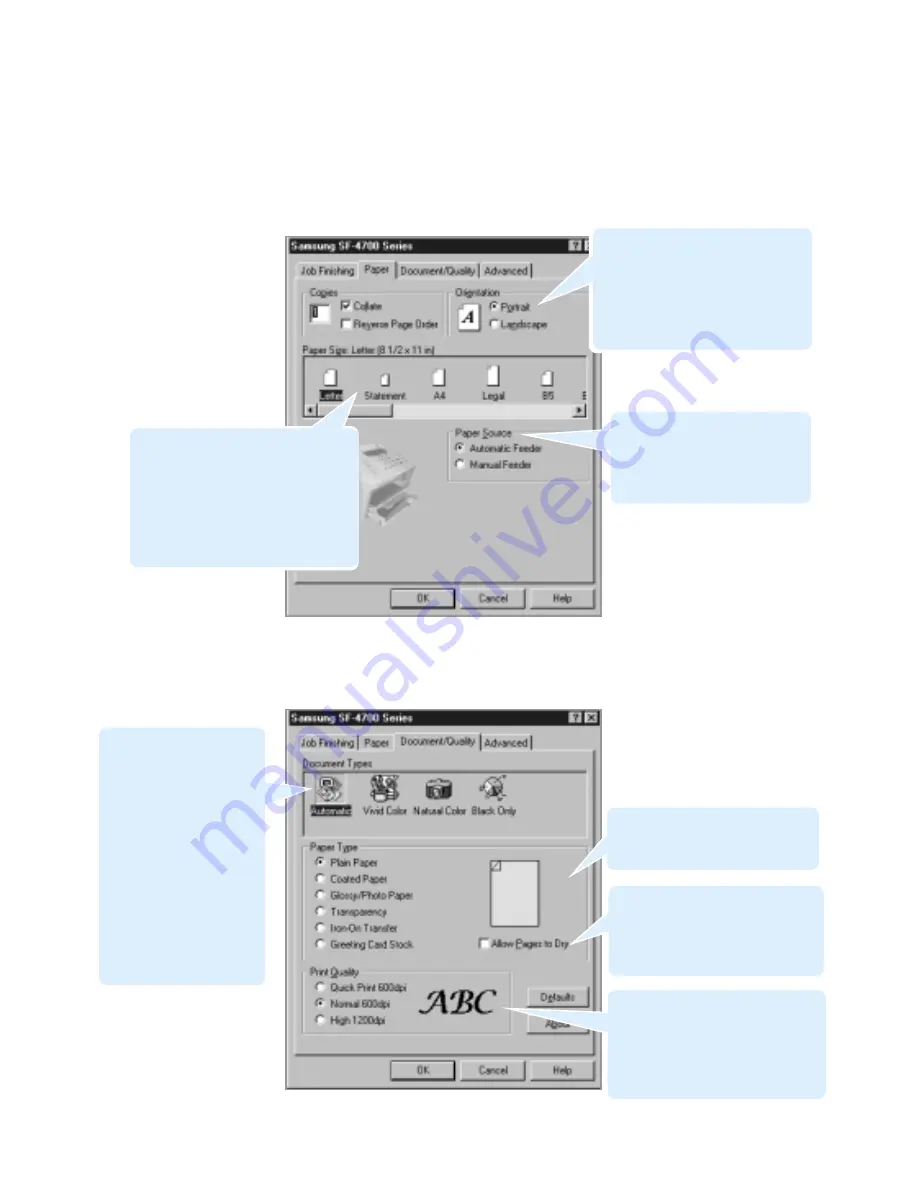
If necessary, click the Paper tab to display the settings shown below.
The Paper tab contains the options for setting the basic paper
handling.
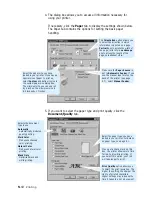
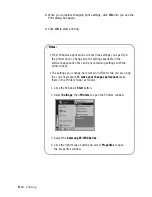
5. If you want to select the paper type and print quality, click the
Document/Quality tab.
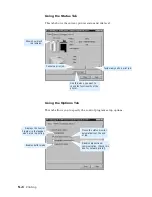
Make sure the Paper Source is
set to Automatic Feeder. If you
use the manual input slot on the
back of the printer (see page
5.7), select Manual Feeder.
Selects the document
type to use:
Automatic
Automatically produces
quality printing.
Vivid Color
Produces enhanced
color printing.
Natural Color
Produces natural color
printing.
Black Only
Optimizes black and
white printing.
Select the paper size you have
loaded in your printer. If you have a
special size of paper to print on,
select Custom and define its size in
the custom paper size dialog box.
The minimum size you can use is 3
by 5 inches. The maximum size is
8.5 inches by 17 inches.
Select the paper type you have
loaded in your printer. For details
on paper type, see page 5.1.
If you put a check mark on this
box, the printer allows more time
for ink to dry while printing. If
you select this option, your job
will take longer to print.
Print Quality option allows you
to select the print resolution. The
higher the setting, the sharper the
clarity of printed characters.
Higher settings may increase the
time it takes to print a document.
The Orientation option allows you
to select the direction in which
information is printed on a page.
Portrait prints across the width of
the page, letter style. Landscape
prints across the length of the
page, spreadsheet style.

