Section 02 717 ENGINE
Subsection 01 (LEAK TEST)
LEAK TEST
SERVICE TOOLS
Description
Part Number
Page
engine leak test kit ............................................................... 295 500 352 ........................................... 11
large hose pincher ................................................................ 529 032 500 ........................................... 13
small hose pincher................................................................ 295 000 076 ..................................... 11–13
GENERAL
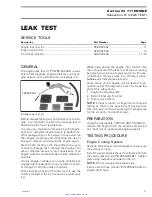
The engine leak test kit (P/N 295 500 352) is avail-
able to help diagnose engine problems such as en-
gine seizure, poor performance, oil leakage, etc.
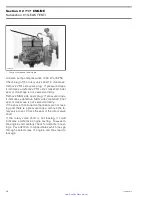
295 500 352
ENGINE LEAK TEST KIT
Before disassembling any components of the en-
gine, it is important to perform a leakage test to
determine which part is defective.
It is also very important after servicing the engine,
even for a complete engine rebuilt, to perform an-
other leakage test; at this stage, it may avoid fur-
ther engine problems and minimizing the risk of
having to remove and reinstall the engine again.
Static bench testing is the most effective way to
conduct a leakage test. Inboard testing does not
allow complete access to, and observation of all
engine surfaces and should be avoided whenever
possible.
On this engine, cylinders can not be verified indi-
vidually due to leakage from one cylinder to anoth-
er through a common intake manifold.
When installing hoses of the leak test kit, use the
collars provided in the kit to ensure a proper seal-
ing.
When pressurizing the engine, first confirm that
the components of the leak test kit are not leaking
by spraying a solution of soapy water on all hoses,
connections, fittings, plates, etc. If there is a leak,
bubbles will indicate leak location.
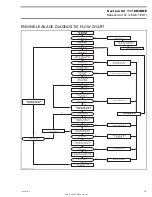
Three areas of the engine will be tested in se-
quence as per the diagnostic flow chart (see the
end of this subsection).
1. Engine Cooling System.
2. Bottom End and Top End.
3. Rotary Valve Shaft.
NOTE:
If a leak is found, it is important to continue
testing as there is the possibility of having more
than one leak. Continue pumping to compensate
for the air lost to find another leak.
PREPARATION
Using the appropriate
VEHICLE SHOP MANUAL
,
remove the engine from the vehicle and place it
on a bench or an appropriate engine support.
TESTING PROCEDURE
Engine Cooling System
Remove the exhaust manifold gasket and ensure
the surface is clean.
Install the appropriate exhaust manifold plate from
the engine leak test kit (P/N 295 500 352). Tighten
plate using fasteners provided in the kit.
NOTE:
Do not torque plate excessively.
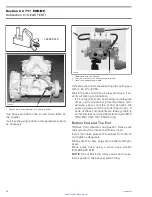
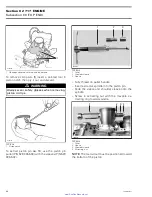
Install a small hose pincher (P/N 295 000 076) on
engine drain hose.
smr2005-075
11
www.SeaDooManuals.net

