


Step 5: Reinstalling the Machine
Procedure
1.
Once the preparations are complete, move the machine with as little delay as possible.
2.
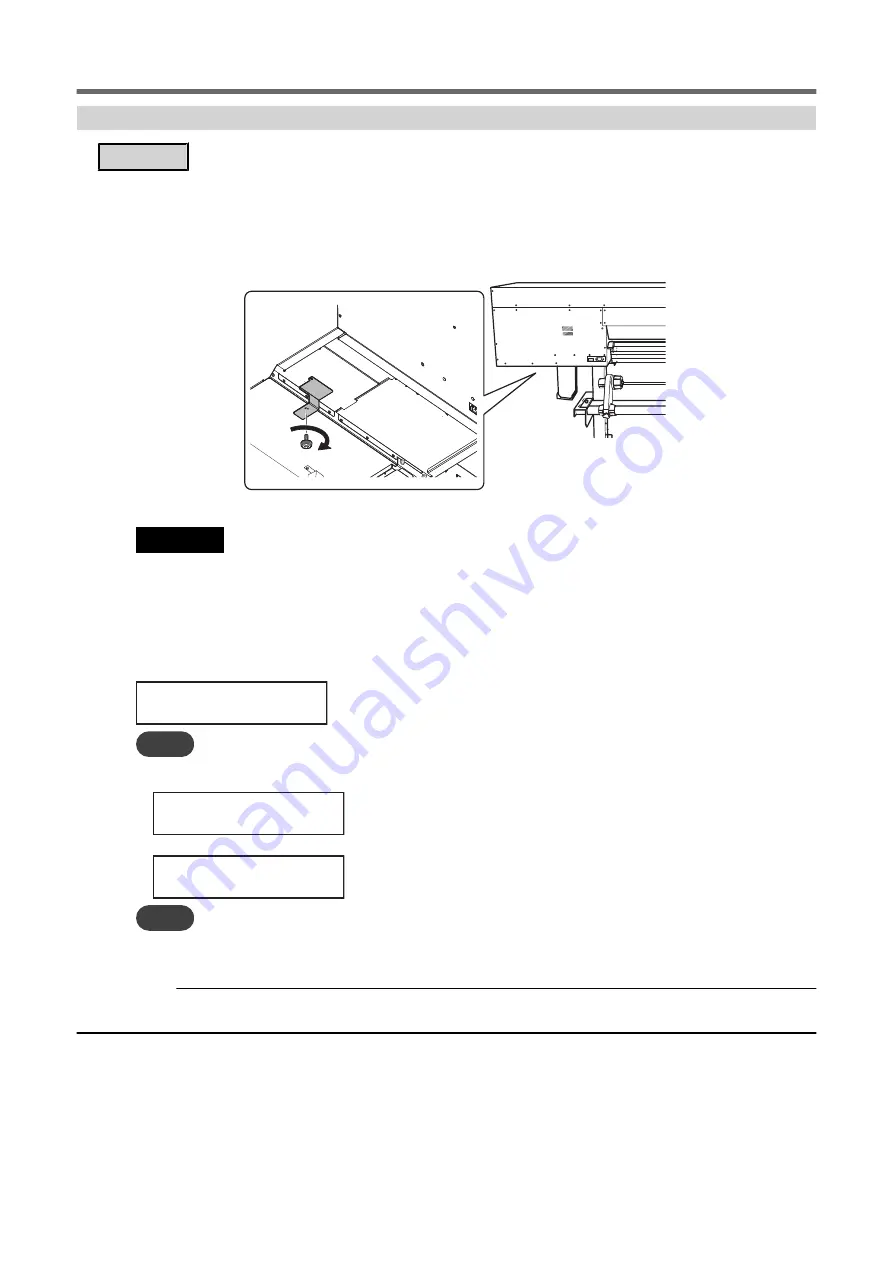
Reinstall the printer immediately, and then remove the retainer securing the print heads in place.
For storage, attach the retainer in the position indicated in the figure.
3.
Turn on the main power switch.
IMPORTANT
To prevent the print heads from being damaged, move the machine with as little delay as possible and switch on the main
power as soon as possible after moving the machine. To install the machine again, follow the procedure in the Setup Guide.
4.
Press the sub power button.
The screen shown below appears, and then the machine is filled with TR2 cleaning liquid. The (approximate)
remaining time for the procedure is displayed on the screen. (The display shown below is an example.
"01:40" = "1 minute and 40 seconds")
FILLING LIQUID
>>>>> 01:40
MEMO
If the cleaning liquid pouch is empty, or is not attached, the following screen will be displayed. Install a cleaning liquid pouch
and press [ENTER].
SET CL-LIQUID
FOR WIPER
Once the machine is filled with TR2 cleaning liquid, the following screen is displayed and the power turns on.
SETUP SHEET
MEMO
After the printer is reinstalled, the media holder adjuster must be adjusted by a suitably qualified worker. This work must be
performed by a Roland DG worker. Contact your authorized Roland DG Corporation dealer.
RELATED LINKS
P. 58 "TR2 Cleaning Liquid Pouch Replacement"
Preparing to Move the Machine
312
1. Operations When Moving the Unit
Summary of Contents for TrueVIS VG2-540
Page 9: ...Chapter 1 Basic Handling Methods 8 ...
Page 36: ...Setup of Media 2 Basic Operations 35 ...
Page 43: ...Setup of Media 42 2 Basic Operations ...
Page 60: ...Ink Pouch TR2 Cleaning Liquid Pouch Replacement 2 Basic Operations 59 ...
Page 61: ...Chapter 2 Output Method 60 ...
Page 70: ...REDO ADJ YES DONE 10 Press ENTER to confirm your entry Printing Output 1 Printing Method 69 ...
Page 138: ...Chapter 3 Optimizing Quality and Efficiency 137 ...
Page 195: ...W1100mm B Adjusting the Output start Location 194 2 Optimizing Work Efficiency ...
Page 217: ...Chapter 4 Maintenance 216 ...
Page 272: ...Chapter 5 Troubleshooting Methods 271 ...
Page 305: ...Chapter 6 Appendix 304 ...
Page 308: ...8 Detach the blade holder Preparing to Move the Machine 1 Operations When Moving the Unit 307 ...


