


Creating a Song
Deleting Measures (Delete)
You can delete a specified range of measures from your
performance. This will cause the subsequent measures to be moved
forward to fill the gap.
Example: Deleting measures 5–8
1
2
3
4
5
6
7
8
9
10
1
2
3
4
5
6
Erasing Measures (Erase)
You can erase a specified range of measures, causing those
measures to be blank.
Erasing performance data will not affect the length of the song.
Example: Erasing the performance data from measures 5–8 (make blank)
1
2
3
4
5
6
7
8
9
10
1
2
3
4
5
6
7
8
9
10
Blank measures
Exchanging Parts (Part Exchange)
You can exchange the notes recorded for one part with the notes
recorded for a different part.
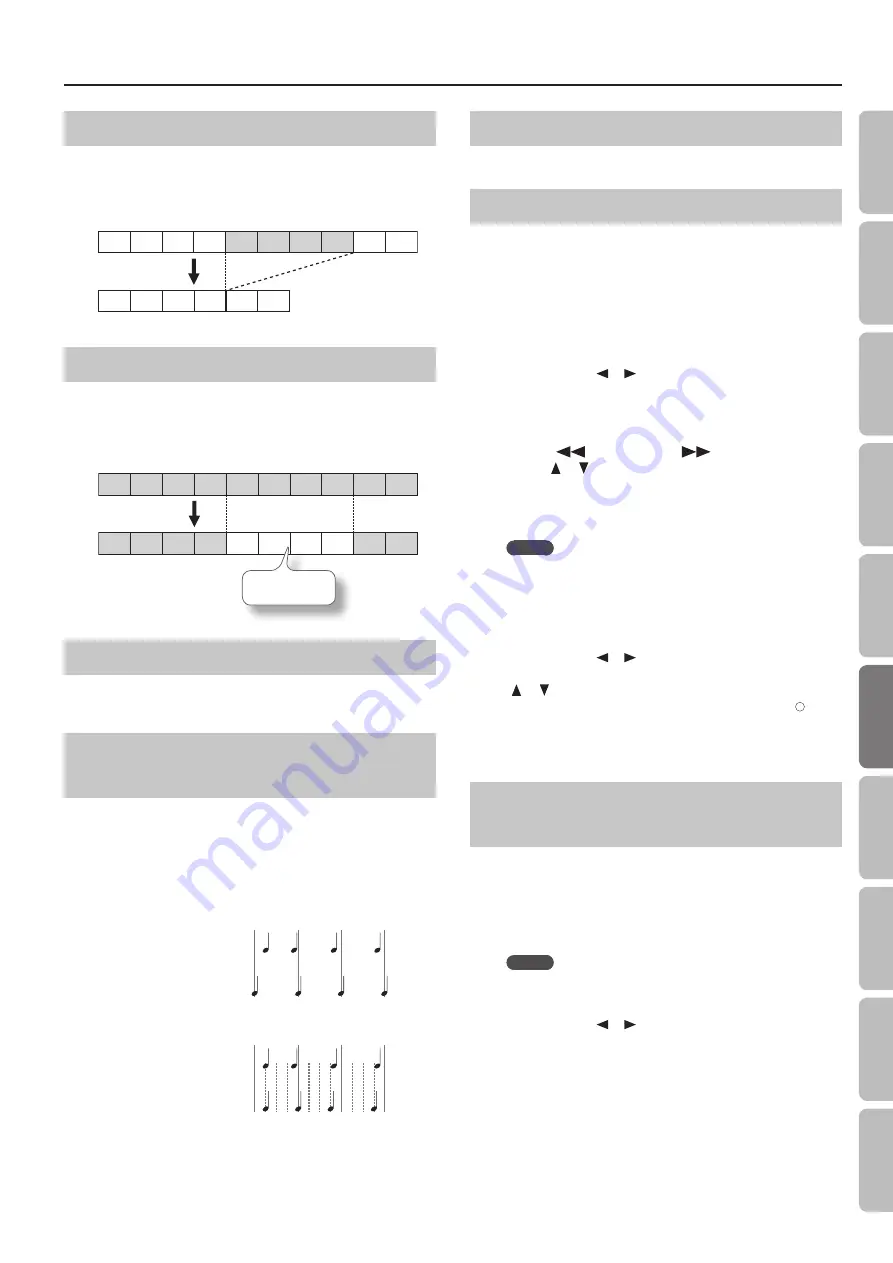
Tightening Up the Note Timing
(Quantize)
Inaccuracies in the timing of your performance can be corrected
to the timing interval you specify. This is called the “ Quantize”
function.
For example, if you intended to play at quarter-note timing, but
were not perfectly accurate, you can tighten-up your performance
by quantizing to quarter-note (1/4) timing.
1
2
3
4
1
2
3
4
Example: Resolution set to “1/4”
Played timing
Corrected by Quantize
Played timing
Corrected by Quantize
Example: Resolution set to “1/16”
Transposing an Entire Part (Transpose)
You can transpose the entire part you specify.
Editing Individual Notes (Note Edit)
You can edit the individual notes of a recorded performance. This
function is called “ Note Edit.”
You can use Note Edit to make the following changes.
• Delete an unintended note
• Change the pitch of a single note
• Change the playing strength (velocity) of a single note
• Change the fingering number
1.
Use the cursor [
] [
] buttons to select the part
containing the note that you want to edit .
The number of the selected part is shown in the center of the
screen.
2.
Use the [
] (Bwd) button, [
] (Fwd) button, or
cursor [
] [
] buttons to select the note that you want
to edit .
Make the note you want to edit appear in the center of the screen.
The location of each note is shown in terms of “measure: beat: tick.”
MEMO
A “tick” is a finer division of timing than a beat. There are 120
ticks in one beat.
3.
Press the [O] button .
The edit screen will appear.
4.
Use the cursor [
] [
] buttons to select the note’s
“Note,” “velocity,” “Finger,” or ”Part”, and use the cursor
[
] [
] buttons to edit the value .
If you want to delete the selected note, press the [ ]
button .
5.
When you’re finished editing, press the [×] button
Editing Tone Changes During the Song
(PC Edit)
Songs in which the instrumental sound changes during the song
(i.e., when the tone used by a part is switched during the song)
contain commands that specify when the tone should change.
These commands are called “program changes (PC).” You can use “
PC Edit” to delete a program change or to change the tone that is
selected.
MEMO
You can’t insert a program change into a measure or beat that
does not already contain a program change.
1.
Use the cursor [
] [
] buttons to select the part
containing the program change that you want to edit .
The number of the selected part is shown in the center of the
screen.
45
O
per
ation G
uide
Bef
or
e
You P
la
y
Per
forming
Lessons
Pr
ac
ticing
Rec
or
ding
Piano Desig
ner
Settings
A
ppendix
Func
tions


