


Recording
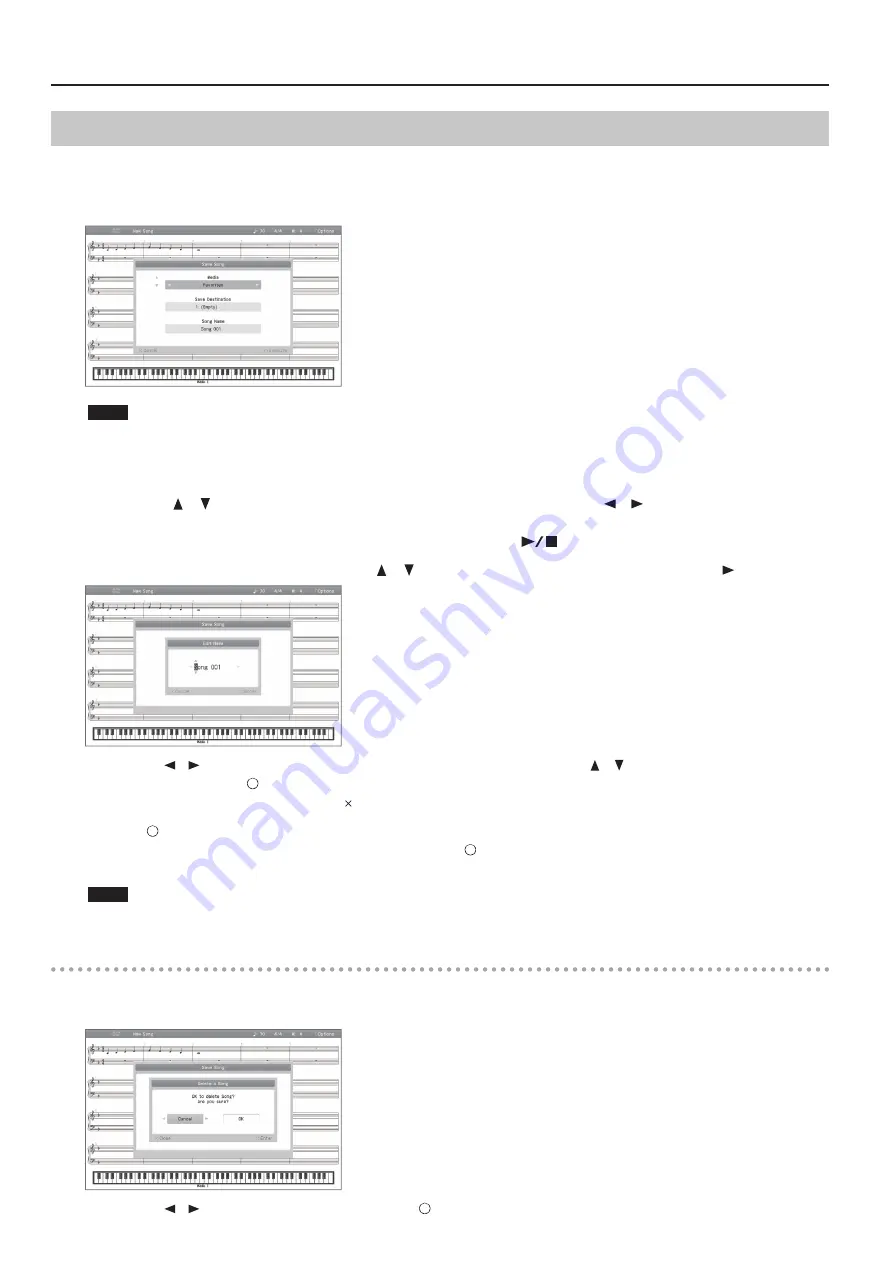
Saving a Song
You can assign a name to the recorded song or the currently selected SMF, and save it in Favorites (internal memory) or on a USB flash drive.
The song save screen will appear when you choose “Save Song” in the setup screen, when you finish recording, and when you edit the song in “16
part recorder” or “Song Edit.”
* Audio songs can’t be saved in Favorites (internal memory).
NOTE
If you turn off the HPi-50e’s power without saving your recorded performance, that performance will be lost. If you want to keep your recorded
performance, you must save it as described below.
1.
The song save screen will appear when you stop recording or when you switch songs .
2.
Use the cursor [
] [
] buttons to select the Media and Save Destination, and use the cursor [
] [
] buttons to change the setting .
You can’t select a USB flash drive as the media unless a USB flash drive is connected to the USB memory port.
If a folder is selected as the save destination, you can enter that folder by pressing the [
] (Play/Stop) button.
3.
If you want to change the song title, use the cursor [
] [
] buttons to select the Song Name and then press the [
] cursor button .
Use the cursor [
] [
] buttons to select the character that you want to change, and use the cursor [
] [
] buttons to change the character.
To confirm the name, press the [ ] button.
If you decide to cancel the name change, press the [ ] button.
4.
Press the [
] button; the song will be saved to the specified media, destination, and song title .
If a folder is selected as the save destination, you can’t save by pressing the [ ] button.
If you save to a song number for which a song title is shown, the newly saved song will overwrite the previously saved song.
NOTE
Never turn off the power while the screen indicates “Executing...”
Cancelling the song save operation
1.
You can cancel the song save operation by pressing the [×] button in the song save screen .
If you’ve previously recorded or edited, the following confirmation screen will appear.
Use the cursor [
] [
] buttons to select “OK” and then press the [ ] button; the song you recorded or edited will be erased.
38


