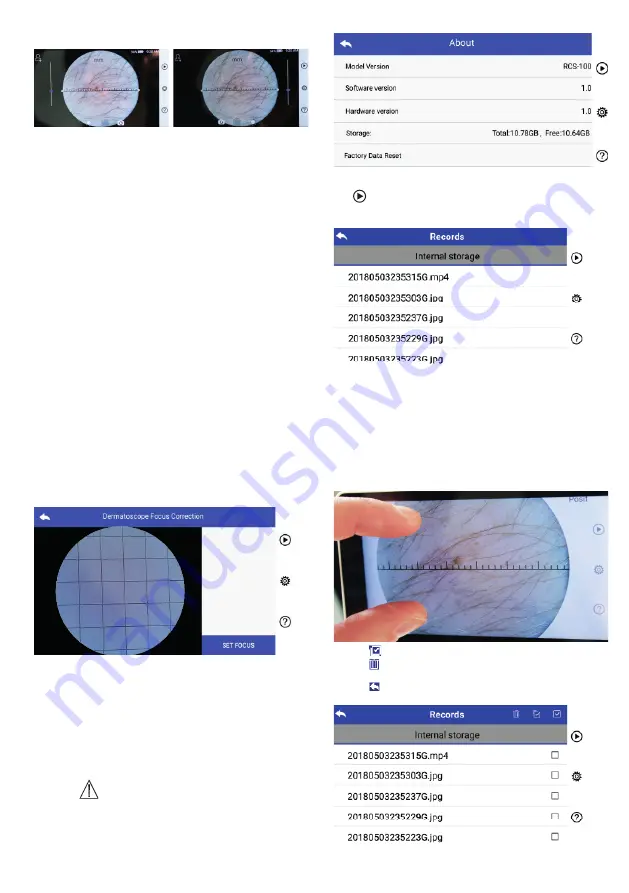
• Right handed mode:
left handed right handed
User can set left / right handed operation mode according to
their operating habits.
• Preserve lens setting:
The system can be set to ‚default‘ mode or ‚record keeping‘
mode. When the lens is changed in ‚default‘ mode, the sys-
tem will reset to default parameters. When the lens is ch-
anged in ‚record keeping‘ mode, the parameters of the last
used lens would be preserved.
• Duration of image review:
The user can set the review time for which the photo is dis-
played after taking the shot. The review time can be set to
2, 3, 5 seconds and freeze.
If set to freeze, the image will be displayed until the next
command is given (use of control wheel or touch to the
display).
• Dermatoscope ruler unit:
There is a software ruler in the main interface of dermato-
scope, user can set the software ruler unit to mm or inch.
• Dermatoscope focus correction:
In dermatoscope mode, user can correct the focusing
length.
Place the DE lens on the desired surface, at the desired
focus distance. The system will automatically focus. If the
focus is poor, pick up the camera and repeat. When the
image can be seen clearly tap ‚SET FOCUS‘ to save the fo-
cus data and then return to the main menu.
• Hospital name:
When hospital name is entered, it will be displayed at the
bottom right of test report.
• About:
About item shows model version, software version, hard-
ware version, storage and factory data reset.
• Factory data reset:
Warning:
Performing the factory data reset will lose recorded files.
7.7 Records manager
Tap
to enter the records management page. All records
displayed in records list by time reverse.
a) Review a record:
Click on the record wanted to review and enter record
view page.
1) Finger slides on the touch screen left/right to review
previous/next record.
2) Use two fingers to move closer (zoom in) or farther away
(zoom out) to view the image on the touch screen.
When the image is zoomed in, use a finger to move the image
around the screen so the entire image can be seen.
3) Tap to delete the picture.
4) Tap to enter a page that all photos are displayed in
square form.
5) Tap to come back to main page.
b) Delete records:
Long press a record to enter the record deletion page.
18
Summary of Contents for RCS-100
Page 1: ...RCS 100 Gebrauchsanweisung...
Page 13: ...RCS 100 Instruction For Use...
Page 25: ...RCS 100 Instructions d utilisation...
Page 37: ...RCS 100 Instrucciones de uso...
Page 49: ...RCS 100...
Page 51: ...51 2 3 3 3 1 3 2 3 6 2600 3 3 4 Riester RCS 100 5 Riester 7 3...
Page 54: ...54 1 2 2800 3 5600 4 4500 5 7500 6 10 000 7 9000 8 6500 2 3 5 7 7 a 1...
Page 60: ...60 1 RCS 100 CISPR 11 1 RCS 100 CISPR 11 B RCS 100 IEC 61000 3 2 A IEC 61000 3 3...
Page 63: ...63 RCS 100 Istruzioni per l uso...
Page 78: ...78...
Page 79: ...79...


