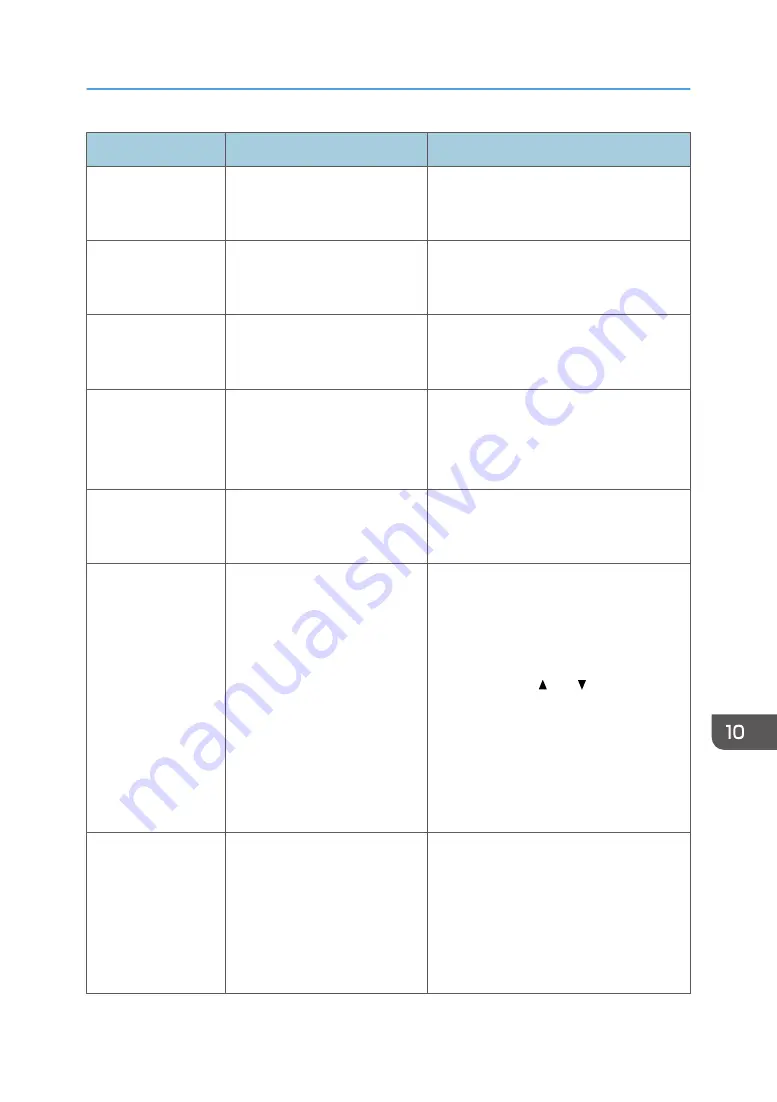
Message
Causes
Solutions
Scan (NW)
Disconnected
A scanned file could not be sent
because the Ethernet cable was
not connected properly.
Reconnect the Ethernet cable properly,
and then try the operation again.
Scan (USB)
Disconnected
The USB cable was
disconnected while scanning
from a computer.
Reconnect the USB cable properly, and
then try the operation again.
Server Connection
Failed
A scanned file could not be sent
because the destination could
not be reached.
Confirm that the destination is registered
correctly, and then try the operation again.
Server Response
Error
An error occurred in
communication with the server
before beginning transmission.
Confirm that the destination is registered
correctly, and then try the operation again.
If the problem could not be solved, contact
the network administrator.
Service call - X
A fatal hardware error has
occurred, and the machine
cannot function.
Contact your sales or service
representative.
Set Correct Paper
The paper tray does not contain
A4, Letter, or Legal size paper.
While the message is displayed, press the
[OK] key. A menu for changing the paper
size of the current tray appears.
Load A4/Letter/ Legal size paper in the
tray, and then select the corresponding
paper size using [ ] or [ ] key and press
the [OK] key. The machine will then print
out the fax.
Note that the paper size setting for the tray
under [Tray Paper Settings] will be
changed. See page 202 "Tray Paper
Settings".
Set Original to ADF
Cannot use exposure
glass
with set. in [Scan
Size].
Scanning could not be
performed because the originals
were not placed in the ADF,
even though the machine is set
to scan originals larger than
A4/Letter size.
• Use the ADF, even when scanning
A4/Letter or smaller size originals.
• If you need to use the exposure glass,
set A4/Letter or smaller size in [Scan
Size] under [Scan Settings], and then
try again. See page 132 "Specifying
Scan Settings for Scanning".
Error and Status Messages on the Screen
277
Summary of Contents for SP 320SFN
Page 2: ......
Page 14: ...Smart Organizing Monitor 1 Click Help on the Printer Configuration screen DSG253 12 ...
Page 18: ...16 ...
Page 36: ...1 Guide to the Machine 34 ...
Page 81: ...2 Press the Clear Stop key DSG129 Basic Operation of Copying 79 ...
Page 136: ...5 Scanning Originals 134 ...
Page 138: ...DSG273 6 Sending and Receiving a Fax 136 ...
Page 222: ...7 Configuring the Machine Using the Control Panel 220 ...
Page 293: ...DSG187 5 Lower the ADF Clearing Misfeeds 291 ...
Page 320: ...11 Configuring Network Settings Using OS X 318 ...
Page 376: ...MEMO 374 ...
Page 377: ...MEMO 375 ...
Page 378: ...MEMO 376 EN GB EN US EN AU M289 8616A ...
Page 379: ... 2016 ...
Page 380: ...M289 8616A AU EN US EN GB EN ...


