1394 Interface Unit Type 4510
20
1
IIII
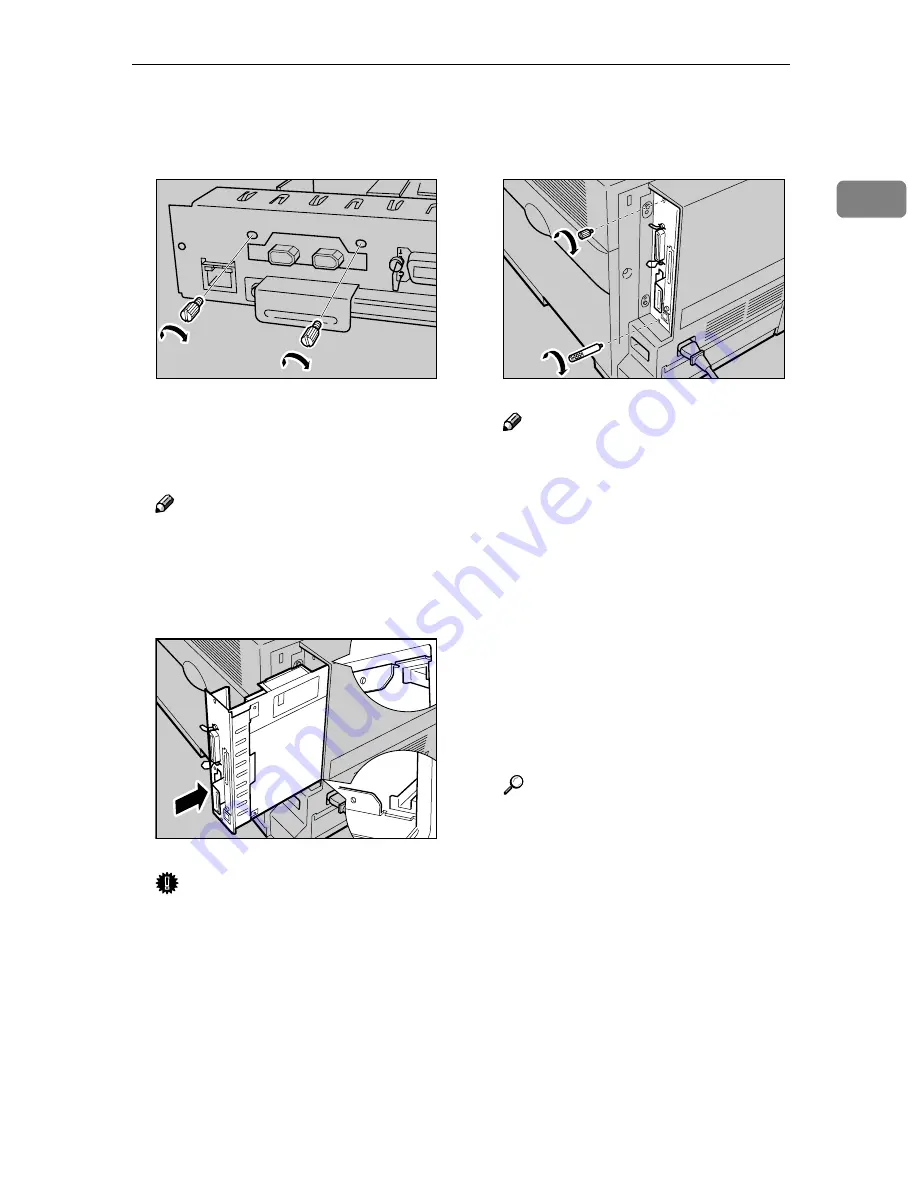
Fasten the 1394 Interface Unit on
the controller board using the
screws that you removed in step
EEEE
.
JJJJ
Align the controller board to the
top and bottom rails, and then
push in slowly until it stops.
Note
❒
When installing other options
on the controller board, do not
close the controller board, but
go to the steps for installing the
option.
Important
❒
The printer may not work prop-
erly if the controller board is not
set correctly.
KKKK
Fasten the controller board to the
printer with the two screws that
you removed in step
CCCC
.
Note
❒
After finishing installation, you
can check whether the 1394 In-
terface Unit is installed proper-
ly. Print the configuration page
from th e " L is t/T est Prin t"
menu. If it is installed properly,
you will see "IEEE1394 " for
"Controller Option".
❒
If the 1394 Interface Unit is not
installed properly, reinstall it
from step
B
. If you cannot in-
stall it properly even after at-
tempting reinstallation, contact
your sales or service representa-
tive.
Reference
For more information about
printing the configuration page,
see "Making Printer Settings
with the Control Panel",
Admin-
istrator Reference.
ZHBPB060E
ZHBP070E
ZHBP010E
Summary of Contents for Aficio CL2000
Page 20: ...8...
Page 40: ...Paper and Other Media 28 2...
Page 60: ...Replacing Consumables and Maintenance Kit 48 3...
Page 88: ...Troubleshooting 76 5...
Page 96: ...EN USA G120 8904...
Page 150: ...54 Copyright 2004...
Page 151: ...55 EN USA GB GB G120 8714...
Page 197: ...43 EN USA G120 8804...
Page 198: ...Copyright 2004...
Page 199: ...EN USA G120 8804...
Page 465: ...266 Operating Instructions Administrator Reference Copyright 2004...
Page 466: ...267 Operating Instructions Administrator Reference EN USA G120 8713...
Page 482: ...Operating Instructions Client Reference 16 IEEE 802 11b...
Page 732: ...266 Operating Instructions Client Reference Copyright 2004...
Page 733: ...267 Operating Instructions Client Reference EN USA G120 8711...


