RT-500-M
RHOTHETA
Page 65 of 168
User Manual
Pressing the hotkey “Go to Freq.” (s. Figure 61, position 1) adopts the currently
marked frequency as main bearing frequency and switches to the normal bearing mode
on the “Bearing” page.
Pressing the hotkey “Delete Freq.” (s. Figure 61, position 2) deletes the currently
marked frequency from “Result List”. The deleted frequency will not be skipped
anymore, when the results are scanned after pressing “Scan Results”.
Pressing “Scan Results” (s. Figure 61, position 3) starts the scan list mode, which runs
only around the frequencies which had a result during the last scan (frequency span
around 100 kHz).
Pressing “Edit Search” (s. Figure 61, position 4) will open the “Search List” dialog (s.
“Edit Scan” below).
Pressing “Edit Exclude” (s. Figure 61, position 5) will open the “Exclude List” dialog (s.
7.2.4.3).
o
Pressing the hotkey “Edit Scan” (s. Figure 60, position 6) will open the dialog for changing the
settings of the “Search List” (s. Figure 62).
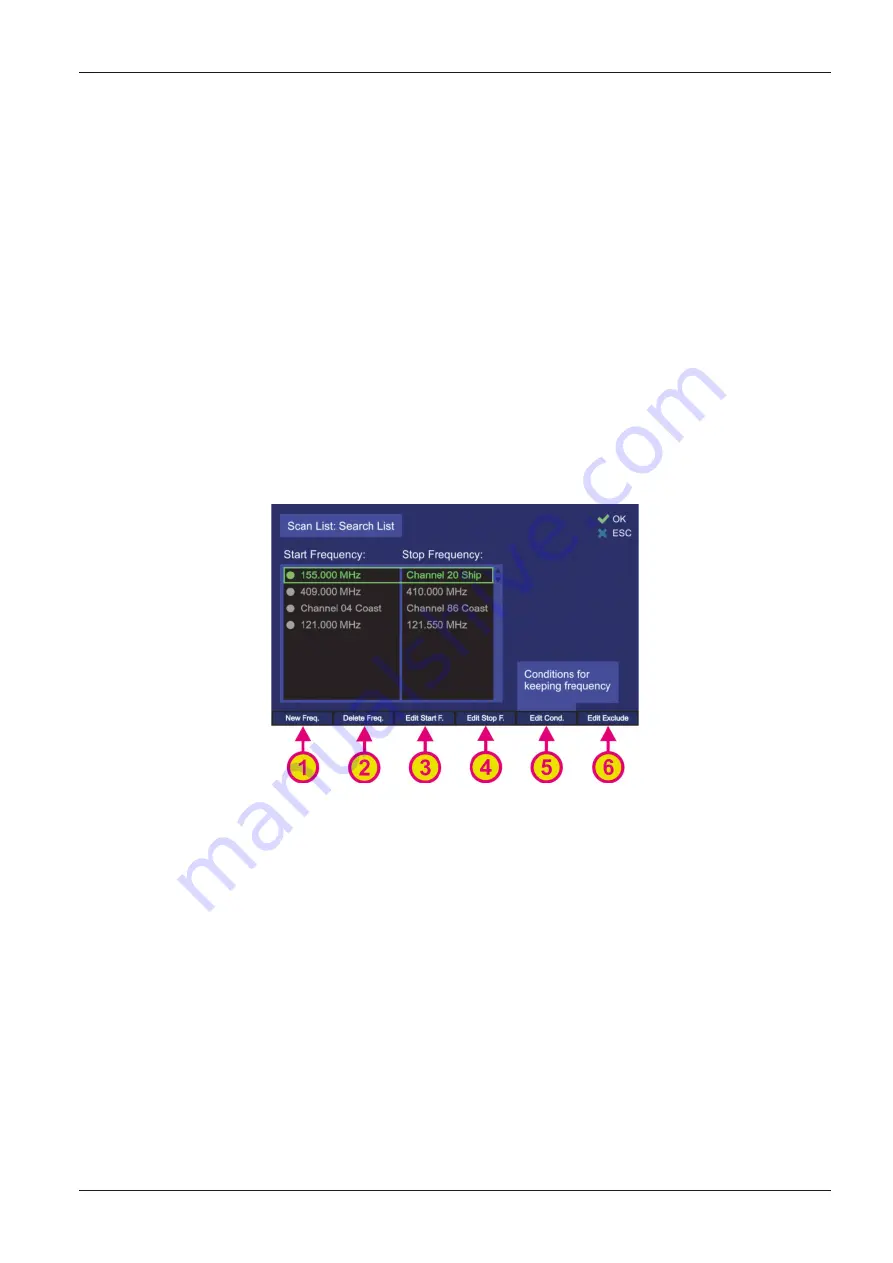
Figure 62. "Search List" settings
Pressing the hotkey “New Freq.” (s. Figure 62, position 1) generates a new line in the
“Search List” and opens the dialog for frequency/channel input (s. Figure 38 and its
description in 7.2.2.4). When entering a new start frequency, the stop frequency is
automatically set to the same value as the start frequency.
Pressing the hotkey “Delete Freq.” (s. Figure 62, position 2) deletes the currently
marked line from the “Search List”. After an entry has been deleted and the dialog left
by pressing “OK”, the deleted frequency range will not be scanned anymore, when you
restart the scan.
Pressing the hotkey “Edit Start F.” (s. Figure 62, position 3) opens the “Frequency
Input Dialog” (s. 7.1.2.2), which allows modifying the “Start” frequency of the currently
marked frequency range.
Pressing the hotkey “Edit Stop F.” (s. Figure 62, position 4) opens the “Frequency Input
Dialog” (s. 7.1.2.2) which allows modifying the Stop Frequency of the currently marked
frequency range.


