10.3 Range
The Range and Range Shift functions enable you to change
the range of depth displayed on-screen. Changes to the Range
and Range shift will apply to both the Sonar and DownVision
applications.
Range
The Range function enables you to define the range of depth
that you see on-screen.
By default, the range is set to automatic, this adjusts the range
to ensure the bottom is always displayed on-screen. This is
useful for locating bigger fish and other objects located closer
to the bottom such as wrecks
There may be circumstances in which you want to see a more
detailed image showing less depth beneath your vessel. This is
useful for finding smaller fish that feed nearer the surface
Range Shift
The Range Shift function enables you to define which area of the
overall depth you want to be able to see on-screen. For example,
if your range is 250 feet and the display is showing the surface
(0 feet) at the very top of the display, and 250 feet at the bottom
of the display, you can use the Range Shift function to focus on
a different 250 feet range. For example, 20 feet at the very top
of the screen, and 270 feet at the very bottom of the screen.
Changing the depth range
You can choose from either:
•
automatic
adjustment whereby the display automatically
shows the shallowest required range.
•
manual
adjustment of the depth range, up to the maximum
depth.
From the application menu:
1. Select
Range
.
2. Select
Range
to switch between Auto and Man.
3. With manual mode selected you can now use the
Rotary
control
to adjust the depth range shown on-screen.
Note:
With the
Range
menu displayed you cannot use the
Rotary Control
to range in and out. To use the
Rotary
control
to range in and out, first close the
Range
menu.
Using range shift
The default setting adjusts the display to keep the bottom in the
lower half of the display window. Alternatively you can shift the
image within the current range. Changes to the range shift are
reflected in all windows.
From the application menu, with
Range
set to Manual:
1. Select
Range
.
2. Select
Range Shift
.
The range shift dialog is displayed.
3. Adjust the setting to the required value.
4. Select
Back
or press the
Ok
button to confirm the setting and
close the range shift dialog.
10.4 Display options
The application can be customized using the display options
menu.
The display options menu allows you to change the current
display mode and to select other features which can be adjusted
or turned on and off as required.
Changing the display mode
In full screen views you can change the display mode of the
Sonar and DownVision applications.
Note:
Display modes are NOT available in splitscreen views.
When in scrolling mode:
1. Press the
OK
button.
The main menu is displayed.
2. Select
Display Options
.
3. Select
Display Mode
.
4. Select Zoom, or A-Scope.
Note:
A-Scope mode is only available in the Sonar
application.
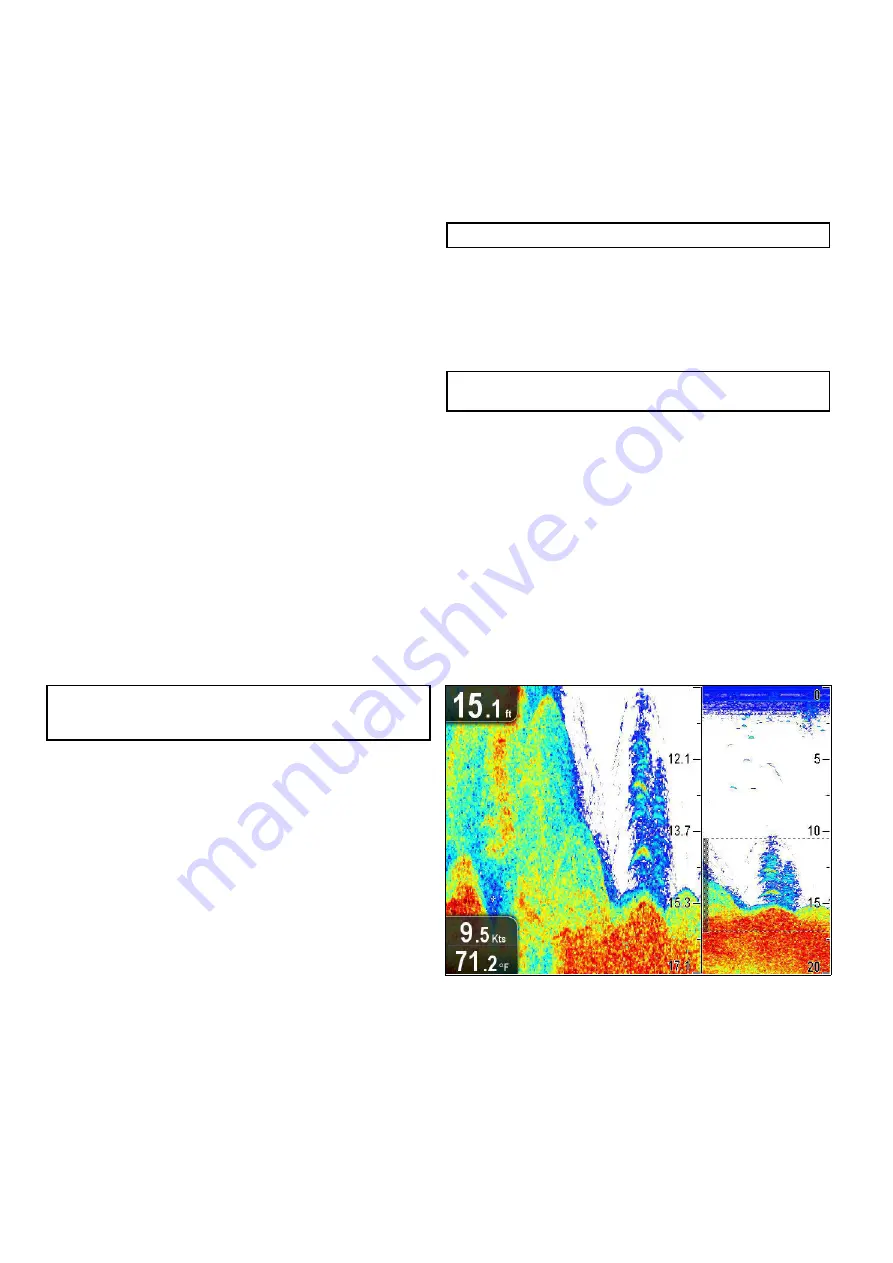
Zoom mode
Zoom mode magnifies a region of the screen to display more
detail.
This zoom option enables you to:
• Replace the standard image with a zoomed image alongside
the standard image.
• Set the zoom factor to a predefined level, or adjust it manually.
• Reposition the zoomed portion of the image to a different point
in the display.
When the range increases, the area shown in the zoom window
also increases.
In Zoom mode the screen is split and displays the zoomed
image alongside the standard image. The zoomed section is
indicated on the standard screen by a zoom box.
Adjusting the zoom factor
When zoom mode is active you can either select a predefined
zoom factor or adjust it manually.
In Zoom mode, from the application menu:
1. Select
Display Options
.
2. Select
Zoom Factor
.
3. Select a preset Zoom Factor (
x2
,
x3
,
x4
) or select
Manual
Once selection is made you will be returned to the Display
Options menu.
4. If Manual is chosen select
Manual Zoom
The manual zoom factor dialog is displayed.
5. Adjust the setting to the required value.
6. Select
Back
or use the
Ok
button to confirm the setting.
62
Dragonfly
Summary of Contents for E70085 Dragonfly
Page 2: ......
Page 4: ......
Page 10: ...10 Dragonfly ...
Page 14: ...14 Dragonfly ...
Page 18: ...18 Dragonfly ...
Page 28: ...28 Dragonfly ...
Page 32: ...32 Dragonfly ...
Page 52: ...52 Dragonfly ...
Page 70: ...70 Dragonfly ...
Page 78: ...78 Dragonfly ...
Page 82: ...82 Dragonfly ...
Page 95: ......
Page 96: ...www raymarine com ...


