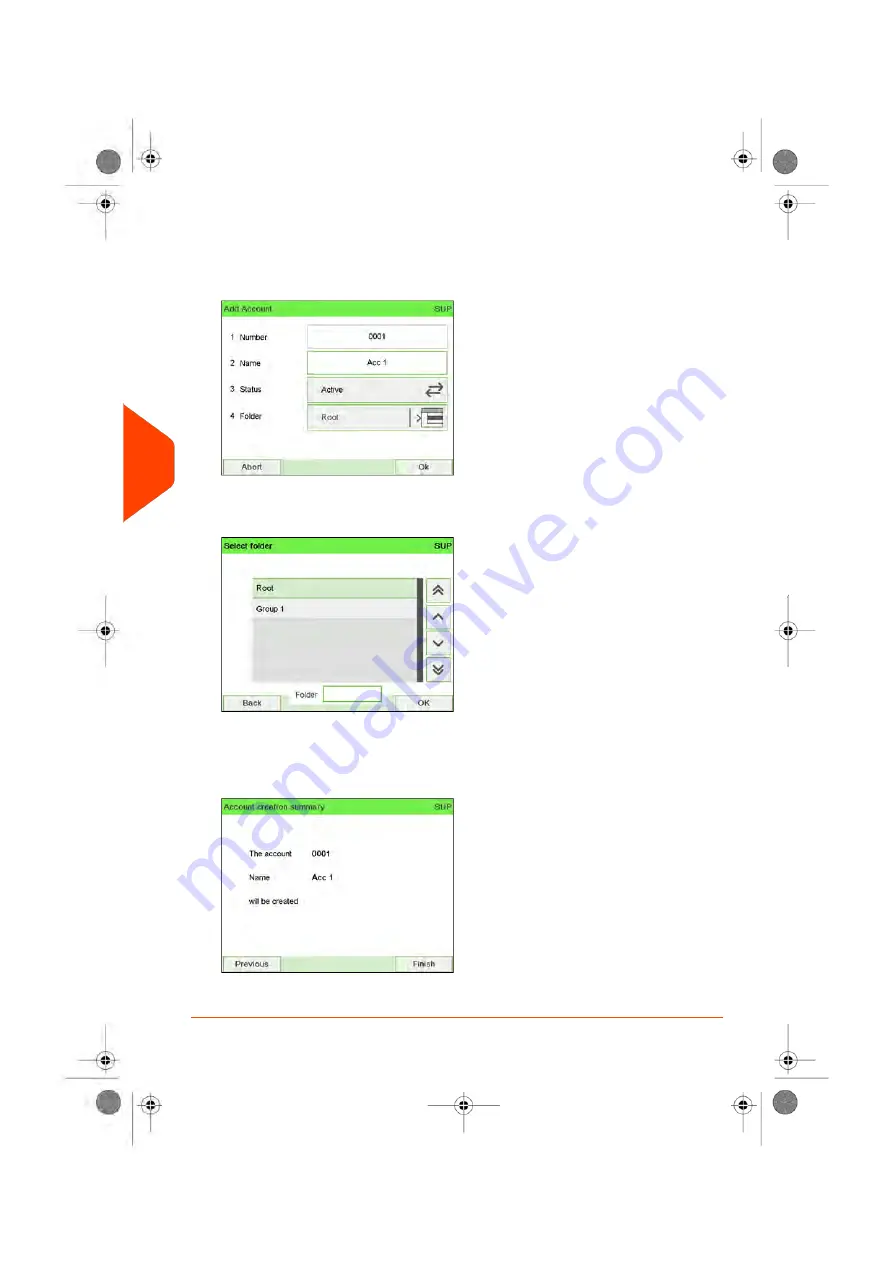
3.
Enter the account Number and Name using the keypad and press
[OK]
. Select the
Account Status (the button displays the current status:
Active
or
Inactive
).
Press the screen to change fields.
4.
To put the Account into a Group other than 'Main Folder', select the Folder button,
select a Group or Subgroup in the list and press
[OK]
.
5.
Activate Budget and Surcharge if necessary.
6.
On the Add account screen, press
[OK]
.
The Account creation summary screen is displayed.
7.
Press
[OK]
to confirm the creation of the account.
154
| Page 154 | Jun-22-2021 11:01 |
6
Accounts
and
Access
Control
Summary of Contents for IX-7
Page 1: ...User Guide iX 7 Franking Machine ...
Page 5: ... Page 4 TOC Jun 22 2021 11 01 ...
Page 7: ......
Page 15: ......
Page 17: ......
Page 107: ......
Page 109: ......
Page 123: ......
Page 125: ......
Page 195: ......
Page 197: ......
Page 205: ......
Page 221: ...Content 216 Page 216 Jun 22 2021 11 01 8 Reports ...
Page 227: ......
Page 229: ......
Page 235: ...2 Call is complete 230 Page 230 Jun 22 2021 11 01 9 Online Services ...
Page 274: ...Geodesic map 10 Configuring your Mailing System 269 Page 269 Jun 22 2021 11 01 ...
Page 275: ...Geodesic codes 270 Page 270 Jun 22 2021 11 01 10 Configuring your Mailing System ...
Page 297: ......
Page 299: ......
Page 329: ......
Page 355: ......
Page 371: ......
Page 380: ...A0139564 B 22 06 2021 ...


