'&%
5
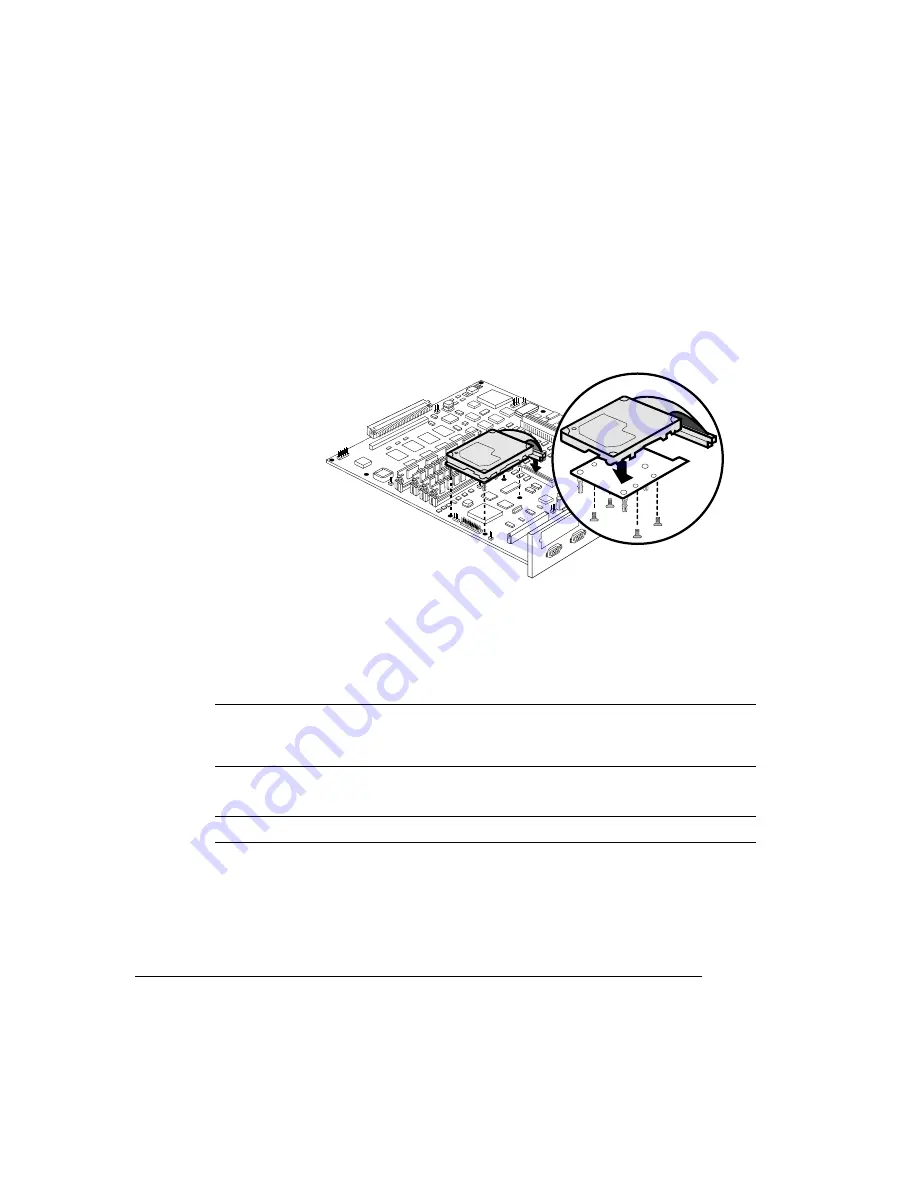
Attach the IDE hard disk to the hard disk bracket.
Attach the IDE hard disk to the bracket with the grooved-end of the bracket facing the
ribbon cable. The screw holes in the bottom of the hard disk should match up with the
holes on the hard disk bracket. Fasten the hard disk to the bracket with the screws
provided.
6
Position the hard disk so that the four support posts face the controller
board, the colored stripe on the ribbon cable faces away from you, and the
connector is down.
7
Insert ribbon cable connector pin 1 (the colored stripe side of the cable) in
hard disk connector pin 1.
Caution:
Make sure that the ribbon cable connector and the controller board
connector pins are properly aligned. Damage to the controller board could result if
the pins are misaligned.
8
Press down gently but firmly on the cable connector until it is fully seated.
Caution:
Do not push or pull with the ribbon cable. Use the cable connector.
9
Align the support posts with the holes on the controller board, and then
press down to secure the hard disk to the controller board.
So that you don’t stress the board, press one corner at a time to secure the hard
disk to the controller board.
...................................................
...................................................
Summary of Contents for Magicolor 2 plus
Page 1: ......
Page 7: ...Introduction on page 1 2 About This Manual on page 1 2 Options on page 1 4...
Page 12: ......
Page 17: ...c Lift the SIMM out 6 Remove the new SIMM from its antistatic bag...
Page 28: ......
Page 52: ......
Page 66: ......
Page 79: ...Sources of Support on page A 2 QMS World wide Offices on page A 4...


