Getting Started
© PHYTEC Meßtechnik GmbH 2002 L-586e_2
19
•
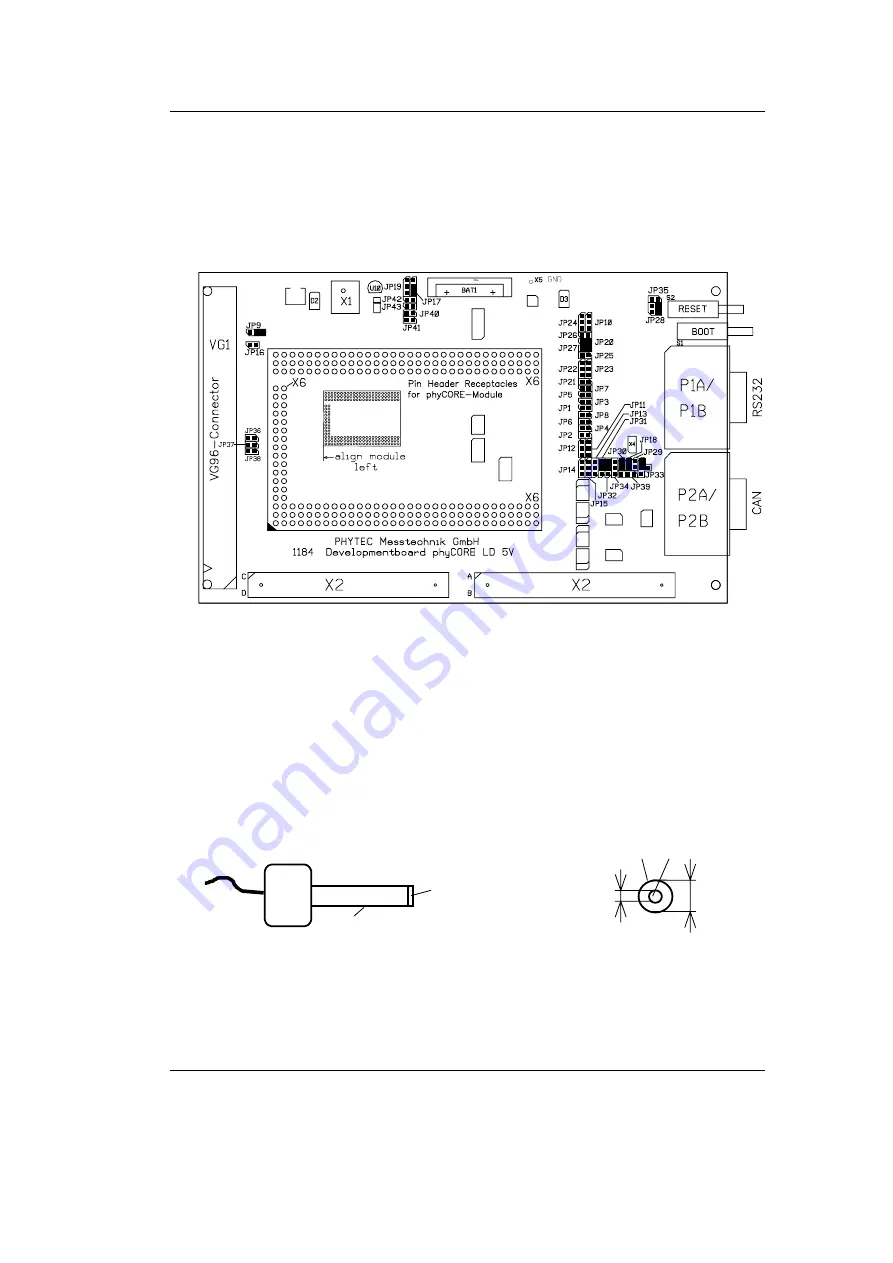
Configure the jumpers on the phyCORE Development
Board LD 5V as indicated below. This correctly routes the RS-232
signals to the DB-9 connector (P1A = bottom) and connects the
Development Board’s peripheral devices to the phyCORE module.
Figure 2:
Important Connectors, Buttons and Suitable Jumper Settings on the
phyCORE Development Board LD 5V
•
Connect the RS-232 interface of your computer to the DB-9
RS-232 interface on the phyCORE Development Board LD 5V
(P1A = bottom) using the included serial cable.
•
Using the included power adapter, connect the power socket on the
board (X1) to a power supply (refer to Figure 3 for the correct
polarity).
+5 VDC
GND
≥
500 mA
Center Hole
1.3 mm
3.5 mm
-
+
Polarity:
Figure 3:
Power Connector
•
Simultaneously press the Reset (S2) and Boot (S1) buttons on the
phyCORE Development Board LD 5V, first releasing the Reset
and then, two or three seconds later, release the Boot button.
Summary of Contents for phyCORE-P87C591
Page 14: ...phyCORE P87C591 QuickStart Instructions 10 PHYTEC Me technik GmbH 2002 L 586e_2...
Page 36: ...phyCORE P87C591 QuickStart Instructions 32 PHYTEC Me technik GmbH 2002 L 586e_2...
Page 52: ...phyCORE P87C591 QuickStart Instructions 48 PHYTEC Me technik GmbH 2002 L 586e_2...
Page 84: ...Published by PHYTEC Me technik GmbH 2002 Ordering No L 586e_2 Printed in Germany...


