103
3
Ta
king
Pict
ures
3
Press the
4
button.
The camera enters the
F
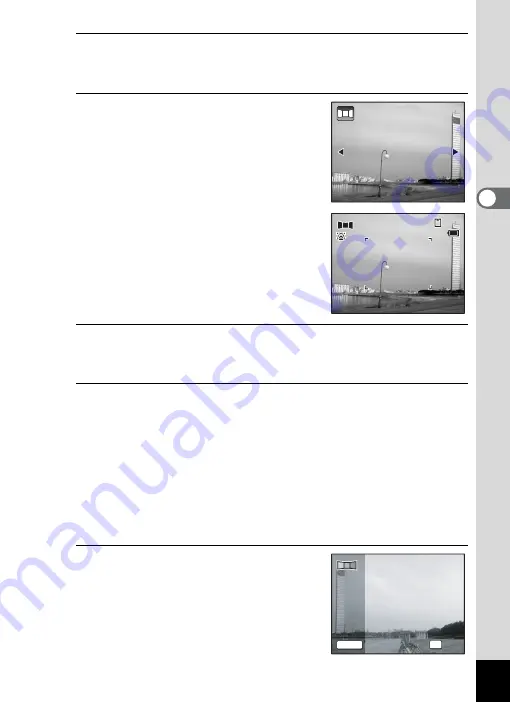
mode and the message [Set shift direction]
is displayed.
4
Use the four-way controller (
45
)
to choose the direction in which
the images will be joined.
The screen for taking the first frame is
displayed.
When the camera recognizes a person’s
face, the Face Recognition function is
activated and the face recognition frame
appears (p.76).
5
Press the shutter release button halfway.
The focus frame on the display turns green when the camera focuses
on the subject at the correct distance.
6
Press the shutter release button fully.
The screen for taking the second frame is displayed after you take the
first frame.
If you select right (
5
) in Step 4:
The right edge of the first frame appears in semi-transparent form on
the left edge of the display.
If you select left (
4
) in Step 4:
The left edge of the first frame appears in semi-transparent form on
the right edge of the display.
7
Take the second frame.
Move the camera so that the semi-
transparent image and the actual view
overlap and press the shutter release
button.
Set shift direction
Set shift direction
3 8
3 8
3 8
1 4
1 4 : 2 5
: 2 5
1 4 : 2 5
0 8 / 0 8 / 2 0 0 9
0 8 / 0 8 / 2 0 0 9
0 8 / 0 8 / 2 0 0 9
1
1
2
SHUTTER
OK
Exit
Exit
2nd Frame
2nd Frame
Summary of Contents for 16101
Page 34: ...Memo 32...
Page 57: ...2 Common Operations Understanding the Button Functions 56 Setting the Camera Functions 61...
Page 70: ...Memo 68...
Page 184: ...Memo 182...
Page 192: ...Memo 190...
Page 193: ...7 Settings Camera Settings 192 Using the Clock Function 208...
Page 262: ...260 9 Appendix Z Zoom x w 82 Zoom button 56 58...
Page 263: ...Memo...


