[VIDEO]
Set the audio output for VIDEO input.
[HDMI1]
Set the audio output for HDMI1 input.
[HDMI2]
Set the audio output for HDMI2 input.
[DIGITAL LINK]
Set the audio output for DIGITAL LINK input.
[NETWORK/USB]
Set the audio output for MEMORY VIEWER, MIRRORING or Panasonic APPLICATION input.
4) Press
qw
to switch the item.
f
The sub items will switch each time you press the button.
[AUDIO IN 1]
Audio connected to the <AUDIO IN 1> terminal is output during projection of image from the set input
terminal.
[AUDIO IN 2]
Audio connected to the <AUDIO IN 2> terminal is output during projection of image from the set input
terminal.
[AUDIO IN 3]
Audio connected to the <AUDIO IN 3> terminal is output during projection of image from the set input
terminal.
[HDMI1 AUDIO IN]
*1
Audio input to HDMI1 is output.
[HDMI2 AUDIO IN]
*2
Audio input to HDMI2 is output.
[DIGITAL LINK AUDIO IN]
*3
Audio input to DIGITAL LINK is output.
[NETWORK/USB AUDIO IN]
*4
Audio input to MEMORY VIEWER, MIRRORING or Panasonic APPLICATION is output.
*1
Only for HDMI1 input.
*2
Only for HDMI2 input.
*3
Only for DIGITAL LINK input.
*4
Only for MEMORY VIEWER, MIRRORING or Panasonic APPLICATION input.
[TEST PATTERN]
Displays the test pattern built-in to the projector.
The settings such as [CONTRAST] or [BRIGHTNESS] that can be set from the [PICTURE] menu will not be
reflected in the test pattern. Make sure to perform various adjustments with input signals displayed.
1) Press
as
to select [TEST PATTERN].
2) Press the <ENTER> button.
f
The ALL WHITE test pattern is displayed.
3) Press
qw
to switch the test pattern.
f
The test pattern will switch each time you press the button.
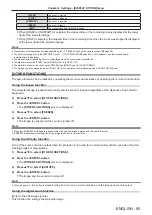
All white
The test pattern is displayed together with the operation guide of [PATTERN SELECT]. Select your
desired test pattern.
Color bar (Vertical)
Color bar (Horizontal)
Cross
Cross (Inversion)
Cross hatch
Note
f
Some adjustment menus such as the [POSITION] menu → [SCREEN ADJUSTMENT] and the [DISPLAY OPTION] menu → [COLOR
ADJUSTMENT] can be set even when the test pattern is displayed.
f
The setting of the [LAMP POWER] is disabled when the test pattern is displayed.
f
If [TEST PATTERN] is assigned to the <FUNCTION> button on the remote control, the cross hatch pattern will be displayed after pressing
the <FUNCTION> button.
[FILTER COUNTER]
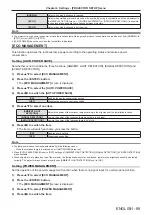
This function is used to check the usage time of the air filter or set the cleaning/replacement cycle of the air filter.
Also, you can reset the air filter usage time.
1) Press
as
to select [FILTER COUNTER].
2) Press the <ENTER> button.
f
The
[FILTER COUNTER]
screen is displayed.
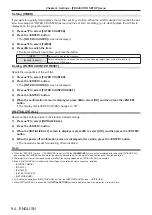
[FILTER COUNTER]
Displays the usage time of the air filter.
[TIMER]
Sets the cleaning/replacement cycle of the air filter.
[FILTER COUNTER RESET]
Resets the air filter usage time.
ENGLISH
-
93
Chapter 4 Settings - [PROJECTOR SETUP] menu


