[DHCP]
[OFF]
Set when a DHCP server does not exist in the network to which the
projector is connected and you need to specify the IP address.
[ON]
Set when a DHCP server exists in the network to which the
projector is connected and the IP address is obtained automatically.
[IP ADDRESS]
Enter the IP address when [DHCP] is set to [OFF].
[SUBNET MASK]
Enter the subnet mask when [DHCP] is set to [OFF].
[DEFAULT GATEWAY]
Enter the default gateway address when [DHCP] is set to [OFF].
[DNS1]
Enter the preferred DNS server address when [DHCP] is set to [OFF].
[DNS2]
Enter the alternate DNS server address when [DHCP] is set to [OFF].
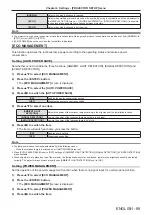
8) After the setting, select [OK] and press the <ENTER> button.
Note
f
For the setting of each item, contact your network administrator.
f
If you use EAP, settings of the projector need to be configured according to the RADIUS server settings. Consult your network administrator
for the RADIUS server settings.
f
If you use EAP together with an access point where SSID broadcast is disabled, select [WPA-EAP] or [WPA2-EAP] for authentication
method even when the authentication of the access point is WPA-EAP/WPA2-EAP.
f
Wired LAN and wireless LAN cannot be used in the same segment.
f
When using the projector with [DHCP] set to [ON], confirm that the DHCP server is running.
f
If wireless LAN connection cannot be made via the access point even after executing “Projector settings” (
Æ
page 112), consult the
manufacturer of your access point (radio repeater).
f
If [USER] is used, you cannot connect to the access point of stealth SSID configuration, please use it to cancel the stealth setting. For
details, refer to the Operating Instructions of the access point.
r
Factory default settings
f
Following setting has been made as a factory default.
[AUTHENTICATION]
[OPEN]
[ENCRYPTION]
[NONE]
[DHCP]
[OFF]
[IP ADDRESS]
192.168.11.100
[SUBNET MASK]
255.255.255.0
[DEFAULT GATEWAY]
192.168.11.1
[DNS1]/[DNS2]
(Blank)
[PROJECTOR NAME]
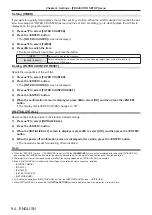
You can change the projector name. Enter the host name if it is required to use a DHCP server.
1) Press
as
to select [PROJECTOR NAME].
2) Press the <ENTER> button.
f
The
[PROJECTOR NAME CHANGE]
screen is displayed.
3) Select characters with the
asqw
buttons and press the <ENTER> button to enter the projector
name.
f
You can enter up to eight characters.
4) After entering the projector name, press
as
to select [OK] and press the <ENTER> button.
Note
f
The factory default setting of the projector name is “Namexxxx”. xxxx stands for the last four-digit number of the network ID. The network
ID is a fixed value assigned to each projector. The network ID can be checked on the idle screen projected when switching to Panasonic
APPLICATION input.
[NETWORK CONTROL]
Set up the control method of the network.
1) Press
as
to select [NETWORK CONTROL].
2) Press the <ENTER> button.
f
The
[NETWORK CONTROL]
screen is displayed.
ENGLISH
-
103
Chapter 4 Settings - [NETWORK/USB] menu


