35
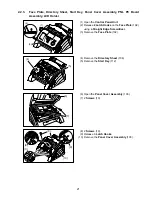
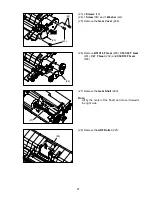
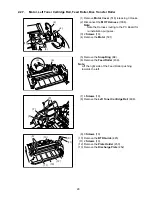
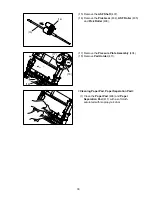
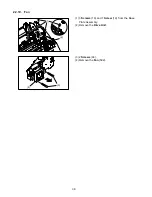
(10) 2 Screws (23).
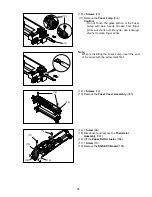
(11) Remove the Fuser Lamp (314).
Caution:
Do not Touch the glass portion of the Fuser
Lamp with bare hands. Grease from finger
prints will shorten its life cycle, use isopropyl
alcohol to clean finger prints.
Note:
When re-installing the Fuser Lamp, insert the end
of the Lamp with the arrow mark first.
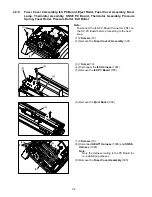
(12) 2 Screws (19).
(13) Remove the Fuser Cover Assembly (305).
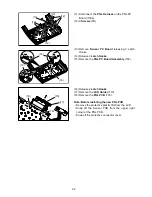
(14) 1 Screw (4B).
(15) Disconnect and remove the Thermistor
Assembly (307).
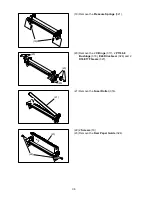
(16) Lift the Paper Exit Actuator (306).
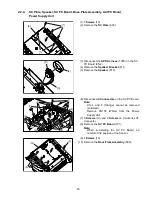
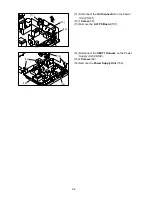
(17) 1 Screw (19).
(18) Remove the SNSE PC Board (704).
(10)
(11)
(12)
(13)
(14)
(15)
(17)
(18)
(16)
Summary of Contents for Panafax UF-490
Page 2: ...2 ...
Page 15: ...15 1 4 Control Panel For USA and Canada For Other Countries ...
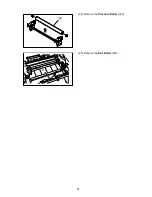
Page 37: ...37 24 Remove the Pressure Roller 322 25 Remove the Exit Roller 304 24 25 ...
Page 63: ...63 3 10 ILS PC Board CN73 Refer to SC PC Board CN11 ...
Page 65: ...65 3 12 ACI PC Board Refer to Power Supply Unit CN101 ...

