22
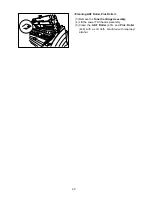
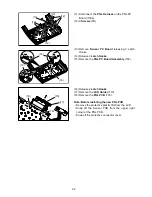
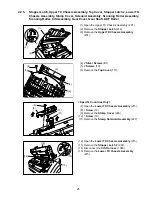
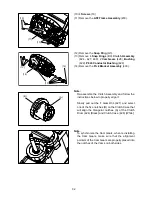
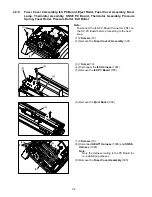
(11) Disconnect the PNL Harness on the PNL PC
Board (1004).
(12) 9 Screws (7B).
(13) Remove Sensor PC Board releasing 2 Latch
Hooks.
(14) Release 3 Latch Hooks.
(15) Remove the PNL PC Board Assembly (703).
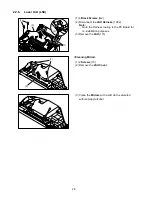
(16) Release 2 Latch Hooks.
(17) Remove the LCD Holder (113).
(18) Remove the PNL PCB (703).
Note: Before installing the new PNL PCB
• Remove the protective plastic film from the LCD.
• Snap off the Sensor PCB from the upper right
corner of the PNL PCB.
• Snap off the protective connector cover.
(11)
(12)
(12)
(12)
(12)
(15)
(13)
(14)
(16)
(16)
(17)
(18)
Summary of Contents for Panafax UF-490
Page 2: ...2 ...
Page 15: ...15 1 4 Control Panel For USA and Canada For Other Countries ...
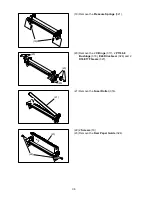
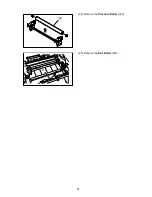
Page 37: ...37 24 Remove the Pressure Roller 322 25 Remove the Exit Roller 304 24 25 ...
Page 63: ...63 3 10 ILS PC Board CN73 Refer to SC PC Board CN11 ...
Page 65: ...65 3 12 ACI PC Board Refer to Power Supply Unit CN101 ...


