32
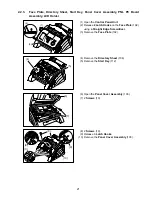
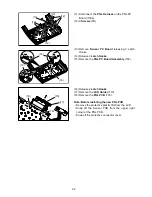
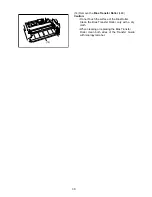
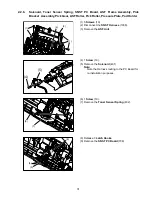
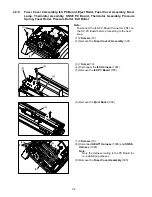
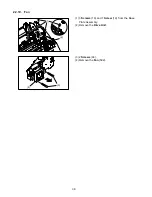
(10) 4 Screws (19).
(11) Remove the ASF Frame Assembly (418).
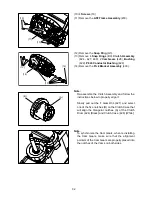
(12) Remove the Snap Ring (G3).
(13) Remove 4 Snap Rings (B9), Clutch Assembly
(424 - 427, 460), 2 Cam Gears (428), Bushing
(422), P6L5 Conductor Bushing (429)
(14) Remove the Pick Bracket Assembly (433).
Note:
Re-assemble the Clutch Assembly and follow the
instructions below to properly align it.
Slowly pull out the F Gear D34 (427) and select
one of the five notches (B) on the Clutch Case that
will align the triangular notches (A) of the Clutch
Drum (424) [Black] and Clutch Case (426) [White]
Note:
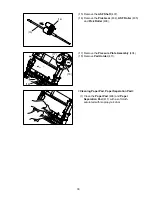
To synchronize the Cam Gears, when re-installing
the Cam Gears, make sure that the alignment
pointers of the Cam Gears are properly placed into
the notches of the Cams on both sides.
(10)
(10)
(11)
(14)
(13)
(13)
(12)
(A)
(B)
Summary of Contents for Panafax UF-490
Page 2: ...2 ...
Page 15: ...15 1 4 Control Panel For USA and Canada For Other Countries ...
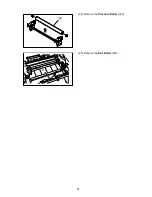
Page 37: ...37 24 Remove the Pressure Roller 322 25 Remove the Exit Roller 304 24 25 ...
Page 63: ...63 3 10 ILS PC Board CN73 Refer to SC PC Board CN11 ...
Page 65: ...65 3 12 ACI PC Board Refer to Power Supply Unit CN101 ...

