28
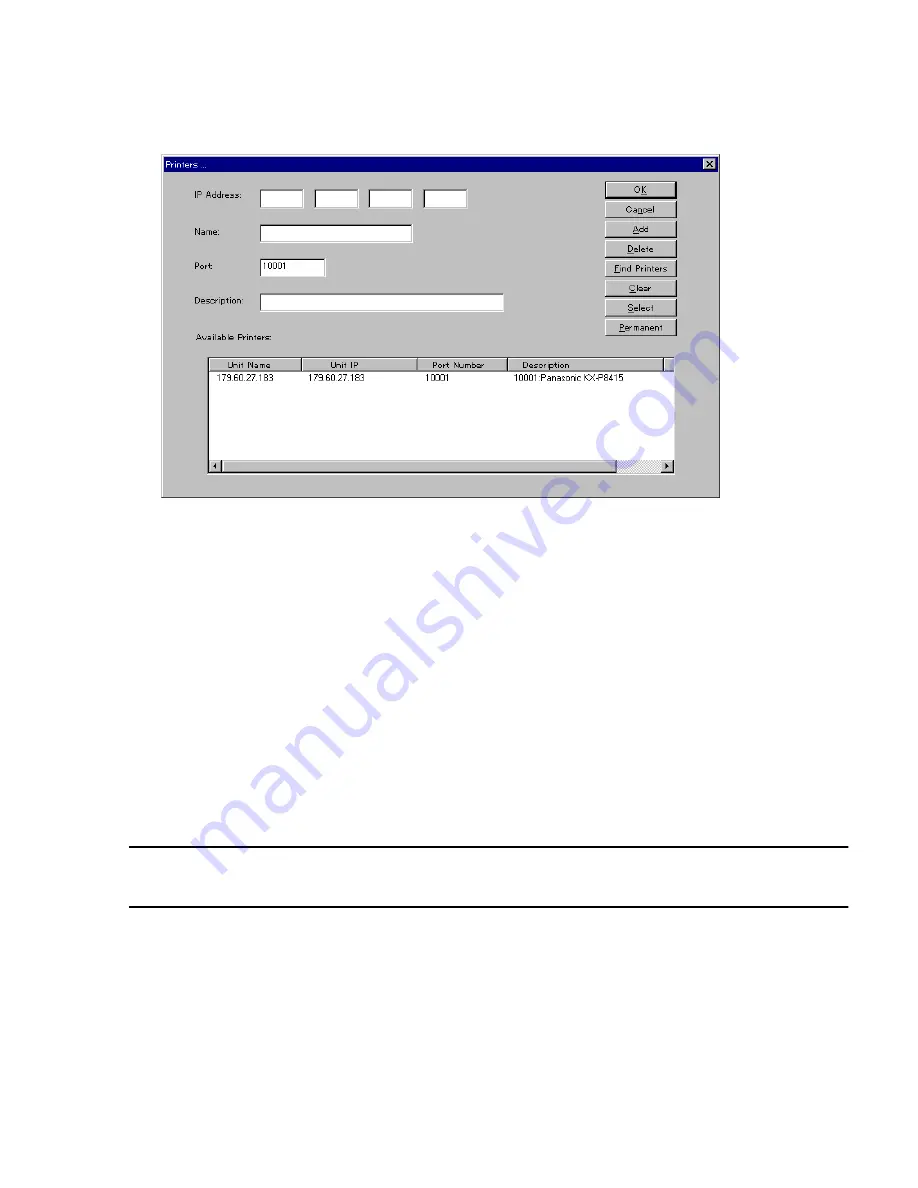
The “Printers...” button will allow you to list, search, remove and manually add printers
to the Window’s Port Listing. The following options are available on this screen:
• OK: Selecting this button accepts all changes made to setup and exits to the
previous screen.
• Cancel: Selecting this button discards any changes made to setup and exits to the
previous screen.
• Add: Selecting this button allows a user to manually add a printer to the Available
Printers: box by inputting the information in the fields to the left of the buttons. By
Adding a printer to the list in this manner, the user bypasses the “Search” function.
The port is not checked to see if it is actually available on the network.
• Delete: Selecting this button deletes the highlighted printer(s) from the Available
Printers: box below. Printers deleted in this fashion will no longer be listed in the
PORT listing when adding a printer. However, This does not actually delete the
printer from the network, it only removes it from the list maintained on this computer.
The printer may be re-added to the list by selecting the “Find Printers” button
(described below) as long as it remains connected to the network.
Note:
You can not delete the IP Port from the printer’s property window. Use the “Delete”
button to delete the IP Port.
• Find Printers: Selecting this button will initiate a search routine out to the network.
This routine will then list all printers found on the network by the method defined in
the previous setup screen. The default method for displaying the list of printers is by
IP Address.
• Clear: Selecting this button clears the Available Printers: box below. This will not
clear any printer marked with the “Permanent” flag.

