


2-10
u
Installation
S
ETTING
U
P
THE
R
ACK
M
OUNT
M
ODEL
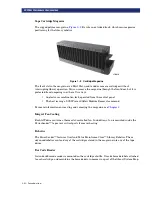
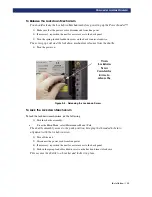
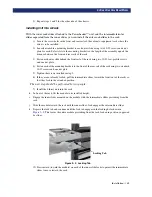
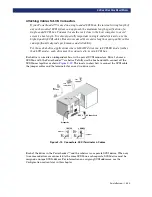
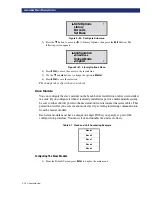
13) Slide the module in and out several times as shown in
, ensuring that the inner and
outer slide locks engage, and that the module does not bind against the slides.
Figure 2–10. Sliding Module In Rack
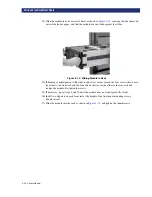
14) If binding or misalignment with other rack devices occurs, loosen the four screws that secure
the slides to the front rails and the four screws that secure the slides to the rear rails and
realign the module. Retighten the screws.
15) If necessary, repeat steps 9 and 10 until the module does not bind against the slides.
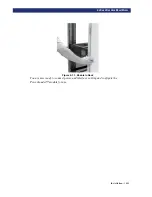
16) Install two clip nuts on each front rail at the height of the front panel mounting screws
(thumbscrews).
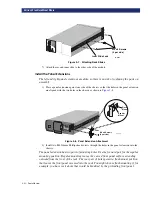
17) Slide the module into the rack as shown in
, and tighten the thumbscrews.
Summary of Contents for PowerLoaders AIT-2
Page 1: ......
Page 4: ...ii u...
Page 13: ...xi LIST OF FIGURES CONT D...
Page 14: ...xii LIST OF FIGURES CONT D...
Page 16: ...xiv LIST OF TABLES CONT D...
Page 26: ...2 2 u Installation RELEASING THE LOCKDOWN MECHANISM Lockdown Screw...
Page 52: ...2 28 u Installation CONFIGURATION OPTIONS DESCRIPTION...
Page 96: ...5 18 u Troubleshooting ERROR RECOVERY...
Page 102: ...A 6 u Specifications SPECIFICATIONS...
Page 104: ...B 2 u...


