63
Reference: The Tool Chest
Curves
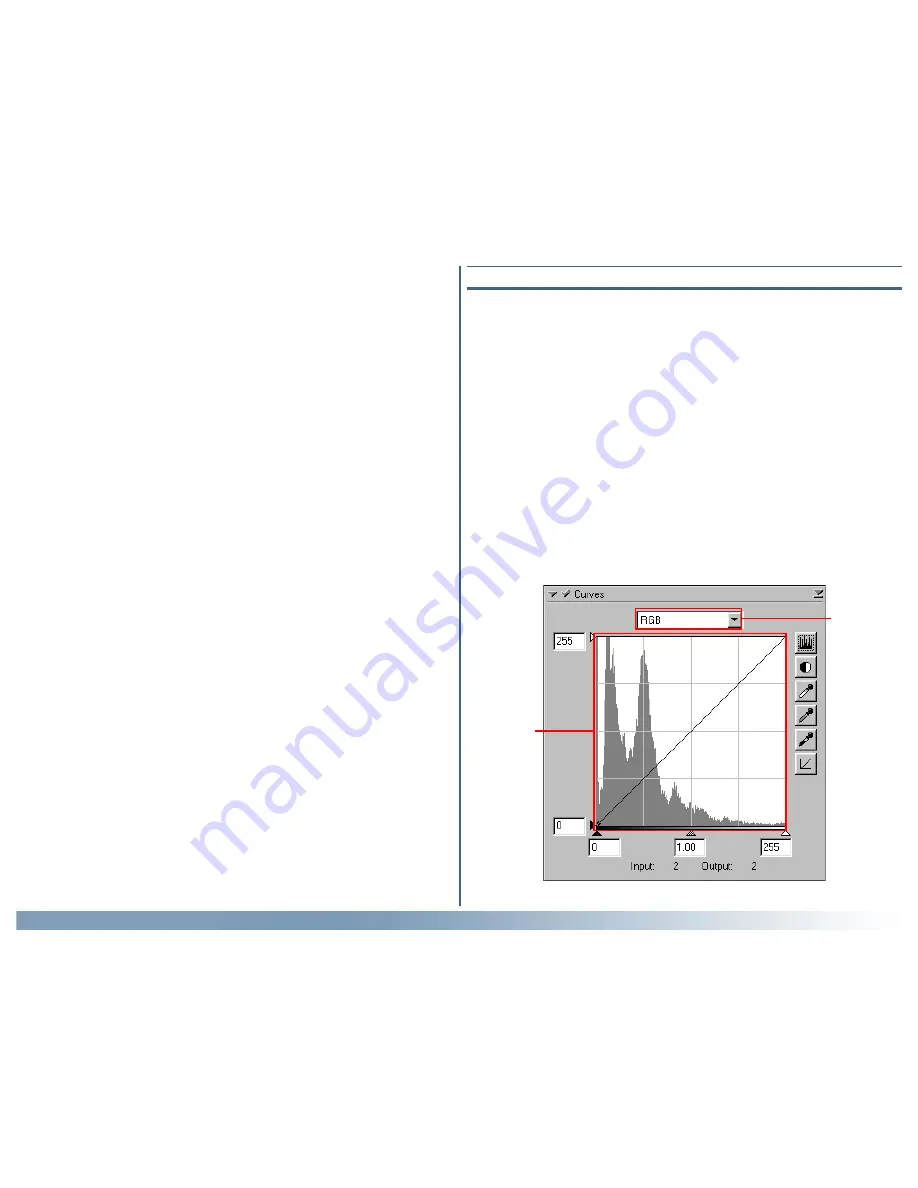
The main editing tool in the Curves palette is the curve edit
display, which contains a curve showing the relationship between
input (the tone information in the image prior to editing) and
output (how these tones will be represented after changes to
curves are applied). Separate curves control the relationship
between input and output for the image as a whole (the “master
curve”) and for each of the components, or “channels,” in the
current color model (red, green, and blue in the RGB model, or
cyan, magenta, yellow, and black in the CMYK model; only one
channel is available in the case of grayscale images). The default
curve in each case is linear, meaning that tones will be output
exactly as they are input.
Getting the Colors You Want:
The Curves, Color Balance, and LCH Editor Palettes
When scanning, you may come across images that are over- or
under-exposed, obliterating details in highlights or shadows, or
that show a general lack of contrast. You may also find that the
colors are “flat” or unnaturally vivid, or that fluorescent lighting
has given your photograph a greenish tinge. These flaws can be
corrected using Nikon Scan’s three color enhancement tools:
Curves, Color Balance, and the LCH Editor.
Of the three, the Color Balance palette is most useful when you
want to make changes to brightness, contrast, and color balance
that affect the entire image. This kind of adjustment may, how-
ever, result in loss of detail in highlights or shadows. The Curves
tool, in contrast, allows adjustments to be made to specific por-
tions of the tone range in highlights, mid-tones, and shadows.
The LCH Editor is useful when adjusting the vividness, or satu-
ration, of colors. It can also be used to map a specific range of
colors in the original image to a different range of colors in the
output.
Current
channel
Curve edit
display


