Web Graphical User In-
terface (GUI) for ESMS
199
Delete User
To delete an existing user.
Procedure:
The Free slots are denoted by "~" in all columns for the slot.
Add a new user:
1. To add a new user, select a free slot and click
Add User
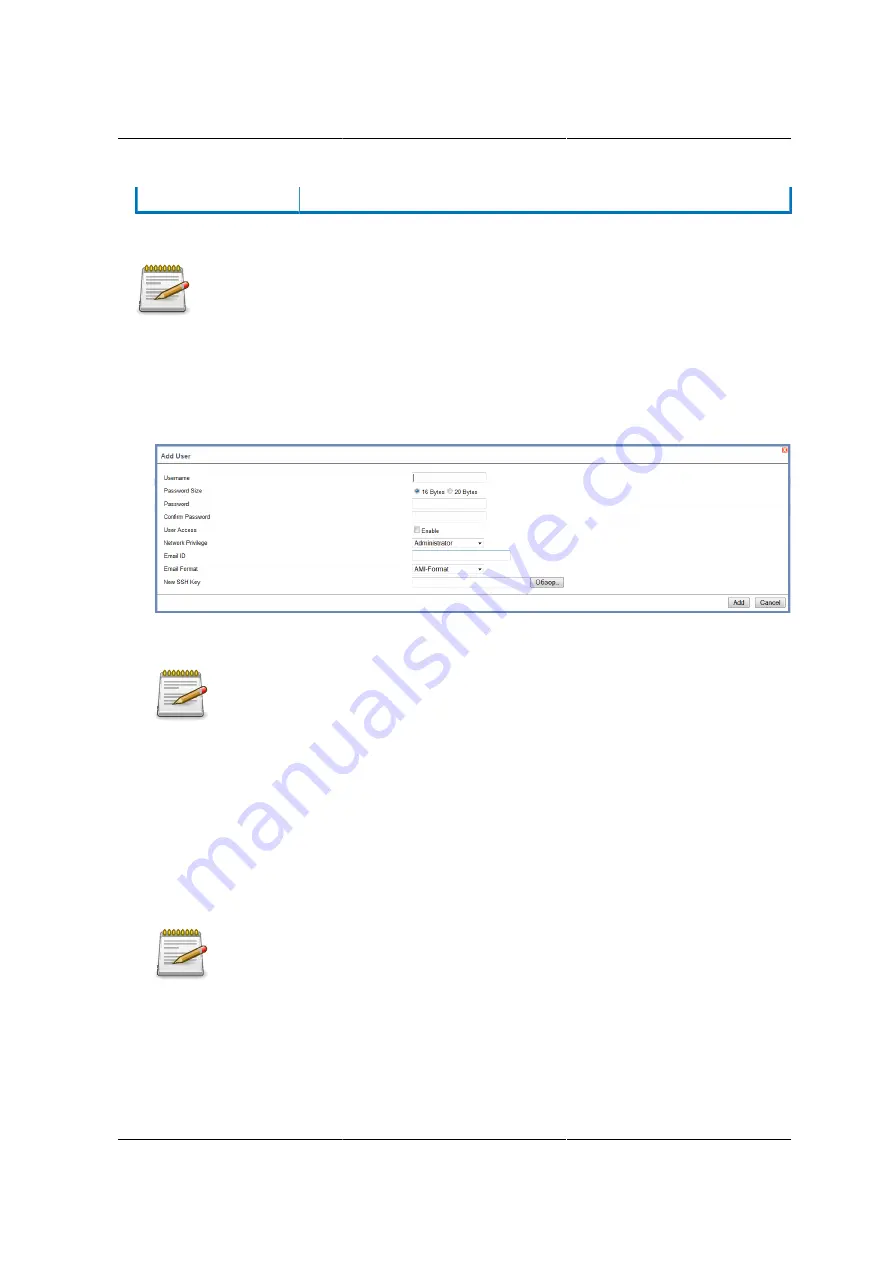
. This opens the Add User screen as
shown in the screenshot below.
Figure 8.35. Add User Page
2. Enter the name of the user in the
User Name
field.
Rules
• User Name is a string of 4 to 16 alpha-numeric characters.
• It must start with an alphabetical character.
• It is case-sensitive.
• Special characters
,
(comma),
.
(period),
:
(colon),
;
(semicolon), '
(space), '/
(slash),
\
(back-
slash),
(
(left bracket) and
)
(right bracket) are not allowed.
3. In the
Password and Confirm Password
fields, enter and confirm your new password.
Rules
• Password must be at least 8 characters long.
• White space is not allowed.
• This field will not allow more than 20 characters.
4. Enable or Disable the User Access Privilege.
Summary of Contents for Demos R130 M2
Page 1: ...Netberg Demos R130 M2 server...
Page 2: ...Netberg Demos R130 M2 server...
Page 11: ...Netberg Demos R130 M2 server xi 9 5 Aligning the Rails 222...
Page 14: ...1 Chapter 1 Netberg Demos R130 M2 server...
Page 31: ...Netberg Demos R130 M2 server 18 On HDD failure HDD Fault Amber Off No failure detected...
Page 32: ...19 Chapter 2 Installing hardware...
Page 57: ...Installing hardware 44 Figure 2 36 Installing the Air Duct...
Page 60: ...Installing hardware 47 Figure 2 40 Connecting the Fan Assembly Cables...
Page 143: ...130 Chapter 6 Server Management Software...
Page 169: ...156 Chapter 8 Web Graphical User Interface GUI for ESMS...
Page 230: ...217 Chapter 9 Rail Kit Assembly...
Page 236: ...223 Chapter 10 Troubleshooting...


