


Disassembly and Reassembly 3-21
1.
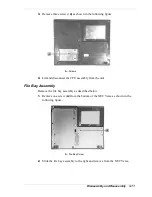
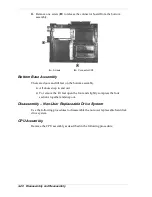
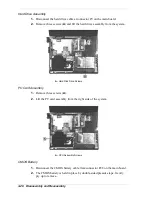
Remove two screws (
B
) from the CPU bay cover on the bottom of the NEC
Versa as shown in the following figure.
A – CPU Bay Cover Screws
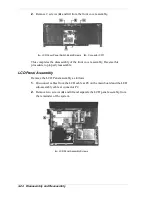
2.
Remove the CPU cover.
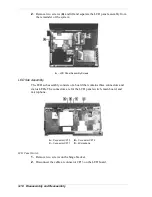
3.
Remove three screws (
A)
as shown in the following figure.
A – Screws
4.
Lift and disconnect the CPU assembly from the unit.
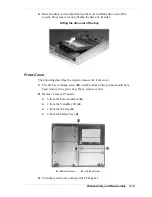
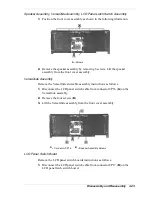
Front Cover
The following describes the steps to remove the front cover.
1.
Turn the system over with the bottom facing up.
2.
Remove a total of 11 screws.
6 from the bottom surface
(A)
Summary of Contents for Versa LX
Page 1: ...NEC Versa LX Notebook Computer VERSA LX S E R V I C E A N D R E F E R E N C E M A N U A L...
Page 57: ...3 Disassembly and Reassembly Required Tools and Equipment Disassembly Reassembly...
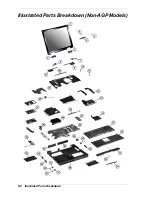
Page 91: ...5 2 Illustrated Parts Breakdown Illustrated Parts Breakdown Non AGP Models...
Page 94: ...Illustrated Parts Breakdown 5 5 Illustrated Parts Breakdown AGP Models...
Page 102: ...7 Troubleshooting Quick Troubleshooting Helpful Questions...


