First Things to Know About Your Machine
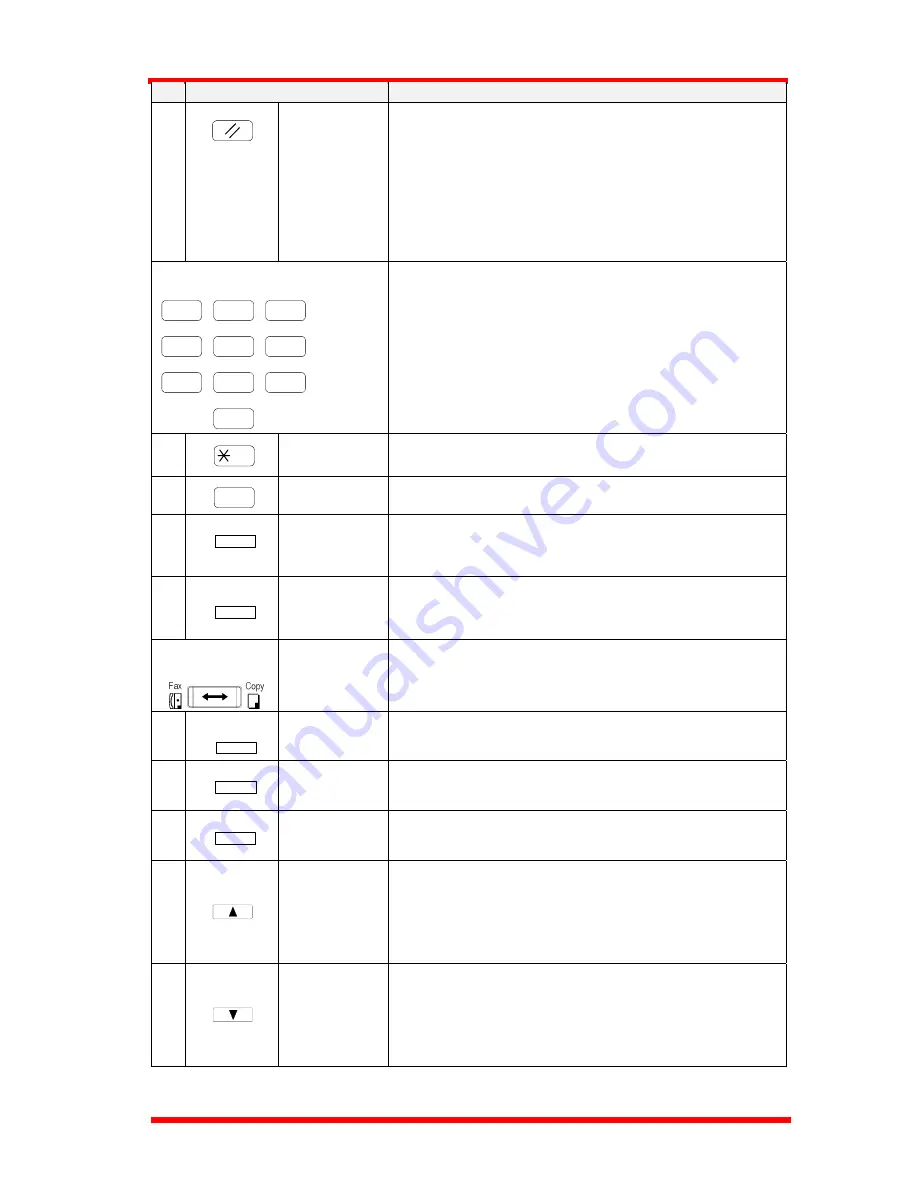
Key
Functions
3
Panel Reset
key
♦
Return to the initial setting:
<copy screen >
Number of Copies : 1
Zoom ratio : Equal
Copy Function : Initial setting by user
Density : Initial setting by user
Copy screen : Initial setting by user
Paper source : Initial setting by user
4
Numeric
keys
♦
Input the number of copies.
♦
Input zoom ratio.
♦
When setting custom size for bypass copy, input
paper size.
♦
Input Fax number
♦
Input numbers in registration of name
♦
Input speed dial number
♦
Specify Fax function or utility item
5
4
key
♦
Send tone signal
♦
Input European font in registration of name.
6
# key
♦
External/Internal function
7
Yes key
♦
Fix the selected item and inputted number or
character.
♦
Others: Depend on LCD message.
8
No/Clear key
♦
Clear inputted number or character.
♦
Back to the previous display.
♦
Others: Depend on LCD message.
9
Copy/Fax
Switching
key
♦
Switch to Fax screen from Copy screen.
♦
Switch to Copy screen from Fax screen.
10
Zoom key
♦
Enter setting zoom ratio with numeric keys
♦
Select the fixed zoom ratio
11
Paper key
♦
Select paper source
12
Auto/Photo
key
♦
Switch 3 density modes: Text-auto density /
Photo-manual density / Text-manual density
13
up arrow
(
▲
)key
♦
When setting the zoom ratio, increase the ratio by
0.01.
♦
Display items or contents by rotation.
♦
When inputting numbers or characters, delete a
character at the cursor.
14
down arrow
(
▼
) key
♦
When setting the zoom ratio, decrease the ratio by
0.01.
♦
Display items or contents by rotation.
♦
When inputting number or character, insert a space at
the cursor.
1
3
2
4
6
5
7
9
8
0
#
Yes
C
No
Zoom
Paper
Auto/Photo
1-4
Summary of Contents for NEFAX 805
Page 1: ...FACSIMAL OPERATION MANUAL ...
Page 2: ...NEC FACSIMILE OPERATION MANUAL ...
Page 13: ...Chapter 1 First Things to Know About Your Machine ...
Page 39: ...Chapter 2 Making Copies ...
Page 60: ...Chapter 3 Basic Fax Operation 1 ...
Page 84: ...Chapter 4 Basic Fax Operation 2 ...
Page 94: ...Chapter 5 Using the Function Utilities ...
Page 124: ...Chapter 6 Using the Enhanced Utilities 1 ...
Page 152: ...Using the Enhanced Utilities 2 Chapter 7 ...
Page 175: ...Chapter 8 Using the Confirm Utilities ...
Page 181: ...Chapter 9 Printing Reports ...
Page 203: ...Chapter 10 Connect to PC ...
Page 208: ...Chapter 11 Troubleshooting ...
Page 228: ...Chapter 12 General Specification ...


