


Remote Surveillance
NVR User Manual
57
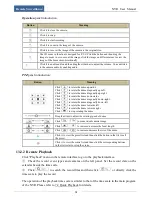
13
Remote Surveillance
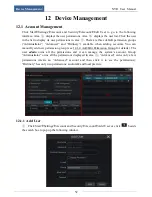
13.1 Remote Access
You can access to the NVR remotely via LAN or WAN. The supported browsers of the remote
surveillance are IE8/9/10/11, 360, Firefox, Opera, Chrome and Safari in Windows system and
Safari in MAC system.
13.1.1 LAN
①
Click Start
Settings
Network
TCP/IPv4 to go to the “TCP/IPv4” interface. Set the IP
address, subnet mask, gateway, preferred DNS and alternate DNS of the NVR.
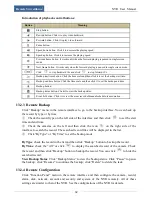
②
Open IE browser on a computer, input the IP address of the NVR in the IE address bar and
then press enter to go to the login interface as shown below. Input the username and password
of the NVR in the interface and then click “Login” to go to the live preview interface.
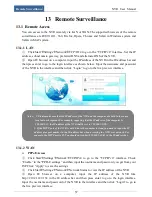
13.1.2 WAN
PPPoE Access
①
Click Start
Settings
Network
TCP/IPv4 to go to the “TCP/IPv4” interface. Check
“Enable” in the “PPPoE settings” and then input the username and password you get from your
ISP. Click “Apply” to save the settings.
②
Click Start
Settings
Network
Network Status to view the IP address of the NVR.
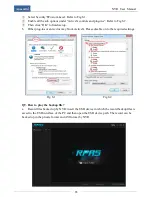
③
Open IE browser on a computer, input the IP address of the NVR like
http://210.21.229.138 in the IE address bar and then press enter to go to the login interface.
Input the username and password of the NVR in the interface and then click “Login” to go to
the live preview interface.
Notes: 1. Please make sure that the IP address of the NVR and the computer are both in the same
local network segment. For example, supposing that the IP address of the computer is
192.168.1.41, the IP address of the NVR shall be set to 192.168.1.XXX.
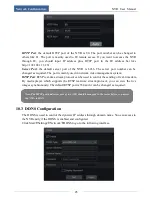
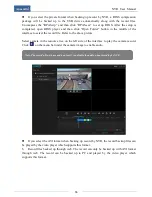
2. If the HTTP port of the NVR is not 80, but other number instead, you need to input the IP
address plus port number in the IE address bar when accessing the NVR over network. For
example, the HTTP port is 81. You should enter http://192.168.1.42:81 in the IE address bar.
Summary of Contents for NGD-8116
Page 74: ...450011000711 A0 ...


