


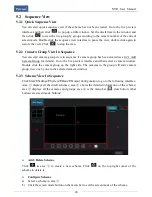


Preview
NVR User Manual
27
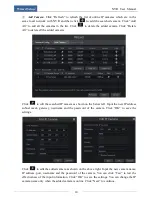
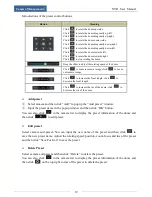
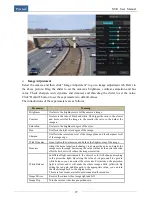
Image Adjustment
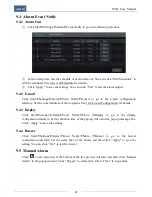
Select the camera and then click “Image Adjustment” to go to image adjustment tab. Refer to
the above picture. Drag the slider to set the camera’s brightness, contrast, saturation and hue
value. Check sharpen, wide dynamic and denoiser and then drag the slider to set the value.
Click “Default” button to set these parameters to default values.
The introductions of these parameters are as follows:
Parameter
Meaning
Brightness
It refers to the brightness level of the camera’s image.
Contrast
It refers to the ratio of black and white. The bigger the ratio is, the clearer
and more colorful the image is; the smaller the ratio is, the darker the
image is.
Saturation
It refers to the brightness degree of the color.
Hue
It reflects the total color degree of the image.
Sharpen
It reflects the resolution level of the image plane and the sharpness level
of the image edge.
Wide Dynamic
It can lighten the darker area and darken the brighter area of the image.
Denoiser
Adopt the noise reduction technology to decrease the noise and make the
image more thorough. Increasing the value will make the noise reduction
effect better but it will reduce the image resolution.
White Balance
In different light environments, the object’s color will change according
to the projection light. By setting the value of red gain and blue gain in
white balance, you can correct the color error. For instance, the projection
light is yellow and it will make the whole image a little yellowish. By
setting the red gain and blue gain to the appropriate value, you can turn
the whole image back to the original color.
There are four modes available: auto/manual/outdoor/indoor.
Image Mirror
Reverse the current video image right and left.
Image Flip
Turn the current video image upside down.
Summary of Contents for NGD-8116
Page 74: ...450011000711 A0 ...


