


Napco iSecure Security System
All technical manuals are available in PDF format at
tech.napcosecurity.com
65
ISEC
-
WL
-
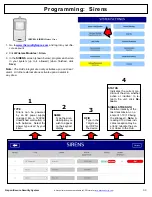
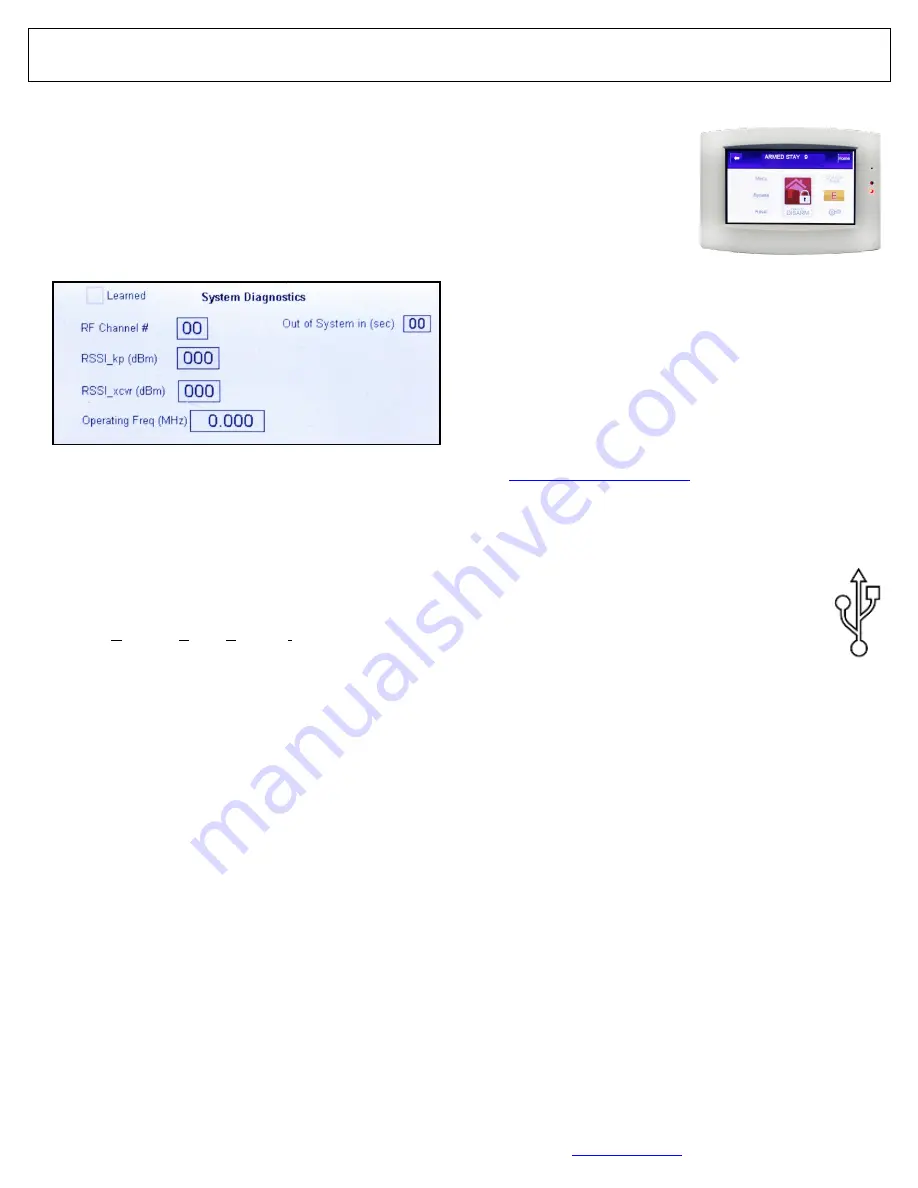
TOUCH "System Diagnostics" and "AutoEnroll"
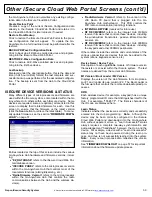
System Diagnostics
The
ISEC
-
WL
-
TOUCH
"
System Diagnostics
" screen shown
below is exclusive to the
ISEC
-
WL
-
TOUCH
4.3
-
inch 900MHz
Color Touchscreen Wireless Keypad. It is designed to help
you find the optimum mounting location for your
ISEC
-
WL
-
TOUCH
keypad by displaying the signal strength of the
900MHz radio signal link between the Go
-
Anywhere Hub and
the
ISEC
-
WL
-
TOUCH
keypad within the installation environ-
ment. This screen is accessed by tapping the
Settings
("gears") icon, then tapping the
DIAG
button.
Each button and field in this screen is described below:
Learned
Checked when the status of the ISEC
-
WL
-
TOUCH key-
pad is paired into the iSecure system; otherwise un-
checked.
RF Channel #
Displays the frequency of the channel used for communi-
cations between the Go
-
Anywhere Hub and the ISEC
-
WL
-
TOUCH keypad.
RSSI_kp (dBm)
RSSI (
Received Signal Strength Indicator
) is a measure-
ment of the power present in a received radio signal.
This field displays the 900MHz radio signal that the ISEC
-
WL
-
TOUCH keypad received from the Go
-
Anywhere
Hub.
RSSI_xcvr (dBm)
The RSSI value that the Go
-
Anywhere Hub received from
this ISEC
-
WL
-
TOUCH Keypad.
Operating Freq (MHz)
Displays the wavelength, in megahertz, of the radio fre-
quency used in communications between the Go
-
Anywhere Hub and the ISEC
-
WL
-
TOUCH keypad.
Out of System in (sec)
Displays the number of seconds the communication link
between the Hub and the ISEC
-
WL
-
TOUCH keypad was
interrupted. If Out of System, this field will count down.
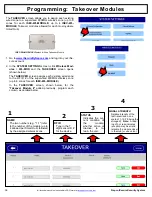
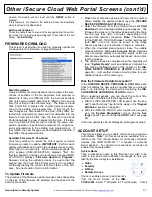
AutoEnroll
This feature is a quick and easy way to enroll wireless devices
into your iSecure system. Before you begin, remove the bat-
tery from the wireless device. With the unpowered wireless
device physically "in hand", and with its battery within reach
(always use fresh batteries), perform the following steps using
the ISEC
-
WL
-
TOUCH keypad:
1.
Press and hold the
System Settings
("gear") icon, enter
your Dealer password, then tap
ENTER
.
The keypad red and green LEDs will flash simultaneous-
ly, while a "please wait" message appears.
2.
In the
System Settings
screen, tap
Sensor Con-
figuration
.
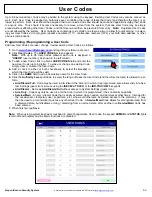
3.
Tap the
Zone #
button
and enter the zone num-
ber into which you wish
to add the device (for
example tap
0 2
for zone
2).
4.
Tap the
AutoEnroll
but-
ton.
5.
Install the battery into the
wireless device.
6.
Ensure the
Wireless ID
#
field is populated with the same transmitter ID number
printed on a sticker affixed to the device (location of the
sticker varies with each device; check the transmitter rear
housing or PC board).
7.
Ensure the
Area
selections are correct for the specific
transmitter to be enrolled, then tap
Save
.
Note:
After AutoEnrolling transmitters, be sure to upload
the new data to the iSecure Cloud Web Portal
(
www.iSecureByNapco.com
) and test the device. See
page 6,
Dealer Programming
for more information.
ISEC
-
WL
-
TOUCH
Wireless 900MHz
Touchscreen
ISEC
-
WL
-
TOUCH2
The enhanced model
ISEC
-
WL
-
TOUCH2
includes
an internal USB connector in the event a graphics
update and/or restore is required. This USB is not
for general use and is to be used ONLY with in-
structions and files from NAPCO Technical Support.


