User’s Guide DrafStation and Drafstation Pro
Chapter 5: Preparations before printing
110
AP-75730, Rev. 2.1, 19/01/2009
5.4 EFFECT MENU
Without weaving ON, an image is completed (formed) by printing a series of
complementary rectangular shaped stripes (bands, swaths, passes). Inherent to
classic inkjet printing is that ink drying effects, stepping mismatch, miss firing nozzles
show up in the printed image via ink bleeding and various types of banding. By
switching ON one of the weave patterns you will give the traditional rectangular print
swaths a wave-shaped look that will save you time and boost your output quality.
Difficult images will print smoother, banding will be suppressed (neutralized) and you
will have to spend less time fine-tuning your printer to create great looking output.
Moreover, when using wave-tuned profiles, you will be able to boost your printer’s colour gamut as the i²
(intelligent interweaving) technology allows depositing more ink, helping you to achieve higher colour
densities.
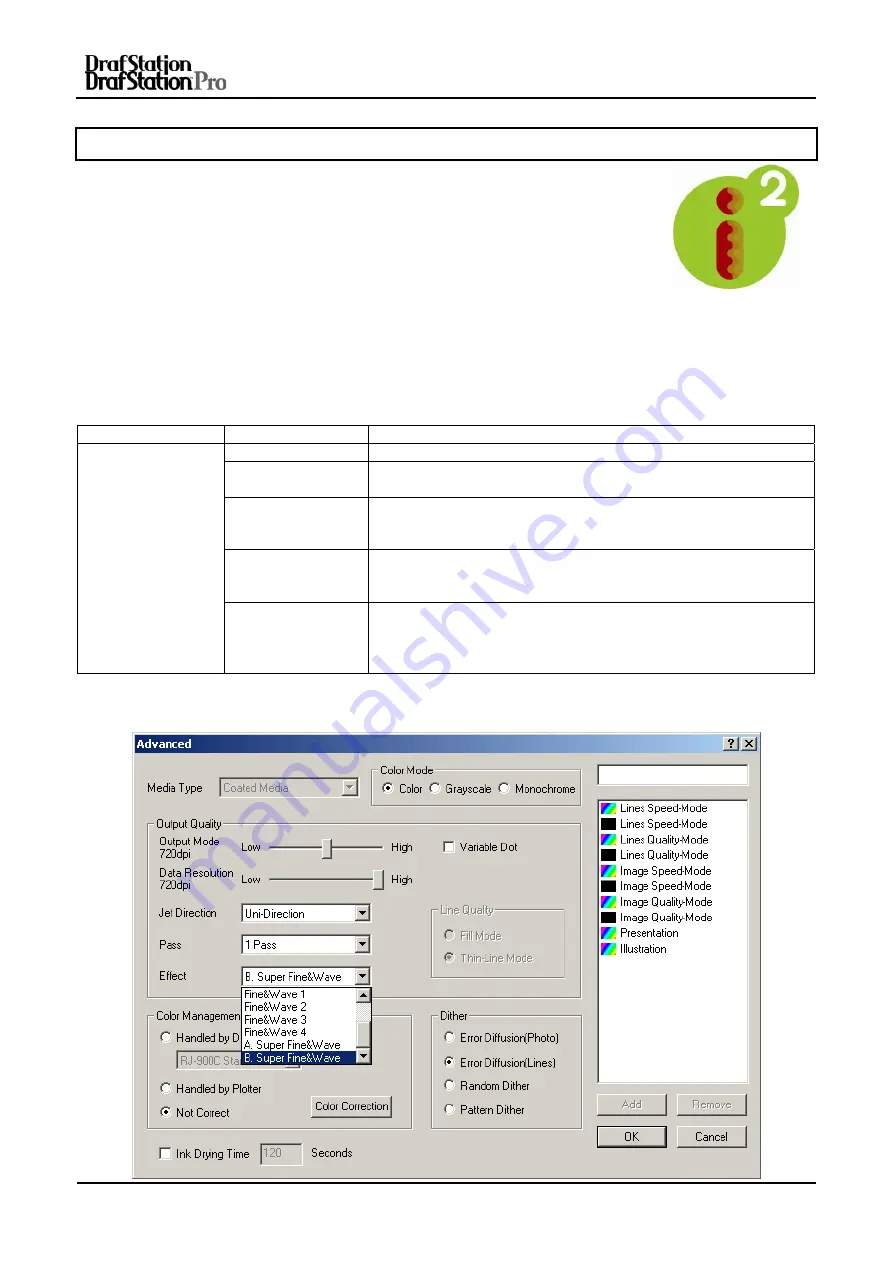
The weaving settings can be chosen in the RIP software via a scroll down menu or via the windows driver.
Use this menu to improve the print quality by means of intelligent interweaving print algorithms (i²)
Setup Item
Setting Value
Description
Effect
None
The Effect function is not used.
Wave
The overlay will be wave form.
It will improve the printing quality.
Fine&Wave
Perform printing at a slow speed compared with "Wave".
Set up this menu when you want to improve the printing quality
compared with "Wave".
S.Fine&Wave
Perform printing at a slow speed compared with "Fine&Wave".
Set up this menu when improving the printing quality compared
with "Fine&Wave".
—
•
[Enter] key: Save the setting and shift to the previous menu.
•
[Cancel] key: Cancel the setting and shift to the previous
menu.
►
Setup menu
Refer to below screenshot to know how the effect menu is integrated in the windows driver. The effect menu
can be similarly found in the RIP software.


