background image

QPix 450 or QPix 460 Colony Picking System User Guide

116

5031498 G

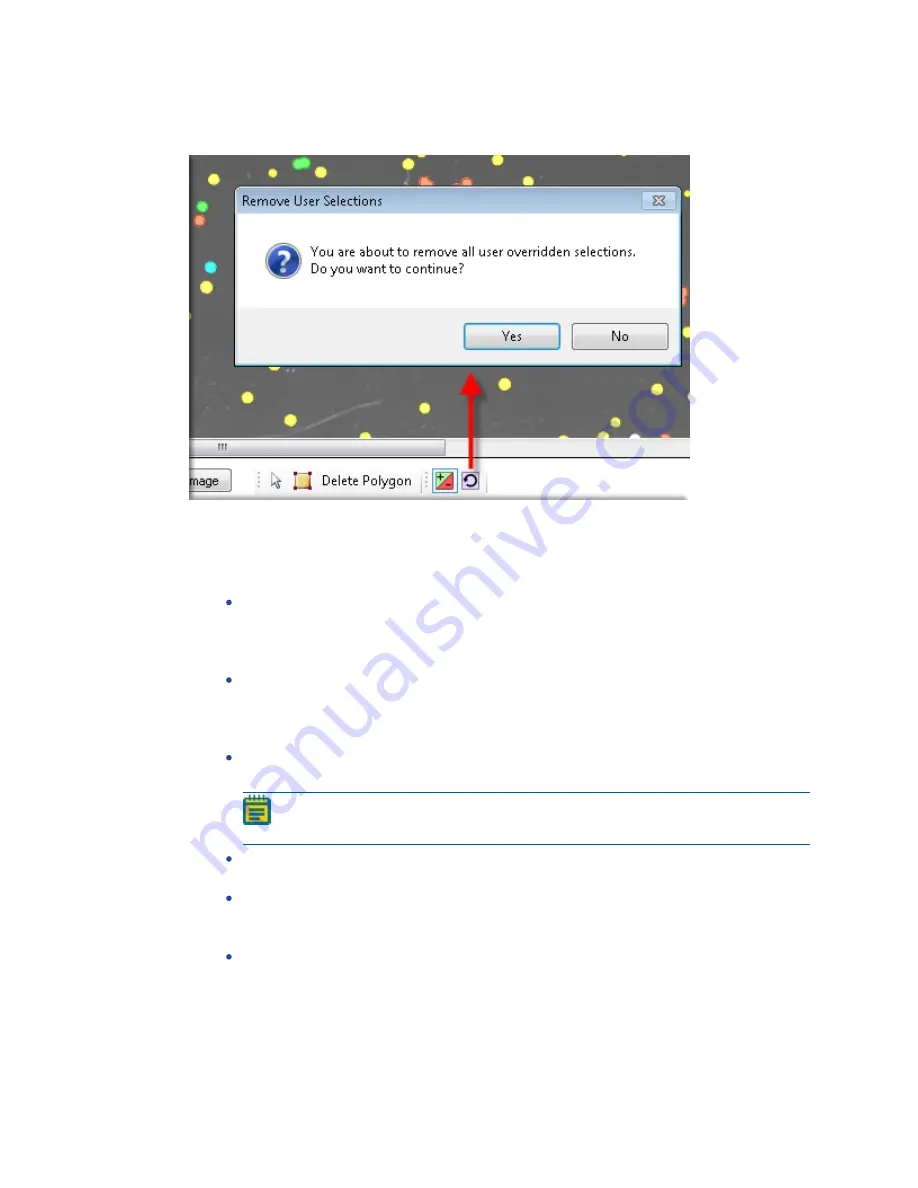
To undo all your user selections, click the Remove User Selections icon to display the Remove
User Selections dialog. Click Yes.

To select the colonies for picking:

1. From the list in the upper-right area, select the barcode or identifier of the receptacle to

view.

2. Refine the colony Selection criteria.

Compactness sets the level of irregularity for picking colonies. The value is a ratio of
the perimeter divided by the area of the colony, so that irregular shaped colonies are
closer to 0 and colonies that are more of a perfect circle are closer to 1. The system
default value is that a colony equal to or less than 0.65 and is not picked.
Axis Ratio measures how oval the colony is. The value is a ratio of the longest diameter
divided by the shortest diameter, so oval shaped colonies are closer to 0 and round are
closer to 1. The system default value is that a colony equal to or less than 0.65 is not
picked.
Min Diameter (mm) sets the minimum diameter of colonies for picking. A colony equal
to or smaller than the value in this field is not picked.

Note: The Min Diameter (mm) cannot be lower than the Diameter value set in
the Debris Discard section of the test image.

Max Diameter (mm) sets the maximum diameter of colonies for picking. A colony equal
to or greater than the value in this field is not picked.
Min Proximity (mm) sets the distance between colonies to pick, so that when picking
one colony, a different adjacent colony is not picked. The system default value is
0.45 mm.
Inhibition Zone - Colony (Mean Radius in mm) sets the criteria for picking colonies
based on the size of the inhibition zone.

Summary of Contents for QPix 450

Page 1: ...5031498 G August 2022 QPix 450 or QPix 460 Colony Picking System User Guide ...

Page 2: ...t and or license to use or permit others to use such manufacturers and or their product names as trademarks Each product is shipped with documentation stating specifications and other technical information Molecular Devices products are warranted to meet the stated specifications Molecular Devices makes no other warranties or representations express or implied including but not limited to the fitn...

Page 3: ...he QPix 450 or 460 System 13 Chapter 2 QPix 450 or 460 System Instrument Overview 15 Front Panel Controls and Display 16 Stackers Overview 17 Instrument Connections 19 Compressed Air Supply 20 Using Barcodes 20 Computer System Requirements 21 Chapter 3 QPix 450 460 Software Overview 23 Menu Options 24 New Process Options 25 Chapter 4 Starting and Setting Up the Instrument 27 Start Up and Shutdown ...

Page 4: ... Editing Regional Picking Processes 120 Running Regional Picking Processes 129 Chapter 10 Blue White Regional Picking Processes 139 Creating and Editing Blue White Regional Picking Processes 140 Running Blue White Regional Picking Processes 148 Chapter 11 Control Plate Creation Processes 159 Creating and Editing Control Plate Creation Processes 160 Running Control Plate Creation Processes 166 Chap...

Page 5: ...leaning the Instrument 228 Testing the Stackers 232 Testing the Pins 233 Aligning the Camera 235 Replacing Fuses 237 Draining the Compressor 238 Moving the Instrument 239 Adding a New User to the SQL Server Database 240 Running the Software as an Administrator 240 Resetting the Path to the SQL Server 240 Obtaining Support 242 Chapter 19 Troubleshooting 243 Common Problems and Possible Solutions 24...

Page 6: ...QPix 450 or QPix 460 Colony Picking System User Guide 6 5031498 G ...

Page 7: ... of other types of hazards such as biohazard electrical or laser safety warnings as are described in the text of the warning When warnings and cautions are displayed in this guide be careful to follow the specific safety information related to them The following user attention statements can be displayed in the text of Molecular Devices user documentation Each statement implies a particular amount...

Page 8: ... source All safety instructions must be read and understood before proceeding with the installation maintenance and servicing of all modules Power off the instrument and disconnect the power cord before you do maintenance procedures that require removal of a panel or cover or disassembly of an interior instrument component Potential heat hazard Strong magnetic field Location of the protective eart...

Page 9: ...ials being used Electrical Safety To prevent electrically related injuries and property damage inspect all electrical equipment before use and immediately report all electrical deficiencies Contact Molecular Devices Technical Support to service equipment that requires the removal of covers or panels WARNING HIGH VOLTAGE Within the instrument is the potential of an electrical shock hazard existing ...

Page 10: ...s the UV light to prevent the risk of damage from UV radiation Magnet Safety Persons with external or implanted medical devices need to evaluate the risks related to these devices before entering an area where the instrument is in use Keep magnetic storage devices or strips such as hard drives and credit cards away from the instrument Interactions with metallic objects can create pinch hazards Ext...

Page 11: ...rea must be clearly marked with an applicable biohazard sign WARNING Never use the instrument in an environment where potentially damaging liquids or gases are present Moving Parts Safety To prevent injury due to moving parts observe the following Never try to exchange labware reagents or tools while the instrument is operating Never try to physically restrict the moving components of the instrume...

Page 12: ...fety on page 11 for details Avoid spilling liquids on the system Fluid spilled into internal components creates a potential shock hazard Wipe up all spills immediately Do not operate the system if internal components have been exposed to spilled fluid Unplug the instrument if there is a fluid spill in the instrument and contact Technical Support Perform only the maintenance tasks described in this...

Page 13: ...em is useful for working with applications such as protein engineering protein evolution directed or enzyme evolution protein expression transformation and sub clone management The QPix 450 or 460 system is available with white light or fluorescent imaging Color filters such as for blue white screening are available in combination with white light imaging Multiple fluorescent filters ensure compat...

Page 14: ...s head uses an LED based light source and preset filter pairs for selecting fluorescence excitation and emission wavelengths and a sensitive monochrome CCD camera for image acquisition The fluorescence head can also be used for white light imaging using the transmitted light source below the source plate holder The fluorescent imaging system lets you add fluorescent intensity parameters in the sel...

Page 15: ...ssing through during operation The bed of the instrument contains source and destination stacker lanes See Setting Up Stacker Cassettes on page 32 The bed also contains wash baths which clean the pins before and during a process See Setting Up Wash Baths on page 29 1 2 5 5 4 7 6 3 Item Description 1 Stacker cassettes 2 Stacker lane 3 Front panel 4 Wash bath 5 Imaging table 6 Pipette chute QPix 460...

Page 16: ...10 11 Item Description 1 Backlit indicator panel 2 START button 3 STOP button 4 Emergency Stop button 5 Power status 6 Instrument robot status 7 Air pressure status 8 Not operational on this system 9 Not operational on this system 10 Not operational on this system 11 UV light indicator Front Panel Controls and Display ...

Page 17: ...trument in the destination stacker cassette after colony inoculation CAUTION Each stacker lane is set up and configured to use specific plate and lid pair type definitions Using undefined plate and lid pair types can cause stacker lane failures For adjustments contact Technical Support https support moleculardevices com Item Description 1 Destination cassette holds the plates that are unloaded fro...

Page 18: ...he process deck it is a deep lane To prevent jamming a stacker lane Load the cassettes with only the plate and lid pairs for the type of stacker lane configuration and definition for the instrument Avoid mixing the plate and lid types even if they are all defined compatible types of plates and lids Note Not all brands and types of plates and lid pairs are compatible with the stacker even if they c...

Page 19: ... right side of the instrument 1 2 3 4 5 6 Item Description 1 Power Inlet Instrument Mains 2 Power Outlets Computer and Monitor 3 Ethernet port 4 Compressed air inlet 5 Fuse carrier Instrument Mains 6 Fuse carrier Computer and Monitor Connection Ports and Fuses The mains power inlet and the computer and monitor power outlets are separately fused ...

Page 20: ...it to the instrument through the filter regulator inlet Use only 6 mm OD polyurethane pneumatic hose rated for more than 100 psi to connect to the air inlet CAUTION The filter regulator is factory set to 0 69 MPa 100 psi at 60 liters per minute Do not adjust the regulator For the inlet air pressure requirements see Technical Specifications on page 251 Using Barcodes If you use barcodes the followi...

Page 21: ...indows 10 64 bit Windows 7 32 bit Memory 4 GB RAM Data Connection 10 100 Ethernet port Camera Connection USB 2 0 port Minimum Computer System Requirements CAUTION Do not replace the computer operating the system with one of your own Also do not replace the operating system on the provided computer The computer supplied with your system includes hardware and driver components specifically configure...

Page 22: ...QPix 450 or QPix 460 Colony Picking System User Guide 22 5031498 G ...

Page 23: ... tabs near the top of the window below the menus New Process gives you a full set of options for creating and managing processes and system maintenance See New Process Options on page 25 Templates displays a list of saved templates that can be used for creating new processes Recent Processes displays a list of recently opened processes Click the Open Process button at the bottom of the window to d...

Page 24: ...ocesses Recent Processes displays a list of recently opened processes Switch User can be used in a multiple user environment to log off the current user so that a different user can log on Exit closes the Navigation window and shuts down the software View Menu Properties displays the properties of the routine that is being set before starting the routine Progress displays the progress of a running...

Page 25: ...tacles using the standard process See Picking Processes on page 57 Blue White Picking picks blue or white colonies from receptacles using the standard process See Blue White Picking Processes on page 81 Zone of Inhibition Detection Picking picks colonies with detectable zones of inhibition from receptacles using the standard process See Zone of Inhibition Detection Picking Processes on page 103 Re...

Page 26: ...a picking routine See Creating and Editing Sanitise Profiles on page 51 Camera Alignment Process calibrates and correctly aligns the camera to get pin to spot precision relating the image pixel co ordinates with the instrument x and y coordinates Do this process whenever the head is returned to the actuator or whenever the actuator is hit as this can have a negative effect on picking precision See...

Page 27: ...er regulator inlet is from 0 69 MPa to 0 83 MPa 100 psi to 120 psi If you are using a standalone air compressor confirm that the power cord for the compressor is properly connected and that power to the power outlet is functioning properly Powering On the System To power on the system 1 Confirm all the tasks listed in Pre Power Up Check List 2 Power on the air source If you are using a laboratory ...

Page 28: ...and wait for the computer to turn off 3 Push the Stop button on the front panel to switch off the instrument 4 Turn off the power at the mains or disconnect the power cord to the instrument 5 Turn off the air source If you use a laboratory built in air system turn off the control valve If you use a standalone air compressor turn off the compressor or disconnect the power cord Emergency Stop In an ...

Page 29: ...d on the requirements for your application 8 Install the stacker cassettes if applicable See Setting Up Stacker Cassettes on page 32 9 Select and run the desired process For information about selecting defining and running processes see the following topics Picking Processes on page 57 Regional Picking Processes on page 119 Control Plate Creation Processes on page 159 Plating Processes on page 177...

Page 30: ... injuries use the software Change Head process to safely move the actuator To change the head 1 From the Navigation window under Utility Processes double click the Instrument Utilities icon 2 In the Instrument Utilities window double click the Change Head icon 3 In the Change Head window click Move to Load Position 4 When the warning message displays make sure that the bed is clear of obstructions...

Page 31: ... or whenever it needs cleaning wipe the exterior of the head with a cloth using 70 ethanol To store the head slide it into its metal cover with the pins facing inward and then secure it in place with the thumbscrew and washer Installing the Head To install the head 1 Hold the head by its handle with the pins pointing down and then on the right slide the head into the actuator assembly 2 Attach the...

Page 32: ... while it is off the instrument After loading and installing the stacker cassettes run the Restacker utility to make sure the stacker is set up correctly When the instrument is not being used keep the empty cassettes on their stacker bases rather than elsewhere off the instrument See Testing the Stackers on page 232 Loading the Source Stacker Cassette Before starting a process the source stacker c...

Page 33: ...you to load it with a stack of prepared plates and lid pairs 4 Load the plate and lid pairs into the cassette from either the top or bottom of the cassette with all the plates facing the same direction Make that sure the bottom plate sits raised on the four black clips at the bottom of the cassette Stacker Cassette Bottom with Black Plate Holding Clips Stacker Cassette Loaded ...

Page 34: ... light turns off 7 Look into the source stacker base and make sure that the four lifting rods in the corners are up Lifting Rods up in the Corners of the Source Stacker Base If the rods are down it is also likely that the red reset light is on and a reset is needed CAUTION Do not continue to the next step and install the source cassette with the lifting rods down The stack of plates will fall to t...

Page 35: ... cassette is locked by trying to lift the cassette up out of the base 13 After installing the stacker cassettes you can run the Restacker utility to make sure that your set up is correct See Testing the Stackers on page 232 Installing the Destination Stacker Cassette The destination cassette installs into the destination cassette stacker base behind the source cassette stacker base The destination...

Page 36: ... and Unstacking Tool The X3533 Stacking and Unstacking Tool is a recommended jig to safely load and unload plates into and out of stacker cassettes It is a stable platform of reasonable height to support plate stacks Item Description 1 Plate stacking platform with recessed stability edges 2 7 support pin holes to hold the cassette at different filling heights 3 Support pin with hairpin cotter Fron...

Page 37: ... a source stacker cassette using the X3533 tool 1 Set up the X3533 tool on the floor and place the cassette over the top of the jig Cassette Fitting Over the X3533 Jig 2 Place a short stack of about five plates and lid pairs oriented the same direction on the top jig platform Make sure that the bottom plate fits securely on the recessed platform edges X3533 Platform with Recessed Edges Short Stack...

Page 38: ...cassette up to the nearest support pin hole that lets the cassette enclose the stack without going too far over Put the pin in the hole and let the cassette rest on the pin Moving the Cassette and Support Pin 5 Add another short stack oriented the same direction on to the existing stack base Adding to the Stack 6 Repeat steps 4 and 5 until you have loaded your cassette ...

Page 39: ...he Jig 8 Verify and adjust as needed the proper stack alignment in your cassette by running your fingers on both hands up the front and the back of the stack The stack should feel smooth and appear level Check Stack Alignment CAUTION Stack misalignment can cause stacker errors during procedures 9 Using two hands lift the filled cassette and install it onto the source stacker cassette base on the i...

Page 40: ...ding the Destination Stacker Cassette Manually unload cassettes while the stacker is off the instrument To unload the destination stacker cassette 1 Make sure that the black destination cassette locking knob is in the unlocked position To unlock it pull it out and twist it until the black locking knob stays pulled out at the back of the lane Destination Cassette Locking Knob in the Unlocked Positi...

Page 41: ...tte back into the destination stacker cassette base on the instrument Unloading the Destination Stacker Cassette Using the X3533 Tool To unload the destination stacker cassette using the X3533 tool 1 Make sure that the black destination cassette locking knob is in the unlocked position To unlock pull out and twist until the black locking knob stays pulled out at the back of the lane Destination Ca...

Page 42: ...ace it over the X3533 jig Make sure that the bottom plate fits securely on the recessed platform edges and that the cassette rests on the support pin Filled Destination Cassette Going onto the X3533 Jig 4 If any plate in the stack is out beyond the cassette enclosure carefully lift them off the stack and set them aside Unload Unenclosed Plate and Lid Pairs ...

Page 43: ...de the cassette down the jig to the next hole exposing a short stack Unload Unenclosed Plate and Lid Pairs 7 Remove and set aside the stack beyond the cassette enclosure 8 Repeat steps 5 through 7 until the cassette is empty 9 Take the cassette off the X3533 jig and place the cassette back onto the destination stacker cassette base on the instrument ...

Page 44: ... configured deep well plates Note A non configured plate is a plate that your stacker system has not been configured to use Plate Type Accessories Standard Plate Lane Deep Well Plate Lane Standard Plate x9150 x9150 and x9152 Skirted PCR Plate x9150 x9150 and x9153 Non skirted PCR Plate N A x9150 and x9151 Deep Well Plate N A x9150 Static Plate Holder Accessories Required to Run Different Plate Typ...

Page 45: ...o required for use Skirted PCR plates Deep Static Holder and Deep Lane Adapters Specifications For ordering information see Replacement Parts and Optional Extras on page 247 The model of the deep lane adapter depends on the type of plate to use The deep lane adapter sits on top of the static holder in the stacker deep lane during the process For example Examples of when to use the software based U...

Page 46: ... System User Guide 46 5031498 G For example When running the process specifying Use Static Holder a prompt step displays so that you can manually load the static holder and plate at the end of the stacker lane in the routine For example ...

Page 47: ...in the back onto the stacker lane 2 Adjust the locking bar on the bottom of the holder by moving the lock handle so that the locking bar fits into the channel in the middle of the lane and the static holder sits flat in the lane 3 Place the plate in the static holder with the A1 well in the front right corner 4 Slide the static holder to the end of the lane making sure that the top corner of the p...

Page 48: ...er can slide back so that the plate does not make proper contact with the metal plate sensor at the process deck end of the lane Contact Technical Support for adjustment help Setting up Deep Stacker Lane for Static Holder Usage For deep well lanes the only difference from the Standard Lane Static Holder Usage process is in step 3 For deep well lanes first place the plate appropriate deep lane adap...

Page 49: ...nds that you manually clean the instrument interior To run a Sanitise process 1 From the Navigation window under Utility Processes double click Instrument Utilities 2 In the Instrument Utilities window double click Sanitise 3 In the Sanitise window select the head you are sanitizing from the Select Head list 4 From the Sanitise Profile select a pre defined profile If you want a different Sanitise ...

Page 50: ...se window select a Sanitise Profile type the duration in seconds for the UV light to remain on The default duration is 600 seconds 10 minutes 4 Confirm that the bed is clear and that the door is closed Tip The door locks automatically while the UV light is on for added safety The door is made from acrylic which prevents UV light from passing through during operation CAUTION Prolonged UV light expo...

Page 51: ...h cycles can contain one or more wash bath steps that can be created in the Manage Sanitise Profiles window Tip You cannot edit Sanitise profiles when setting up a routine for a process While you are working in the Manage Sanitise Profiles window it is worth creating a set of various profiles that you think you might need for future routines The recommended Default Sanitise Profile uses the follow...

Page 52: ...ise Profile dialog in the Name field enter a short descriptive name for the profile 4 Select one of the following options for the wash profile Select Single Stage to use the same wash cycle before and during a routine Select Multi Stage to use different wash cycles before and during a routine 5 Click OK The Sanitise profile appears in the Profiles table along with all other Sanitise profiles Altho...

Page 53: ...Utility Processes double click Manage Sanitise Profiles 2 In the Manage Sanitise Profiles window in the Profiles table click the profile you want to edit If the profile is a Single Stage profile the Stages list displays First and Main Wash Cycle If the profile is a Multi Stage profile the Stages list includes First Wash Cycle and Main Wash Cycle ...

Page 54: ...Time seconds list enter the number of seconds to dry the pins with the halogen dryer 7 From the Wait After Drying seconds list enter the number of seconds to wait before moving on to the next step or ending the wash routine if this is the last step 8 Continue to add or remove steps as required for the wash stage 9 When you are finished editing click Save Note If you are editing a Multi Stage profi...

Page 55: ... 1 From the Navigation window under Utility Processes double click the Manage Sanitise Profiles icon 2 In the Manage Sanitise Profiles window in the Profiles table click the profile you want to delete 3 Click Delete 4 In the Confirm Profile Deletion dialog click Yes 5 Click Next to return to the Navigation window ...

Page 56: ...QPix 450 or QPix 460 Colony Picking System User Guide 56 5031498 G ...

Page 57: ... a batch of plates containing control samples These can be created by picking colonies from source receptacles into destination wells See Control Plate Creation Processes on page 159 Create New Regional Tray adds new plate source definitions to the regional picking plate type database which can then be selected for use in the regional picking process See Manage Regional Tray Processes on page 173 ...

Page 58: ...n the Picking window 1 From the Navigation window under Picking Processes double click Picking 2 In the Picking window click Picking Type to view the picking type options Select White Light to use only white light to illuminate and identify the colonies to pick Select White Light and Fluorescent to use white light to illuminate and identify colonies and fluorescent light to determine the colonies ...

Page 59: ...the routine is of the same type as the one you are creating then the imported routine displays in the Select Routine list Exporting Routines To export a routine click Export and then navigate to the location that you want to save the xml file You can change the name of the file Click Export to save the routine in xml format Deleting Routines You should export the routine before you delete it This ...

Page 60: ... to allow the system to automatically assign a valid random barcode and continue the routine 3 Use the Validation Barcode list to define the barcodes for source receptacles If the scanned barcode on a source receptacle cannot be found in the list a message displays To manually enter valid barcodes enter each barcode in the field below the list and then click Insert To import valid barcodes from a ...

Page 61: ...rom which to import the identifiers To remove an identifier from the list click the identifier in the list and then click Remove To generate a defined list of identifiers for the source receptacles click Generate List To define the parameters for the generated list Enter static text for the start of the identifier in the Prefix field the first number to generate in the Start Number field the numbe...

Page 62: ... list select the plate type to use for a duplicate copy of the destination plate This sends the picking head to inoculate a second plate without returning to re pick the colonies Doing so can decrease the efficiency of inoculation in the copy plate Note To make a copy during the picking process the system must have a minimum of two available stacker lanes 4 Select the Deposit Order to deposit the ...

Page 63: ...plate template image see rows A C E and G After you define the wells to dip or skip click Exit 7 Click Next to select the stackers Selecting the Destination Stackers To select the destination stackers 1 In the Destination Stackers window click the rectangle that represents the stacker to use for the routine The stacker rectangle changes from gray to red Note If the stacker you want to use cannot b...

Page 64: ... the pins for the inoculation If you select Make Copy for the destination plate enter a value for the copy 4 From the Sanitise Profile list select the Sanitise profile to use for the picking routine If the available profiles are not suitable for the picking routine exit the picking process and create a new Sanitise profile See Creating and Editing Sanitise Profiles on page 51 5 Click Next to defin...

Page 65: ...the summary click Print Click Next to change the head See Changing the Picking Head on page 80 Changing the Picking Head The Change Head window reminds you which picking head must be loaded based on the Setting Summary routine you configured and provides you an opportunity to change the head The head is housed in a unique actuator system that permits easy exchange and set up of the head Although i...

Page 66: ...then secure it in place with the thumbscrew and washer To install a head hold the head by its handle with the pins pointing down and then slide the head into the actuator assembly from the right Then attach the thumbscrew and washer on the left and hand tighten the thumbscrew to secure the head to the actuator 5 Close the front door 6 Click Move to Park Position to move the picking head arm to the...

Page 67: ... configured settings for the routine See Viewing the Settings Summary on page 65 4 In the Settings Summary window click Next 5 After the Please Load Source window displays load the source receptacles in the correct locations on the instrument deck 6 Close the instrument door 7 Click Next to take a white light test image of the source receptacles See Adjusting the White Light Test Image on page 67 ...

Page 68: ...e list The frame is in red 2 Under Acquisition adjust the Exposure and Gain settings In the Exposure ms field enter the number of milliseconds from 10 to 1000 to expose the sample to light when acquiring the image Adjust the Gain to increase the image signal without changing the light exposure After making adjustments to the Exposure or Gain settings click Grab Image to apply the new settings to t...

Page 69: ... Low Limit value clear the Use Auto Thresholding check box and then drag the slider to the left until some background is clearly detected Select the Use Auto Thresholding check box and the Auto Threshold Each Frame check box again and then enter the value from the Threshold field into the Low Limit field To determine the High Limit value clear the Use Auto Thresholding check box and then drag the ...

Page 70: ...ay Click Overlay only to display the detected colonies in white with yellow rings and a black background To remove the yellow ring from the detected colonies deselect the Outline Detected Features check box 11 Select the Debris tab 12 Adjust the Diameter and Axis Ratio to exclude objects that are smaller than the desired colonies Each detected feature displays within a yellow ring while excluded f...

Page 71: ...routine for white light only the system captures and processes a higher resolution image and then displays the Feature Selection window If you run a routine for white light and fluorescent imaging the Fluorescent Test Image window displays Adjusting the Fluorescent Test Image If you run a routine for white light and fluorescent imaging the Fluorescent Test Image window displays after you make adju...

Page 72: ...m 10 to 1000 to expose the sample to light when acquiring the image Adjust the Gain to increase the image signal without changing the light exposure After you adjust the Exposure or Gain settings click Grab Image to take a new test image with the new settings 3 Click Next to capture and process a higher resolution image and then open the Feature Selection window Selecting Colonies for Picking Afte...

Page 73: ...out a yellow ring in the test image is excluded from becoming a pickable object Drag the Zoom slider below the image to get a closer look at the image and drag the Contrast slider to change the contrast between the objects and the background To save the image in bmp jpg or png format click Export Image To select a smaller region of interest ROI in the image draw a polygon around the region To draw...

Page 74: ...age map that you want to change When clicked as an override the yellow marked pickable objects change to blue and become unpickable To undo the selection right click over the image map and select Pick Item The object changes to green and becomes pickable When clicked as an override the red marked unpickable objects change to green and become pickable To undo the selection right click over the imag...

Page 75: ...er divided by the area of the colony so that irregular shaped colonies are closer to 0 and colonies that are more of a perfect circle are closer to 1 A colony equal to or less than 0 65 is not picked by default Axis Ratio measures how oval the colony is The value is a ratio of the longest diameter divided by the shortest diameter so oval shaped colonies is closer to 0 and round colonies is closer ...

Page 76: ...ntensity threshold For Between enter two values to define the range 4 Change the pickable property of individual objects To define an object as pickable right click the object and select Pick Item to display the object in green To define an object as unpickable right click the object and select Discard Item to display the object in blue 5 In the Limit Colonies field enter the maximum number of col...

Page 77: ...ntinue or Save New Routine dialog displays To save the settings for the routine before you continue click Save Routine enter a Name and a short Description for the routine and then click Save To continue without saving the settings for the routine click Routine Without Saving and then click OK If you edit a routine the Save Changes to Routine dialog displays To save the settings for the routine be...

Page 78: ...ed if you select Make Copy for the routine Destination Barcode is the barcode of the destination receptacle that is currently being inoculated Destination Offset is the reference well for where the pins are lowered This value changes for 384 well plates Colonies Picked is the number of colonies picked so far Colonies To Pick is the total number of colonies to be picked Estimated Time Remaining ind...

Page 79: ...ent deck 5 Close the instrument door 6 Click Next to continue running the picking routine If you click Continue With Image Review the system takes a white light test image of the source receptacles and then displays the Test Image window See Adjusting the White Light Test Image on page 67 If you click Continue Without Image Review the system captures and processes a higher resolution image and the...

Page 80: ...o position near the front of the instrument 3 Open the front door 4 Install the picking head To remove an installed head unscrew and remove the thumbscrew and washer on the left that secures the head to the actuator assembly Then grab the handle on the right and slide the head out of the actuator Before storing the head or whenever it needs cleaning wipe the exterior of the head with a cloth using...

Page 81: ...ocesses on page 173 Note Before running a picking process it is important that you do the cleaning and set up procedures in Preparing to Run Processes on page 29 If this is your first picking process you must edit or create a Sanitise profile to use with the picking process See Creating and Editing Sanitise Profiles on page 51 Blue White Colony Detection is a technique that uses the E Coli LacZ ge...

Page 82: ... 87 on page 87 Viewing the Settings Summary on page 88 on page 88 Note Some steps that are included in these procedures might not be available depending on the features included with the instrument and license Opening the Blue White Picking Window To open the blue white picking window 1 From the Navigation window under Picking Processes double click Blue White Picking 2 Click Start to home the dri...

Page 83: ... Routines Before you can import a routine you must export the routine from the other computer in xml format and then save the export file on the system computer To import the xml file click Import and then locate and select the file Click Import to add the routine to the database If the routine is of the same type as the one you are creating then the imported routine displays in the Select Routine...

Page 84: ... a barcode Note If the system fails to identify a barcode for the source receptacle the routine ends since the source requires a valid barcode Click Auto Generate to allow the system to automatically assign a valid random barcode and continue the routine 3 Use the Validation Barcode list to define the barcodes for source receptacles If the scanned barcode on a source receptacle cannot be found in ...

Page 85: ... To import identifiers for the source receptacles from a text or csv file click Import and then select the file from which to import the identifiers To remove an identifier from the list click the identifier in the list and then click Remove To generate a defined list of identifiers for the source receptacles click Generate List To define the parameters for the generated list Enter static text for...

Page 86: ...osit the picked colonies By Columns or By Rows 5 Define the Deposit Strategy Click Fill All Microplates to fill every selected well of a destination plate before starting a new destination plate Click New Microplate for Each Position to start a new destination plate whenever the instrument starts picking from a different source QTray or Petri dish Click New Microplate for Each Batch to start a new...

Page 87: ... colonies to the destination plate For the fastest transfer rate select All to use all available picking pins to pick colonies before inoculating the destination plate For smaller picking groups the available selections depend on the Deposit Order selection made in the Destination Options window If you select By Columns you can pick colonies using from 1 to 11 columns If you select By Rows you can...

Page 88: ...ble 5 In the Picking Depth Into Agar mm field enter a value in millimeters to define the depth that the pins are to be inserted in the agar for picking 6 Select the Limit Max Number of Features Per Position check box and then in the Max Number of Features Per Position field enter the maximum number of colonies that can be picked from a single QTray or Petri dish Note Setting a limit for the maximu...

Page 89: ...to move the actuator into position near the front of the instrument 3 Open the front door 4 Install the picking head To remove an installed head unscrew and remove the thumbscrew and washer on the left that secures the head to the actuator assembly Then grab the handle on the right and slide the head out of the actuator Before storing the head or whenever it needs cleaning wipe the exterior of the...

Page 90: ...e 1 Open the Blue White Picking window See Opening the Blue White Picking Window on page 82 2 Select the picking routine to run See Selecting Blue White Picking Routines on page 82 If you do not need to make changes to the routine select the Skip Steps check box before clicking Next 3 Review the settings for the routine See Viewing the Settings Summary on page 88 4 In the Settings Summary window c...

Page 91: ...ation within the image 1 Right click over the image map and select Intensity 2 Move the cursor over the area of interest in the image map to display the pixel intensity value To adjust the test image 1 From the Receptacle list select the number of the receptacle to view and then click the frame to view in the receptacle image below the list The frame is in red 2 Under Acquisition adjust the Exposu...

Page 92: ...Low intensity value move the histogram red slider line left to the lowest preferred value and Ctrl Click The value displays in the table cell To select the High intensity value move the histogram red slider line right to the highest preferred value and Ctrl Click The value displays in the table cell To manually select blue or white colonies To manually select Blue Colonies select an Intensity Rang...

Page 93: ... white with yellow rings and a black background To remove the yellow ring from the detected colonies clear the Outline Detected Features check box 8 Select the Debris tab 9 Adjust the Diameter and Axis Ratio to exclude objects that are smaller than the desired colonies Each detected feature displays within a yellow ring while excluded features do not have a yellow ring In the Diameter mm field ent...

Page 94: ... can be considered unpickable if it is too close to the edge of the receptacle or it does not match the selection criteria To view the details of a colony hold the cursor over a colony to display the properties of that colony If a colony has not been selected as pickable the reason for the exclusion shows in red text Note During image processing each object without a yellow ring in the test image ...

Page 95: ... the corners of the polygon When you draw a polygon on the image the system detects and picks colonies only from within the defined region of interest To resize the polygon drag the blue boxes on its corners To remove the polygon click Delete Polygon To change the selection of the system chosen pickable objects that are displayed in the image map click the user selection button to override the sys...

Page 96: ...ction right click over the image map and select Discard Item The object changes to blue and becomes unpickable To undo all the selections click the Remove User Selections icon to display the Remove User Selections dialog Click Yes If you run a routine for white light and fluorescent imaging two tabs are available The White Light tab displays the image taken with white light The other tab is labele...

Page 97: ...d section of the test image Max Diameter mm sets the maximum diameter of colonies for picking A colony equal to or greater than the value in this field is not picked Min Proximity mm sets the distance between colonies to be picked so that when picking one colony a different adjacent colony is not picked The system default value is 0 45 mm 3 For a fluorescent image adjust the Intensity Measure as s...

Page 98: ... to display all detected features with a yellow circle Select the Shade Features check box to give the detected colonies some shading for clearer visualization Select the Display Proximity Indicators check box to display connecting red lines between a detected colony and its closest neighbor Select the Shade Exclusion Zone check box to display a red shaded exclusion zone where the system cannot pi...

Page 99: ... follow the instructions to verify that the plates are set up correctly 12 Make sure that the instrument door is closed 13 Click Next to start the picking process 14 When the Finished Picking Current Batch dialog displays select an option for how you want to continue then click OK ...

Page 100: ...the destination plates the Finished Picking Current Batch dialog displays Continuing or Ending the Picking Routine After all the colonies are picked from the source receptacles and delivered to the destination plates the Finished Picking Current Batch dialog displays If there are no more source receptacles to pick click Finish Picking and then click OK To continue picking more source receptacles 1...

Page 101: ...used and missing source receptacles To save this information in csv format click Export To view details of all activities related to the source and destination receptacles click Details To save the detailed information in csv format click Export To close the picking details and return to the Picking Summary window click Close In the Picking Summary window click Next and then click Finish to return...

Page 102: ...QPix 450 or QPix 460 Colony Picking System User Guide 102 5031498 G ...

Page 103: ...ing control samples These can be created by picking colonies from source receptacles into destination wells See Control Plate Creation Processes on page 159 Create New Regional Tray adds new plate source definitions to the regional picking plate type database which can then be selected for use in the regional picking process See Manage Regional Tray Processes on page 173 Note Before running a pick...

Page 104: ...te Some steps that are included in these procedures might not be available depending on the features included with the instrument and license Opening the Zone of Inhibition Detection Picking Window To open the Zone of Inhibition Detection picking window 1 From the Navigation window under Picking Processes double click Zone of Inhibition Detection Picking 2 In the Zone of Inhibition Detection Picki...

Page 105: ...database Importing Routines Before you can import a routine you must export the routine from the other computer in xml format and then save the export file on the system computer To import the xml file click Import and then locate and select the file Click Import to add the routine to the database If the routine is of the same type as the one you are creating then the imported routine displays in ...

Page 106: ... system fails to identify a barcode for the source receptacle the routine ends since the source requires a valid barcode Click Auto Generate to allow the system to automatically assign a valid random barcode and continue the routine 3 Use the Validation Barcode list to define the barcodes for source receptacles If the scanned barcode on a source receptacle cannot be found in the list a message dis...

Page 107: ...ck Insert To import identifiers for the source receptacles from a text or csv file click Import and then select the file from which to import the identifiers To remove an identifier from the list click the identifier in the list and then click Remove To generate a defined list of identifiers for the source receptacles click Generate List To define the parameters for the generated list Enter static...

Page 108: ...eposit Order to deposit the picked colonies By Columns or By Rows 5 Define the Deposit Strategy using one of the following options To fill every selected well of a destination plate before starting a new destination plate click Fill All Microplates To start a new destination plate whenever the instrument starts picking from a different source QTray or Petri dish click New Microplate for Each Posit...

Page 109: ...on plate For the fastest transfer rate select All to use all available picking pins to pick colonies before inoculating the destination plate For smaller picking groups the available selections depend on the Deposit Order selection made in the Destination Options window If you select By Columns you can pick colonies using from 1 to 11 columns If you select By Rows you can pick colonies using from ...

Page 110: ...cking Depth Into Agar mm field enter a value in millimeters to define the depth that the pins are to be inserted in the agar for picking 6 Select the Limit Max Number of Features Per Position check box and then in the Max Number of Features Per Position field enter the maximum number of colonies that can be picked from a single QTray or Petri dish Note Setting a limit for the maximum number of col...

Page 111: ... click OK to move the actuator into position near the front of the instrument 3 Open the front door 4 Install the picking head To remove an installed head unscrew and remove the thumbscrew and washer on the left that secures the head to the actuator assembly Then grab the handle on the right and slide the head out of the actuator Before storing the head or whenever it needs cleaning wipe the exter...

Page 112: ...ee Selecting Zone of Inhibition Detection Picking Routines on page 104 If you do not need to make changes to the routine select the Skip Steps check box before you click Next 3 Review the settings for the routine See Viewing the Settings Summary on page 110 4 In the Settings Summary window click Next 5 When the Please Load Source window displays load the source receptacles in the correct locations...

Page 113: ...nds from 10 to 1000 to expose the sample to light when acquiring the image Adjust the Gain to increase the image signal without changing the light exposure Tip Increase the Exposure until the secondary layer is highly exposed and appears very white After you adjust the Exposure or Gain settings click Grab Image to apply the new settings to the test image 3 Click Next to go to the next step Zone of...

Page 114: ...r the colony to display the properties of that colony If a colony has not been selected as pickable the reason for the exclusion shows in red text Drag the Zoom slider below the image to get a closer look at the image and drag the Contrast slider to change the contrast between the objects and the background To save the image in bmp jpg or png format click Export Image To select a smaller region of...

Page 115: ... the gallery images to show the colonies that meet or fail to meet the criteria To exit the gallery click Return to Image Switch between the two views to define the pickable colonies To change the selection of the system chosen pickable objects that display in the image map click the user selection button to override the system chosen and unchosen objects and then click the objects in the image ma...

Page 116: ...oval the colony is The value is a ratio of the longest diameter divided by the shortest diameter so oval shaped colonies are closer to 0 and round are closer to 1 The system default value is that a colony equal to or less than 0 65 is not picked Min Diameter mm sets the minimum diameter of colonies for picking A colony equal to or smaller than the value in this field is not picked Note The Min Dia...

Page 117: ...atures check box to give the detected colonies some shading for clearer visualization Select the Display Proximity Indicators check box to display connecting red lines between a detected colony and its closest neighbor Select the Shade Exclusion Zone check box to display a red shaded exclusion zone where the system cannot pick 7 Click Next 8 In the Continue or Save New Routine dialog or the Save C...

Page 118: ...currently doing such as Pick when the system is picking To turn the light table on or off click Light Table On or Light Table Off To safely pause the routine click Pause After all the colonies are picked from the source receptacles and delivered to the destination plates the Finished Picking Current Batch dialog displays Viewing the Zone of Inhibition Detection Picking Summary After all picking ro...

Page 119: ...ng control samples These can be created by picking colonies from source receptacles into destination wells See Control Plate Creation Processes on page 159 Create New Regional Tray adds new plate source definitions to the regional picking plate type database which can then be selected for use in the regional picking process See Manage Regional Tray Processes on page 173 Note Before you run a regio...

Page 120: ... the Navigation window under Picking Processes double click the Regional Picking icon 2 In the Regional Picking window click Picking Type to view the picking type options Select White Light to use only white light to illuminate and identify the colonies to pick Select White Light And Fluorescent to use white light to illuminate and identify colonies and fluorescent light to determine the colonies ...

Page 121: ...outines Before you can import a routine you must export the routine from the other computer in xml format and then save the export file on the system computer To import the xml file click Import and then locate and select the file Click Import to add the routine to the database If the routine is of the same type as the one you are creating then the imported routine displays in the Select Routine l...

Page 122: ...sponse when a barcode cannot be read Click Manual Prompt to open a dialog where you can enter a barcode or name for the receptacle Click Skip Receptacle to ignore the receptacle and scan the next receptacle for a barcode Note If the system fails to identify a barcode for the source receptacle the routine ends since the source requires a valid barcode Click Auto Generate to allow the system to auto...

Page 123: ...To import identifiers for the source receptacles from a text or csv file click Import and then select the file from which to import the identifiers To remove an identifier from the list click the identifier in the list and then click Remove To generate a defined list of identifiers for the source receptacles click Generate List To define the parameters for the generated list Enter static text for ...

Page 124: ...n 3 Select the Make Copy check box and from the Select Copy Microplate list select the plate type to use for a duplicate copy of the destination plate Note To make a copy during the picking process the system must have a minimum of two available stacker lanes 4 Click Next to select the stackers Selecting the Destination Stackers To select the destination stackers 1 In the Destination Stackers wind...

Page 125: ...illimeters to define the depth that the pins are to be inserted in the agar for picking 6 Click Next to the source and destination options Setting Regional Picking Source and Destination Options To set the regional picking source and destination options 1 In the Destination Source Options window select the Limit Max Number of Features Per Region check box and then in the Number of Features Per Reg...

Page 126: ...om square blocks of eight regions such as A1 to B4 A5 to B8 and so on This is similar to the picking order used for a QPix 460 System plating process See Plating Processes on page 177 5 Under Destination Microplate Template click Edit to define the wells to dip or skip You can skip wells that you use as blank or control wells The defined template is used for all the destination plates during the p...

Page 127: ...the Wash Between Partial Inoculation check box Clear this check box to wait until all pins are used for picking and inoculation before running the wash routine 3 In the Destination field enter the distance in millimeters above the bottom of the destination plate wells to dip the pins for the inoculation If you select Make Copy for the destination plate enter a value for the copy 4 From the Sanitis...

Page 128: ...lick OK to move the actuator into position near the front of the instrument 3 Open the front door 4 Install the picking head To remove an installed head unscrew and remove the thumbscrew and washer on the left that secures the head to the actuator assembly Then grab the handle on the right and slide the head out of the actuator Before storing the head or whenever it needs cleaning wipe the exterio...

Page 129: ...you do not need to make changes to the routine select the Skip Steps check box before clicking Next 3 Review the configured settings for the routine See Viewing the Settings Summary on page 127 4 In the Settings Summary window click Next 5 When the Please Load Source window displays load the source receptacles in the correct locations on the instrument deck 6 Close the instrument door 7 Click Next...

Page 130: ...d select the Auto Threshold Each Region check box to process each region with its own uniquely calculated value To process the regions using a value calculated of the entire image clear this check box 6 With the Auto Threshold Each Region check box selected enter threshold values in the Low Limit and High Limit fields To determine the Low Limit value clear the Use Auto Thresholding check box and t...

Page 131: ... the minimum diameter of the required colonies In the Axis Ratio field define the minimum roundness ratio of the required colonies 13 Select the Depth tab 14 Adjust the Agar Depth Height and Maximum Height manually In the Agar Depth mm field enter a value in millimeters for the depth that the picking head descends into the source agar The Agar Height mm field is read only and displays the height o...

Page 132: ...cursor over the area of interest in the image map to display the pixel intensity value To adjust the test image 1 From the Receptacle list select the number of the receptacle to view and then click the region to view in the receptacle image below the list The region is in red 2 Under Acquisition adjust the Exposure and Gain settings In the Exposure ms field enter the number of milliseconds from 10...

Page 133: ...considered unpickable if it is too close to the edge of the receptacle or it does not match the selection criteria To view the details of a colony hold the cursor over that colony to display the properties of that colony If a colony is not selected as pickable the reason for the exclusion displays in red text Note During image processing each object with no yellow ring in the test image is exclude...

Page 134: ...mage map that you want to change When clicked as an override the yellow marked pickable objects change to blue and become unpickable To undo the selection right click over the image map and select Pick Item The object changes to green and becomes pickable When clicked as an override the red marked unpickable objects change to green and become pickable To undo the selection right click over the ima...

Page 135: ...ea of the colony so that irregular shaped colonies are closer to 0 and colonies that are more of a perfect circle are closer to 1 The system default value is that a colony equal to or less than 0 65 and is not picked Axis Ratio measures how oval the colony is The value is a ratio of the longest diameter divided by the shortest diameter so oval shaped colonies are closer to 0 and round colonies are...

Page 136: ...dual objects To define an object as pickable right click the object and select Pick Item to display the object in green To define an object as unpickable right click the object and select Discard Item to display the object in blue 5 In the Limit Colonies field enter the maximum number of colonies to pick from each region If a limit was previously set for the maximum number of colonies in the Desti...

Page 137: ...and then click Save To continue without saving the settings click Routine Without Saving and then click OK If you edit a routine the Save Changes to Routine dialog displays To save the settings before continuing click Save To save the settings as a new routine without changing the existing routine click Save As enter a Name and a short Description for the routine and then click Save To continue wi...

Page 138: ...umber of Positions to Use select the number of receptacle holders to load on the instrument deck 3 Click OK 4 When the Please Load Source window displays replace the picked receptacles with the new receptacles on the instrument deck 5 Close the instrument door 6 Click Next to continue running the picking routine If you click Continue With Image Review the system takes a white light test image of t...

Page 139: ...ocesses on page 173 Note Before running a picking process it is important that you do the cleaning and set up procedures in Preparing to Run Processes on page 29 If this is the first picking process you must edit or create a Sanitise profile to use with the picking process See Creating and Editing Sanitise Profiles on page 51 Blue White Colony Detection is a technique that uses the E Coli LacZ gen...

Page 140: ...on page 144 Selecting the Destination Stackers on page 144 on page 144 Setting Regional Picking Source and Destination Options on page 145 Selecting the Head and Sanitizing Options on page 146 Viewing the Settings Summary on page 147 After creating the routine you can close the process and run it later or you can run it immediately Note Some steps that are included in these procedures might not be...

Page 141: ...ch the type of routine that you are creating are included in the list For example a white light and fluorescent imaging routine is not included in the Select Routine list if you are creating a White Light only routine If you have a saved routine from a different computer you can import the routine You can also export a routine from the database so that it can be imported into the database on a dif...

Page 142: ...log where you can enter a barcode or name for the receptacle Click Skip Receptacle to ignore the receptacle and scan the next receptacle for a barcode Note If the system fails to identify a barcode for the source receptacle the routine ends since the source requires a valid barcode Click Auto Generate to allow the system to automatically assign a valid random barcode and continue the routine 3 Use...

Page 143: ...nsert To import identifiers for the source receptacles from a text or csv file click Import and then select the file from which to import the identifiers To remove an identifier from the list click the identifier in the list and then click Remove To generate a defined list of identifiers for the source receptacles click Generate List To define the parameters for the generated list Enter static tex...

Page 144: ...tination 3 Select the Make Copy check box and from the Select Copy Microplate list select the plate type to use for a duplicate copy of the destination plate Note To make a copy during the picking process the system must have a minimum of two available stacker lanes 4 Click Next to select the stackers See Selecting the Destination Stackers on page 144 Selecting the Destination Stackers To set the ...

Page 145: ...ional Picking Source and Destination Options To set regional picking source and destination options 1 In the Destination Source Options window select the Limit Max Number of Features Per Region check box and in the Number of Features Per Region field enter the maximum number of colonies to pick from a single source receptacle Setting a limit for the maximum number of colonies in the Destination So...

Page 146: ... Rows Before Inoculation list select the number of pins to use to pick in each column or row before transferring the picked colonies to the destination plate For the fastest transfer rate select All to use all available picking pins to pick colonies before inoculating the destination plate For smaller picking groups the available selections depend on the Deposit Order selection made in the Destina...

Page 147: ...e picking head 1 Click Move to Load Position to move the picking head arm to the loading position 2 When the message displays make sure the bed is clear of obstructions and that the door is closed and then click OK to move the actuator into position near the front of the instrument 3 Open the front door 4 Install the picking head To remove an installed head unscrew and remove the thumbscrew and wa...

Page 148: ...picking routine 1 Open the Blue White Regional Picking window See Opening the Blue White Regional Picking Window on page 140 2 Select the picking routine to run See Selecting Blue White Regional Picking Routines on page 141 If you do not need to make changes to the routine select the Skip Steps check box before you click Next 3 Review the configured settings for the routine See Viewing the Setting...

Page 149: ...n within the image 1 Right click over the image map and select Intensity 2 Move the cursor over the area of interest in the image map to display the pixel intensity value To adjust the test image 1 From the Receptacle list select the number of the receptacle to view and click the frame to view in the receptacle image below the list The frame is in red 2 Under Acquisition adjust the Exposure and Ga...

Page 150: ...h intensity value move the red slider line right to the highest value and Ctrl Click The value displays in the table cell To manually select blue or white colonies To manually select Blue Colonies select an Intensity Range that starts near the left side of the histogram and ends to the left of the large spike that represents the largest area which is the agar See Step 6 for Intensity Range setting...

Page 151: ...tures check box 8 Click the Debris tab 9 Adjust the Diameter and Axis Ratio to exclude objects that are smaller than the desired colonies Each detected feature displays within a yellow ring while excluded features do not have a yellow ring In the Diameter mm field enter a value in millimeters for the minimum diameter of the required colonies In the Axis Ratio field define the minimum roundness rat...

Page 152: ...has not been selected as pickable the reason for the exclusion shows in red text Note During image processing each object with no yellow ring in the test image is excluded from becoming a pickable object Drag the Zoom slider below the image to get a closer look at the image and drag the Contrast slider to change the contrast between the objects and the background To save the image in bmp jpg or pn...

Page 153: ...e map that you want to change When clicked as an override the yellow marked pickable objects change to blue and become unpickable To undo the selection right click over the image map and select Pick Item The object changes to green and becomes pickable When clicked as an override the red marked unpickable objects change to green and become pickable To undo the selection right click over the image ...

Page 154: ...han 0 65 and is not picked Axis Ratio measures how oval the colony is The value is a ratio of the longest diameter divided by the shortest diameter so oval shaped colonies are closer to 0 and round colonies are closer to 1 The system default value is that a colony equal to or less than 0 65 is not picked Min Diameter mm sets the minimum diameter of colonies for picking A colony equal to or smaller...

Page 155: ...ay Proximity Indicators check box to display connecting red lines between a detected colony and its closest neighbor Select the Shade Exclusion Zone check box to display a red shaded exclusion zone where the system cannot pick 6 Click Next 7 In the Continue or Save New Routine dialog or the Save Changes to Routine dialog select whether or not to save the routine before continuing with the picking ...

Page 156: ...ource receptacles and delivered to the destination plates the Finished Picking Current Batch dialog displays Continuing or Ending the Regional Picking Routine After all the colonies are picked from the source receptacles and delivered to the destination plates the Finished Picking Current Batch dialog displays If there are no more source receptacles to pick click Finish Picking and then click OK T...

Page 157: ...stination plates used and missing source receptacles To save this information in csv format click Export To view details of all activities related to the source and destination receptacles click Details To save the information in csv format click Export To close the picking details and return to the Regional Picking Summary window click Close In the Regional Picking Summary window click Next and t...

Page 158: ...QPix 450 or QPix 460 Colony Picking System User Guide 158 5031498 G ...

Page 159: ...les using the regional process See Blue White Regional Picking Processes on page 139 Control Plate Creation creates a batch of plates containing control samples These can be created by picking colonies from source receptacles into destination wells as described in this chapter Create New Regional Tray adds new plate definitions to the regional picking plate type database which can then be selected...

Page 160: ...mmediately Note Some steps that are included in these procedures might not be available depending on the features included with the instrument and license Opening the Control Plate Creation Window To open the Control Plate Creation window 1 From the Navigation window under Picking Processes double click Control Plate Creation 2 In the Control Plate Creation window click Start to home the drives an...

Page 161: ...rting Routines Before you can import a routine you must export the routine from the other computer in xml format and then save the export file on the system computer To import the xml file click Import and then locate and select the file Click Import to add the routine to the database If the routine is of the same type as the one you are creating then the imported routine displays in the Select Ro...

Page 162: ...sted contact Molecular Devices to add a new plate type to the list See Obtaining Support on page 242 2 Select either to dip the pins a number of times or to stir the wells of the destination plate during inoculation To dip the pins a number of times click Multi Dip and in the Number of Dips field enter the number of times to dip the pins To stir the wells click Stir Destination 3 In the Number of ...

Page 163: ... list select the Sanitise profile to use for the picking routine If the available profiles are not suitable for the control plate creation routine exit the control plate creation process and create a new Sanitise profile See Creating and Editing Sanitise Profiles on page 51 4 Click Next to define options for the source receptacle Setting Source Receptacle Options To set source and receptacle optio...

Page 164: ...ss the wells To deselect a well click the well again Wells that have not been selected show in light blue 3 Continue clicking receptacles and wells until all the control wells have been defined 4 Click Next to view a summary of the settings Viewing the Settings Summary The Settings Summary window contains a summary of the control plate creation routine settings Review the summary details to make s...

Page 165: ...OK to move the actuator into position near the front of the instrument 3 Open the front door 4 Install the picking head To remove an installed head unscrew and remove the thumbscrew and washer on the left that secures the head to the actuator assembly Then grab the handle on the right and slide the head out of the actuator Before storing the head or whenever it needs cleaning wipe the exterior of ...

Page 166: ... be available depending on the features included with the instrument and license To run a configured control plate creation routine 1 Open the Control Plate Creation window See Opening the Control Plate Creation Window on page 160 2 Select the picking routine to run See Selecting Control Plate Creation Routines on page 160 If you do not need to change the routine select the Skip Steps check box be...

Page 167: ...on within the image 1 Right click over the image map and select Intensity 2 Move the cursor over the area of interest in the image map to display the pixel intensity value To adjust the test image 1 From the Receptacle list select the number of the receptacle to view and then click the frame to view in the receptacle image below the list The frame is in red 2 Under Acquisition adjust the Exposure ...

Page 168: ...n enter the value from the Threshold field into the Low Limit field To determine the High Limit value clear the Use Auto Thresholding check box and then drag the slider to the right until some colonies start to become undetected Select the Use Auto Thresholding check box and the Auto Threshold Each Frame check box again and then enter the value from the Threshold field into the High Limit field 7 ...

Page 169: ...tion window pickable objects show in yellow and unpickable object show in red A colony can be considered unpickable if it is too close to the edge of the receptacle or it does not match the selection criteria To view the details of a colony hold the cursor over that colony to display the properties of that colony If a colony is not selected as pickable the reason for the exclusion shows in red tex...

Page 170: ...between colonies to pick so that when picking one colony a different adjacent colony is not picked The system default value is 0 45 mm 3 Manually change the pickable property of individual objects To define an object as pickable right click the object and select Pick Item to display the object in green To define an object as unpickable right click the object and select Discard Item to display the ...

Page 171: ...closed 11 Click OK to start the control plate creation process Viewing the Control Plate Creation Progress While the control plate creation routine is running the Picking Progress window displays a summary of the routine Start Time shows the time that the picking of the colonies began Source Barcode shows the barcode or identifier of the source receptacle being picked from Pin is the picking pin b...

Page 172: ... the instrument deck Note Make sure that the source receptacles are in the exact same tray locations so that the instrument can locate them 5 Close the instrument door 6 Click Next to continue running the picking routine If you click Continue With Image Review the system takes a white light test image of the source receptacles and then displays the Test Image window See Adjusting the White Light T...

Page 173: ... from receptacles using the regional process Blue White Regional Picking Processes on page 139 Control Plate Creation creates a batch of plates that contain control samples These can be created by picking colonies from source receptacles into destination wells See Control Plate Creation Processes on page 159 Manage Regional Trays adds modifies or removes new regional tray source definitions to the...

Page 174: ...l tray in the Regional Tray Name field 3 Complete all the parameter fields on the left side of the window using the specification document from the manufacturer Failure to input correct plate dimensions can result in damage to the picking head and pins 4 Select the Defined Tray tab to see a visual representation of the parameters 5 After you enter the tray dimensions and confirm the new tray is re...

Page 175: ...ge Regional Trays icon The new plate definition screen displays along with parameter fields and a guide image 2 Select the Manage Previously Created Trays tab 3 From the Defined Trays list select the name of the tray to modify To modify the definition edit the parameter fields on the left using the specification document from the manufacturer and then click Save Regional Tray To make a copy of the...

Page 176: ...QPix 450 or QPix 460 Colony Picking System User Guide 176 5031498 G ...

Page 177: ...hether the liquid handling unit is aspirating and dispensing correctly do a calibration test See Calibrating Aspirated and Dispensed Liquid Volumes on page 186 Note Plating processes are available for the QPix 460 System only Creating and Editing Plating Processes If this is the first plating process you must edit or create a Sanitise profile to use with the plating process See Creating and Editin...

Page 178: ...om the database so that it can be imported into the database on a different computer If you no longer need a routine you can delete it from the database Importing Routines Before you can import a routine you must export the routine from the other computer in xml format and then save the export file on the system computer To import the xml file click Import and then locate and select the file Click...

Page 179: ...ceptacle for a barcode Note If the system fails to identify a barcode for the source receptacle the routine ends since the source requires a valid barcode Click Auto Generate to allow the system to automatically assign a valid random barcode and continue the routine 3 Use the Validation Barcode list to define the barcodes for source receptacles If the scanned barcode on a source receptacle cannot ...

Page 180: ...rt To import identifiers for the source receptacles from a text or csv file click Import and then select the file from which to import the identifiers To remove an identifier from the list click the identifier in the list and then click Remove To generate a defined list of identifiers for the source receptacles click Generate List To define the parameters for the generated list Enter static text f...

Page 181: ...l point Radial does a multi directional radiating pattern from a central point Left to Right does a pattern where the pins stir the liquid in a left to right and top to bottom direction 10 Click Next to define aspiration volume and depth options Setting Volume and Depth Options To set volume and depth options 1 In the Volume and Depths Options window from the Plating Head list select the head to u...

Page 182: ...e Stackers window click the rectangle that represents the stacker to use for the routine The stacker rectangle changes from yellow to red Note If the stacker you want to use cannot be selected then it is not compatible with the destination plate type selected in the Source and Destination Options window 2 Click Next to view the settings summary Viewing the Settings Summary The Settings Summary win...

Page 183: ...ne before continuing with the plating process If you create a new routine the Continue or Save New Routine dialog displays To save the settings for the routine before continuing click Save Routine enter a Name and a short Description for the routine and then click Save To continue without saving the settings for the routine click Routine Without Saving and then click OK If you edit a routine the S...

Page 184: ...he sample is being dispensed Destination Region shows the region in the destination receptacle into which the sample is being dispensed To safely pause the routine click Pause After all the samples have been transferred from the source plates to the destination receptacles the Plating Process window displays Viewing the Plating Summary After plating routine completes the Plating Process window dis...

Page 185: ...he available patterns do not meet your needs you can create a different pattern or edit a pattern using the Plating Pattern Editor To create or edit a plating pattern 1 From the Navigation window under Plating Processes double click the Plating Pattern Editor icon 2 In the Plating Editor window from the Pattern list select the pattern to edit To create a new pattern click Add and then enter a name...

Page 186: ... The destination plate is weighed before filling it with liquid After the destination plate is filled it is removed and weighed again to determine the quantity of liquid transferred to each well This determines if the liquid handling unit is aspirating and dispensing the correct liquid volumes Calibrating aspirated and dispensed liquid volumes involves the following procedures Opening the Plating ...

Page 187: ...ate type selected in the Microplate Selection window 2 Click Next to set the aspirate and dispense options Setting Volume and Depth Options To set the volume and depth options 1 In the Volumes window select the head to use for the plating routine 2 In the Liquid Volume ul field enter a value from 10 to 130 for the aspiration volume in microliters µl 3 To triturate the liquid in the Mix Volume ul f...

Page 188: ...strument and weigh it To determine the volume of liquid dispensed into each well subtract the empty weight from the full weight and then divide the result by the number of filled wells Click Next to open the Adjust Volume Step Size window Adjusting the Volume Step Size The Adjust Volume Step Size window allows you recalibrate the aspirate and dispense volume if the volume is incorrect If the volum...

Page 189: ...tise Profiles on page 51 Creating and Editing Replication Processes The procedures for creating and editing the different types of replicating processes are similar Differences and exceptions are identified within the instructions when applicable If this is your first replication process you must edit or create a Sanitise profile to use with the replication process See Creating and Editing Sanitis...

Page 190: ...ine 1 In the Routines window select to create a new routine or to edit an existing routine To create a new routine click New Routine To edit an existing routine click Run Existing Routine and then select the name of the routine from the Select Routine list To run the routine without making changes select the Skip Steps check box 2 Click Next to set the barcode options Note You can import export an...

Page 191: ...as the one you are creating then the imported routine displays in the Select Routine list Exporting a Routine To export a routine click Export and then navigate to the location that you want to save the xml file You can change the name of the file Click Export to save the routine in xml format Deleting a Routine You should export the routine before you delete it This lets you import the routine af...

Page 192: ...ceptacle for a barcode Note If the system fails to identify a barcode for the source receptacle the routine ends since the source requires a valid barcode Click Auto Generate to allow the system to automatically assign a valid random barcode and continue the routine 3 Use the Validation Barcode list to define the barcodes for source receptacles If the scanned barcode on a source receptacle cannot ...

Page 193: ...entifiers for the source receptacles from a text or csv file click Import and then select the file from which to import the identifiers To remove an identifier from the list click the identifier in the list and then click Remove To generate a defined list of identifiers for the source receptacles click Generate List To define the parameters for the generated list Enter static text for the start of...

Page 194: ...cated colonies If the plate type that you need is not listed contact to add a new plate type to the list For Library Replication you can select only plates with the same number of wells as the source plate For Library Compression you can select 384 well plates only For Library Expansion you can select 96 well plates only 4 Select either to dip the pins a number of times or to stir the wells of the...

Page 195: ...eposit samples into plates from multiple stacker cassettes You must also select the stacker to use for the copy Click Same Stacks to deposit samples into plates from the same stacker cassette and then in the Copies field enter the number of copies to make 4 To clean the pins between copies of the destination plates select the Sanitise Between Copies check box 5 Under Inoculation Heights mm above w...

Page 196: ...tor into position near the front of the instrument 3 Open the front door 4 Install the picking head To remove an installed head unscrew and remove the thumbscrew and washer on the left that secures the head to the actuator assembly Then grab the handle on the right and slide the head out of the actuator Before storing the head or whenever it needs cleaning wipe the exterior of the head with a clot...

Page 197: ...alog or the Save Changes to Routine dialog select whether or not to save the routine before continuing with the replication process If you create a new routine the Continue or Save New Routine dialog displays To save the settings for the routine before continuing click Save Routine enter a Name and a short Description for the routine and then click Save To continue without saving the settings for ...

Page 198: ...tination plate into which the A1 pin is being lowered This value changes for 384 well plates Calculating Remaining Time indicates remaining time in the routine Current Action displays what the system is currently doing such as Wash head when the system is running the Sanitise profile To safely pause the routine click Pause After all the source plates have been replicated to the destination plates ...

Page 199: ...earraying process See Creating and Editing Sanitise Profiles on page 51 Creating and editing a rearraying process involves the following procedures Opening the Rearraying Window on page 199 Selecting Rearraying Routines on page 200 Selecting Barcode Options on page 200 Selecting the Source Plate Options on page 201 Selecting the Destination Plate Options on page 202 Selecting the Head and Stacker ...

Page 200: ...e a routine select the routine in the Select Routine list and then click Delete In the Delete Routine dialog click OK to permanently remove the routine from the database Selecting Barcode Options You can scan source and destination plates for barcodes Using a Barcode Reader Note You should always use barcodes for accurate data tracking To use a barcode reader 1 Select the Use Barcode Reader check ...

Page 201: ...e right click the source plate and then click Add Selected Barcode If you add a plate to the Selected Barcodes list that is not a source for this routine then select the plate and click Remove When all source plates are in the Selected Barcodes list click Import 3 Select a barcode or identifier in the Source Microplate list and then click Insert to open an image of the plate from which to define t...

Page 202: ...s not listed contact Molecular Devices to add a new plate type to the list See Obtaining Support on page 242 2 Select either to dip the pins a number of times or to stir the wells of the destination plate during inoculation To dip the pins a number of times click Multi Dip and in the Number of Dips field enter the number of times to dip the pins To stir the wells click Stir Destination 3 Select th...

Page 203: ...tom of the plate where the pins stop in the Source and Destination plate wells 4 Click Next to select a Sanitise profile Selecting the Sanitizing Options To select the sanitize options 1 In the Sanitise window from the Sanitise Profile list select the Sanitise profile to use for the rearraying routine If the available profiles are not suitable for the rearraying routine exit the rearraying process...

Page 204: ...en click OK to move the actuator into position near the front of the instrument 3 Open the front door 4 Install the picking head To remove an installed head unscrew and remove the thumbscrew and washer on the left that secures the head to the actuator assembly Then grab the handle on the right and slide the head out of the actuator Before storing the head or whenever it needs cleaning wipe the ext...

Page 205: ...e dialog or the Save Changes to Routine dialog select whether or not to save the routine before continuing with the rearraying process If you create a new routine the Continue or Save New Routine dialog displays To save the settings for the routine before continuing click Save Routine enter a Name and a short Description for the routine and then click Save To continue without saving the settings f...

Page 206: ...e number of wells that have been rearrayed Total Wells to Rearray shows the total number of wells to be rearrayed Estimated Time Remaining indicates remaining time in the routine Current Action displays what the system is currently doing such as Deposit when the system is depositing colonies into the destination plate To safely pause the routine click Pause After all the source plates have been re...

Page 207: ...ng and Editing Sanitise Profiles on page 51 Creating and editing a gridding process involves the following procedures Opening the Gridding Window on page 207 Selecting Gridding Routines on page 208 Selecting Barcode Options on page 208 Selecting the Head and Sanitizing Options on page 210 Setting Source and Destination Options on page 210 Selecting the Stacker Options on page 210 Creating Filter D...

Page 208: ...eleting a Routine To delete a routine select the routine in the Select Routine list and then click Delete In the Delete Routine dialog click OK to remove the routine from the database Selecting Barcode Options You can scan source and destination receptacles for barcodes or define unique identifiers for receptacles without scanning for barcodes Using a Barcode Reader Note You should always use barc...

Page 209: ... identifiers with the prefix Auto for the source receptacles select the Generate Random Barcodes check box No other parameters are required for this option To manually define identifiers for the source receptacles enter each identifier in the field below the Barcode list and then click Insert To import identifiers for the source receptacles from a text or csv file click Import and then select the ...

Page 210: ... list See Obtaining Support on page 242 2 Select either to dip the pins a number of times or to stir the wells of the source plate To dip the pins a number of times click Multi Dip and in the Number of Dips field enter the number of times to dip the pins To stir the wells click Stir Source 3 In the Inoculation Height mm field enter the distance in millimeters mm above the bottom of the plate where...

Page 211: ...ame number and color The field number also influences the sample deposit order Field 1 is visited before field 2 Six fields are available for QTray and Filter destination receptacles while only one field is available for an OmniTray destination receptacle Although the numbers and colors used in the patterns look similar there is no relation between the numbers and colors used in the Spot Pattern a...

Page 212: ...tion of the spot size in the Estimated Spot Size µm field enter a value in microns up to 1500 5 Under Structure field enter the number of Rows and Columns to stamp in the Spot Pattern for each pin 6 In the Row Pitch µm and Column Pitch µm fields enter values in microns to define the space between each spot in the Spot Pattern The values in the Row Pitch µm and Column Pitch µm fields change dependi...

Page 213: ...ield represents a different sample to be stamped in that field The field pattern must have a logical numerical sequence to it such as 1 2 3 4 5 6 or 1 2 2 3 3 4 If you create an illogical sequence such as 1 1 2 5 3 5 the No Sequence button displays in red For information about the error click No Sequence to display the Field Pattern Status message To skip a field select the number in the field and...

Page 214: ... stamped four times and re inked after two stamps the Immediate method stamps the first spot two times before returning to the source plate to collect more sample and then stamps the second spot two times before returning to the source plate to collect more sample and then stamps the third spot two more times 3 In the Stamp Time ms field enter the number of milliseconds to press the pins against t...

Page 215: ...he actuator into position near the front of the instrument 3 Open the front door 4 Install the picking head To remove an installed head unscrew and remove the thumbscrew and washer on the left that secures the head to the actuator assembly Then grab the handle on the right and slide the head out of the actuator Before storing the head or whenever it needs cleaning wipe the exterior of the head wit...

Page 216: ...k Next 5 In the Continue or Save New Routine dialog or the Save Changes to Routine dialog select whether or not to save the routine before you continue with the gridding process If you create a new routine the Continue or Save New Routine dialog displays To save the settings for the routine before continuing click Save Routine enter a Name and a short Description for the routine and then click Sav...

Page 217: ...he current destination spot replicate onto which the sample is being stamped Stamp shows the current stamp being gridded Estimated Time Remaining shows an estimate of the time remaining in the gridding process in hours minutes and seconds Current Action displays what the system is currently doing such as Washing when the system is running the Sanitise profile To safely pause the routine click Paus...

Page 218: ...QPix 450 or QPix 460 Colony Picking System User Guide 218 5031498 G ...

Page 219: ... Adding Annotations to Routines Receptacles and Locations on page 222 Exporting Data and Settings on page 223 Working With Plate Properties on page 223 Viewing Receptacle Location Maps on page 224 Working With Sample Trails on page 224 Note Some steps that are included in these procedures might not be available depending on the features included with the instrument and license Finding Data in the ...

Page 220: ... Tag and then from the Available Tags list select the tag you want and click Add to add the tag to the Search Tags list You can add as many tags as you need The items related to the selected tags display See Working With Tags on page 221 Click By User and then from the User list select the user name for the search to display a list of all the routines that were run on that date Click a routine in ...

Page 221: ...ations 1 Find and select the routine receptacle or location to which you want to add tags See Finding Data in the Database on page 219 2 From the list on the left click Add Tag 3 In the Select Tags to Add dialog click either Process Receptacle or Location to define the type of item to tag The available items depend on the level of detail you have selected in the Data Viewer window 4 From the list ...

Page 222: ...on to which you want to add an annotation See Finding Data in the Database on page 219 2 From the list on the left click Add Annotation 3 In the Add Annotations dialog enter the annotation 4 Click either Process Receptacle or Location to define the type of item to which to add the annotation The available items depend on the level of detail you have selected in the Data Viewer window 5 Click Add t...

Page 223: ... the list on the left click Add Property 3 In the Add Property dialog in the Property Name field enter a name for the property 4 In the Property Value field enter the value for the property 5 From the Property Type list select the type of value to be used for the property Click String if the value is text such as Positive Sample Click Int if the value is an integer such as 5 Click Double if the va...

Page 224: ...log Working With Sample Trails You can use a sample trail to display the details of how one or more wells were used in a plate for a routine Add wells to the Sample Trail list in the lower right corner of the Data Viewer window After you define a sample trail you can display or clear the sample trail from the list on the left To display the details of a defined sample trail for a plate from the li...

Page 225: ...9 2 From the Sample Trail list in the lower right area of the Data Viewer window click Add Remove 3 In the Edit Sample Trail dialog click the wells to include in the sample trail Unselected wells are yellow and selected wells are red To deselect a well click it again 4 Click OK to close the Edit Sample Trail dialog The selected wells display in the Sample Trail list in the lower right area of the ...

Page 226: ...QPix 450 or QPix 460 Colony Picking System User Guide 226 5031498 G ...

Page 227: ...e 243 CAUTION Maintenance procedures other than those specified in this guide must be performed by Molecular Devices When service is required contact Molecular Devices technical support Doing Preventive Maintenance You are responsible for doing daily and weekly maintenance Also Molecular Devices strongly recommends that a complete instrument maintenance be done every six 6 months by an approved se...

Page 228: ...ater solution Spor Klenz Ready To Use Cold Sterilant US EU Asia or ParaSafe EU The instrument can be left in a laboratory during formaldehyde vapor fumigation at a safe concentration However excessive formaldehyde treatment can damage sensitive electrical and optical components You can clean all components that come into close contact with biological materials The picking head and pins can be remo...

Page 229: ...recommends that you spray ethanol on a cloth for cleaning the instrument Autoclaving is not compatible with anodized parts Do not use the ethanol on acrylic parts Use water and then turn on the UV lamp Automated cleaning with a Sanitise profile does not replace sonicating the pins See Sonicating the Pins and Springs on page 230 Cleaning the Wash Baths and Bristle Insert The plastic ethanol wash ba...

Page 230: ...into its metal cover with the pins facing inward and then secure it in place with the thumbscrew and washer 3 Remove the 10 screws that secure the top plate to the head CAUTION Use care to not damage the screws because the screws are soft stainless steel The screws that secure the top plate can differ depending on the type of head and the date of manufacture Use the correct tool for removing the s...

Page 231: ...down in the instrument with the UV lamp on CAUTION Do not autoclave the anodized metal picking head You can soak the springs and screws in 100 ethanol and then let them thoroughly dry Replacing the Picking Pins and Springs in the Head Before reassembly make sure that all parts are thoroughly dry To reassemble the picking head 1 Insert each pin in its spring and then insert each pin assembly into a...

Page 232: ...move a plate from the source cassette to the end of the lane inside the instrument Observe that the plate leaves the source cassette travels along its lane free from obstruction and the receptacle lid is successfully removed at the ramp inside the instrument 5 Click Return Plate to move a plate from the end of the lane inside the instrument to the destination cassette Observe that the plate travel...

Page 233: ...ies window double click the Pin Fire Test icon 3 When the Pin Fire Test message displays make sure that the bed is clear of obstructions and that the door is closed and then click OK to move the actuator into position near the front of the instrument If you have not previously installed the head to test install it now See Changing the Head on page 30 4 In the Pin Fire Test window select the head t...

Page 234: ...ox The test continues until you click Stop or all the pins have been fired The image in the window indicates which pin is fired by clearing the dot from the circle for its position on the picking head To define the speed at which the pins fire during the test drag the slider located below the image CAUTION Wait for all pin firing to stop before opening the door Make sure the pins move smoothly If ...

Page 235: ...ouble click the Camera Alignment Process icon and wait for the Camera Alignment Process window to display 2 If you do not have a standard 96 pin picking head installed click Move to Load Position See Changing the Head on page 30 After you install the standard 96 pin picking head click Move to Park Position and then click Next 3 Select the type of source plate that you must place on the light table...

Page 236: ...b Image until the image is clearly visible 11 Click Fire Pin A1 and then click the blue arrows on the left to move the pin down until it creates a visible indent in the agar You can adjust the increment for each movement by editing the Move Size field under the positioning arrows 12 Click Retract Pin 13 Under Visit Position click Goto Camera 14 Under Lateral click the red and green arrows to move ...

Page 237: ...ce the fuses You can obtain replacement fuses from Molecular Devices Fuses must be replaced with the correct type and rating as specified in Technical Specifications on page 251 CAUTION Do not touch or loosen screws or parts other than those specifically designated in the instructions Doing so could cause misalignment and possibly void the warranty The fuses are located in the fuse carriers on the...

Page 238: ...rier 5 Gently place a new fuse into the carrier by hand 6 Slide the fuse carrier back into the instrument 7 Use the screwdriver to turn the carrier clockwise until it is snug but do not over tighten it 8 Plug the power cord into the power port 9 Turn on the power to the instrument Note If the instrument still does not power on after changing the fuse contact technical support Draining the Compress...

Page 239: ...be attached 2 Unscrew the fluid collection bottle cap and dispose of the fluid as required by your lab protocol 3 Screw the fluid collection bottle cap back on and return the bottle to the metal holder Moving the Instrument The instrument should not be moved after installation If relocation is necessary standard lifting gear is sufficient but must be used only with supervision by an approved engin...

Page 240: ... Databases ReceptacleVault Security Users 13 Confirm that the new user name is included in the list 14 Close the Microsoft SQL Server Management Studio window Running the Software as an Administrator The QPix 450 460 Colony Picking must be run by a user with administrator privileges If a user does not have administrator privileges then change the program compatibility settings to run the program a...

Page 241: ...tionString 6 Set the Connection String value so that the new computer name is included in the path statement Data Source COMPUTERNAME sqlexpress Initial Catalog ReceptacleVault Integrated Security True Where COMPUTERNAME is the current name of the computer 7 Click Close 8 Close the Edit Configuration dialog by clicking the X in the upper right corner 9 In the Navigation window click File Exit To t...

Page 242: ...mentation technical notes software upgrades safety data sheets and other resources If you still need assistance you can submit a request to Molecular Devices Technical Support Please have your instrument serial number or Work Order number and your software version number available when you call WARNING BIOHAZARD It is your responsibility to decontaminate components of the instrument before you ret...

Page 243: ...power and then turn it on again The computer does not start Make sure that the power switch on the computer is in the on position and that the main power switch is turned on at the wall Make sure that the fuses are in good condition See Replacing Fuses on page 237 One or more of the axes do not move Make sure that the main power switch is turned on at the wall the Emergency Stop button is pulled o...

Page 244: ...nd on the edge of the bioassay tray Check the agar volume setting bioassay tray positioning and tray holder positioning in the bed A Door Open warning displays Make sure that the door is closed and locked Low air warning If you are using a laboratory built in air system verify that the supplied air pressure is from 0 69 MPa to 0 83 MPa 100 psi to 120 psi and that the control valve is switched on I...

Page 245: ...lem contact Molecular Devices Technical Support See Obtaining Support on page 242 Recovering from a Stacker Failure Recovering from a stacker failure depends on the cause and requires some manual intervention Stacker failures can happen in different sections of the stacker lane and cause the red reset button at the end of the lane to light signifying a failure CAUTION The software does not display...

Page 246: ...ample The fluorescence can leach into the agar Reduce the exposure time Plating Problems and Possible Solutions Plating processes are available for the QPix 460 System only The pipette tips are not being picked up Check the air pressure Contact technical support See Obtaining Support on page 242 The pipette tips are not being released Check the air pressure Contact technical support See Obtaining ...

Page 247: ...ony Selection Software Kit Blue White Colony Selection Software Kit Includes software license and 2 filters X1101 S ME004541 Wash bath S ME004542 Wash brushes Note Replacements included with service contracts X4390 Picking springs 100 springs per pack T0130 QPix Pipette Tips 130µl 10 boxes Picking Heads X4006A Picking head for E coli phagemid 96 pin tip diameter 0 55 mm deep well X4006B Picking he...

Page 248: ...ds X4310A Re arraying and replicating head for E coli standard transfer 96 pin for 96 well and 384 well plates tip diameter 0 55 mm pin length 49 5 mm X4310B Re arraying and replicating head for Yeast standard transfer 96 pin for 96 and 384 well plates tip diameter 1 6 mm pin length 49 5 mm Picking Pins X4370 Picking pin for E coli phagemid tip diameter 0 55 mm X4371 Picking pin for phage plaque t...

Page 249: ...029 Vented QTray with cover and 48 Well Divider 242 mm x 240 mm x 20 mm X9150 Static Holder X9151 Non Skirted PCR Plate Deep Lane Adapter X9152 Standard Plate Deep Lane Adapter X9153 Skirted PCR DW Lane Adapter X9401 Adjustable Petri dish holder 1 hole diameter 140 mm X9402 Adjustable OmniTray holder 2 hole X9403 Adjustable Petri dish holder 4 hole diameter 100 mm X9404 Adjustable Petri dish holde...

Page 250: ...QPix 450 or QPix 460 Colony Picking System User Guide 250 5031498 G ...

Page 251: ...or disconnecting power from the instrument maintain a 66 cm 26 in minimum clearance area on the right side of the instrument Ambient operating temperature 15 C to 40 C 59 F to 104 F Ambient storage and transport temperature 25 C to 55 C 13 F to 131 F Humidity restrictions 20 to 80 non condensing Altitude restrictions Up to 2000 m 6562 ft Sound pressure level Maximum sound pressure at one meter 70 ...

Page 252: ...6 bar 90psi Minimum operating volume 80 L min Optional air compressor Compressor unit DynAir DA7001CS Clean oil free compressor with sub micron filtration Dimensions 440 mm width x 440 mm depth x 613 mm height Weight 38 kg 84 lb Power 0 75 KW 115V 60Hz Tank size 9 L Pump head number 2 Rated output free air Max 5 37CFM 152L Min Noise level 56 5 dBA Drain Manual buffer bottle Technical Specification...

Page 253: ...n centimeters and inches 1 3 2 1 3 2 Item Description 1 Height of instrument with stacker cassettes 120 cm 47 in 2 Height of instrument without stacker cassettes 75 cm 30 in 3 Width of instrument 226 cm 89 in Front View of the QPix 450 Colony Picking System or QPix 460 Colony Picking System with Dimensions C ...

Page 254: ... 1 3 2 Item Description 1 Height of instrument with stacker cassettes 120 cm 47 in 2 Height of instrument without stacker cassettes 75 cm 30 in 3 Depth of instrument 80 cm 31 in Side View of the QPix 450 Colony Picking System or QPix 460 Colony Picking System with Dimensions ...

Page 255: ... FCC Notice This equipment has been tested and found to comply with the limits for a Class A digital device pursuant to part 18 of the FCC Rules These limits are designed to provide reasonable protection against harmful interference when the equipment is operated in a commercial environment This equipment generates uses and can radiate radio frequency energy and if not installed and used in accord...

Page 256: ...QPix 450 or QPix 460 Colony Picking System User Guide 256 5031498 G ...

Page 257: ...lecular Devices LLC or their respective owners Specifications subject to change without notice Patents www moleculardevices com patents FOR RESEARCH USE ONLY NOT FOR USE IN DIAGNOSTIC PROCEDURES 2022 Molecular Devices LLC All rights reserved 5031498 G ...

Reviews: