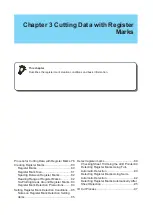
Chapter 3 Cutting Data with Register Marks
84
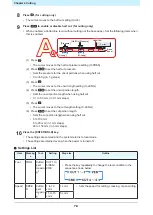
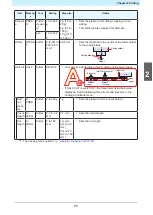
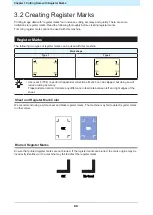
No-Plotting Areas Around Register Marks
Do not plot data around register marks. The mark origins may be identified incorrectly, or the machine may
fail to detect the register marks.
Mark shape
Type 1
Type 2
〃
〃
〃
〃
(A)
(B)
(B)
: No-Plotting areas
: Layout area
〃
〃
〃
〃
(A)
(B)
(B)
: No-Plotting areas
: Layout area
l
Mark Origin Mis-detection Example
• If register marks are plotted in the no-plotting area as shown in the figure below, the line may be
incorrectly identified as a register mark.
Mis-detection
Mark origin
: No-Plotting areas
: Layout area
Register Mark Detection Precautions
• To ensure the distance between register marks is the same as the cutting length, enter the distance
between printed register marks when they are detected.
In this case, the distance correction is disabled, and register mark spacing scale correction takes
precedence.
Subsequently altering the distance correction function value disables the register mark spacing scale
correction.
• The sheet tilt correction, register mark spacing scale correction, and origin position will be cleared if the
clamp lever is pushed to the rear and the sheet removed.
• The origin is set at TP1 (position at center of corner lines) when a register mark is detected.
• Using the jog keys to set the origin to another position enables that origin.
• Position the register marks to form a rectangle when the four points are linked.
Cutting offset may result if the marks are arranged unevenly.
• If the rotation function was set, this will be automatically disabled.
Summary of Contents for CG-100AR
Page 39: ...Chapter 1 Before Using This Machine 39 2 Shut down the computer connected to the machine 1 ...
Page 76: ...Chapter 2 Cutting 76 ...
Page 98: ...Chapter 3 Cutting Data with Register Marks 98 ...
Page 131: ...Chapter 4 Helpful Tips 131 4 Press the END key several times to exit 4 ...
Page 132: ...Chapter 4 Helpful Tips 132 ...
Page 133: ...Chapter 5 Settings This chapter Describes the individual settings FUNCTION 134 SET UP 135 ...
Page 150: ...Chapter 6 Maintenance 150 ...
Page 158: ...Chapter 7 Options 158 ...
Page 178: ...Chapter 9 Appendix 178 ...
Page 182: ...MEMO ...

