Chapter 8 Dealing with Problems
164
8
Check the following again.
•
"Checking Register Mark Sensor Responsiveness"(P. 162)
• If the buzzer does not sound four times, check the printed register mark conditions and contact
your local distributor, our sales office, or service center.
Aligning the Register Mark Sensor Position
The offset between the cutter and register mark sensor can be adjusted.
Load a sheet on which register marks are printed.
1
Attach a cutter to the cutter holder.
2
Load a sheet on which register marks are printed.
• Creating Register Marks
3
Press
on the local mode screen.
• The machine switches to jog mode.
4
Use
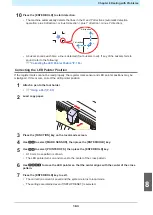
to move the pen nib close to the center of the register mark detection position.
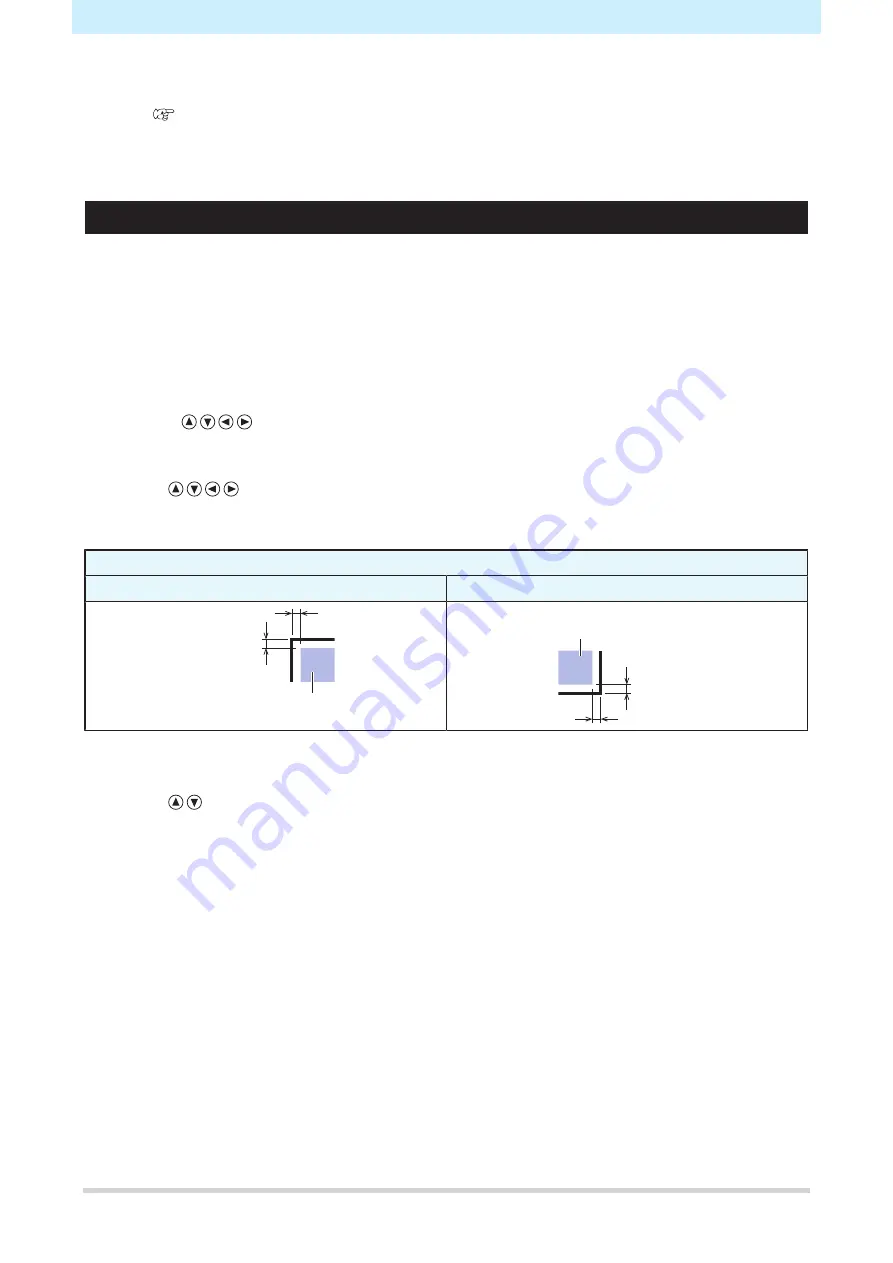
• Register mark detection should be performed at a position at least 1 mm from the register mark.
Mark shape
Type 1
Type 2
Register mark
detection position
1 mm or more
Register mark
detection position
1 mm or more
5
Press the [FUNCTION] key in local mode.
6
Use
to select [MARK SENSOR], then press the [ENTER/HOLD] key.
Summary of Contents for CG-100AR
Page 39: ...Chapter 1 Before Using This Machine 39 2 Shut down the computer connected to the machine 1 ...
Page 76: ...Chapter 2 Cutting 76 ...
Page 98: ...Chapter 3 Cutting Data with Register Marks 98 ...
Page 131: ...Chapter 4 Helpful Tips 131 4 Press the END key several times to exit 4 ...
Page 132: ...Chapter 4 Helpful Tips 132 ...
Page 133: ...Chapter 5 Settings This chapter Describes the individual settings FUNCTION 134 SET UP 135 ...
Page 150: ...Chapter 6 Maintenance 150 ...
Page 158: ...Chapter 7 Options 158 ...
Page 178: ...Chapter 9 Appendix 178 ...
Page 182: ...MEMO ...


