Chapter 3 Cutting Data with Register Marks
96
5
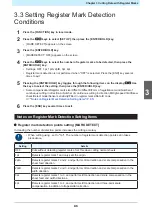
Use
to select the width to be scanned, then press the [ENTER/HOLD] key.
• Setting: 10 to 30 cm
6
Use
to select the search range, then press the [ENTER/HOLD] key.
• Setting: 10 to 50cm
7
Press the [END] key several times to exit.
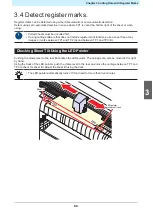
• If marks are not recognized as register marks or if no response is obtained even after scanning
the set search range, the "SEARCH FAILED" message appears for a preset length of time.
The machine then returns to the origin position and switches to normal semi-automatic register
mark detection mode.
Summary of Contents for CG-100AR
Page 39: ...Chapter 1 Before Using This Machine 39 2 Shut down the computer connected to the machine 1 ...
Page 76: ...Chapter 2 Cutting 76 ...
Page 98: ...Chapter 3 Cutting Data with Register Marks 98 ...
Page 131: ...Chapter 4 Helpful Tips 131 4 Press the END key several times to exit 4 ...
Page 132: ...Chapter 4 Helpful Tips 132 ...
Page 133: ...Chapter 5 Settings This chapter Describes the individual settings FUNCTION 134 SET UP 135 ...
Page 150: ...Chapter 6 Maintenance 150 ...
Page 158: ...Chapter 7 Options 158 ...
Page 178: ...Chapter 9 Appendix 178 ...
Page 182: ...MEMO ...


