


16
Figure 2-6 Slide out of Main Menu
Tap the options in the main menu to enter the corresponding submenu.
The opening methods of channel menu and math menu are slightly different from that of the main menu. Tap the
channel icon and math icon to open the corresponding menu.
Three-finger slide:
to quickly turn on/off Zoom. Refer to “
3.5 Zoom Mode
” for details.
Four-fingers slide
: for quick screen capture. Refer to “
7.1 Screen Capture Function
” for details.
Single-finger drag:
For coarse adjustments of vertical position, trigger point, trigger level, cursor, etc. of the
waveform. Refer to “
3.1 Horizontal Move Waveform
” and “
4.3 Adjust Vertical Position
” for details.
2.8 Mouse Operation
Connect the mouse to the “USB Host” interface, then operate the oscilloscope with the mouse. The menu will pop
up with the right mouse button. The left mouse button has the same function as the finger touch, and the horizontal
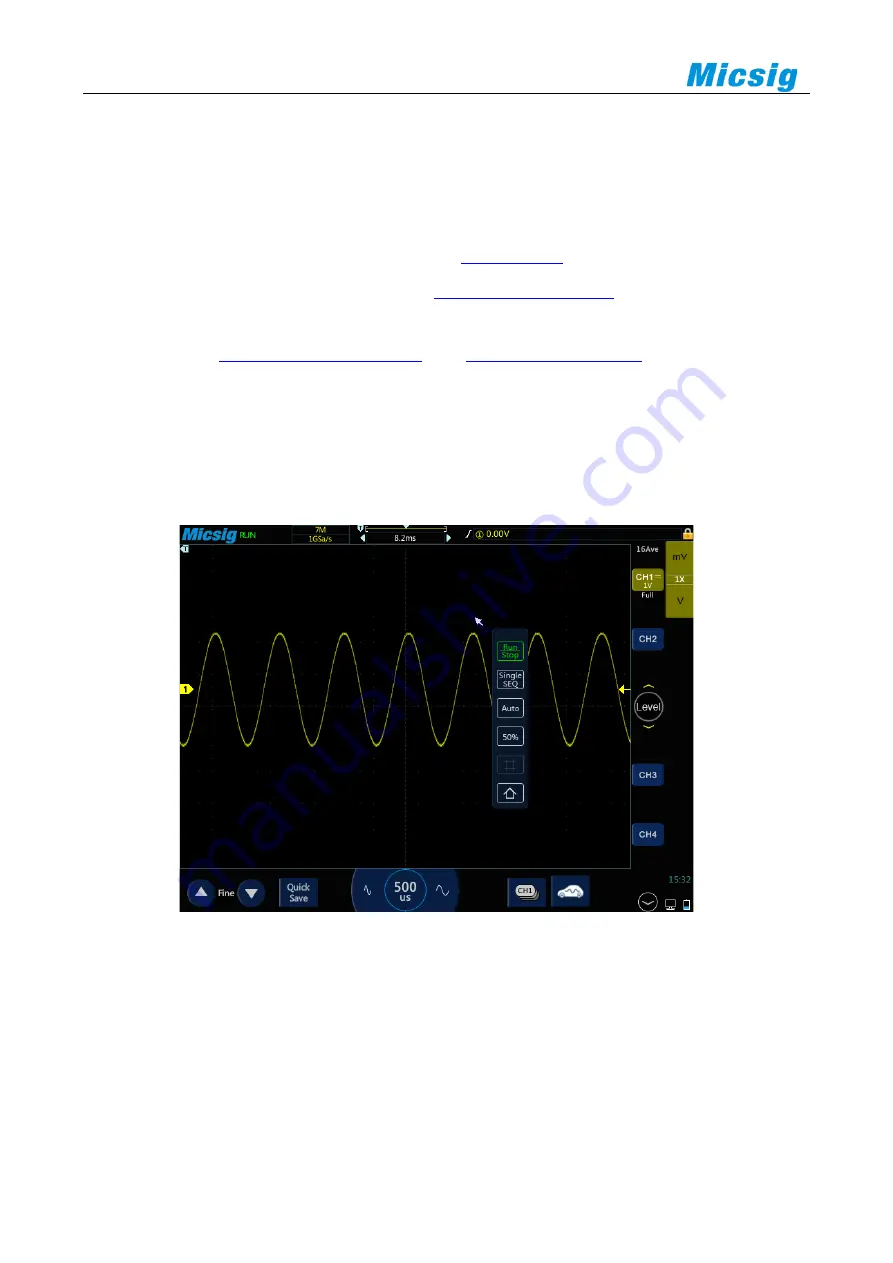
time base can be adjusted by rolling the mouse wheel. The right mouse button menu is shown in Figure 2-7.
Figure 2-7 Mouse Cursor
Note: The touch operation cannot be used normally after the mouse is connected (unless it is unlocked, see 12.9 Shut
down, lock screen and unlock for details)
2.9 Connect Probe to the Oscilloscope
1)
Connect the probe to the oscilloscope channel BNC connector.
2)
Connect the retractable tip on the probe to the circuit point or measured equipment. Be sure to connect the
probe ground wire to the ground point of the circuit.
Summary of Contents for ATO1000 Series
Page 1: ......
Page 2: ...Version Info Version Date Remarks V1 0 2020 06 ...
Page 52: ...Chapter 3 Automotive Test 49 Figure 3 30 Electronic fuel pump test ...
Page 71: ...68 Figure 3 49 K line test ...
Page 79: ...76 Figure 3 57 Mazda 6 Cylinder internal pressure measurement ...


