83
Instruments and Programming
4
2.1.4 Implement Width
Press the UP button to go to the next menu section, that is used to set the implement width. This value is used to along
with the distance travelled to calculate the Area Worked. When the cluster is brand new the default value should be 0 =
0,0 centimetres. The width can be set in Feet or Centimetres.
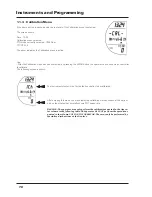
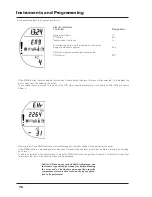
This first screen will show the current setting and units, 30.0 Feet in the example. A graphic is shown at the bottom of
the screen to symbolise implement width.
To change the implement width:
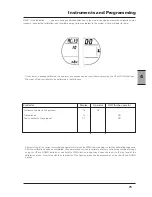
1- Press the MENU button
2- The actual implement width will flash (e.g. 30.0).
3- press UP or DOWN to scroll metric units in divisions of 10 between 0000 and 9990. The range of imperial units will be
0 to 199.5 in divisions of 0.5.
If the MENU button is pressed now, you can directly set the unit of measurement as here described.
4- To save this new setting press and hold the MENU button for longer than 2 seconds (the numbers will stop flashing)
and press the UP and DOWN buttons to access other parts of the Accessory menu.
If the units need to be changed:
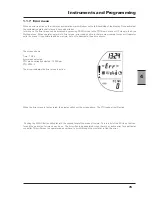
1- Press the MENU button
2- The actual implement width will flash.
3- Press the MENU button again and the units will flash.
4- Press UP or DOWN to switch between metric and imperial.
F= Feet C= Centimetres
If the MENU button is pressed now, you can directly set the width as here described.
4- To save this new setting press and hold the MENU button for longer than 2 seconds (the letter will stop flashing) and
press the UP and DOWN buttons to access other parts of the Accessory menu.
Note: Press MENU again after stage 3 to return to width adjustment.
- If the key is turned to the off position before the new value is set the old value is used.
Summary of Contents for X60 Series
Page 39: ...39 Controls Cab 3 Section 3 Controls Cab...
Page 61: ...61 Instruments and Programming 4 Section 4 Instruments and Programming...
Page 90: ...90 Instruments and Programming This page has been left blank intentionally...
Page 91: ...91 Operation 5 Section 5 Operation...
Page 151: ...149 Tyres Wheels Ballasting 6 Section 6 Tyres Wheels Ballasting...
Page 168: ...166 Tyres Wheels Ballasting This page has been left blank intentionally...
Page 169: ...167 Maintenance 7 Section 7 Maintenance...
Page 229: ...Electrical system 227 8 Section 8 Electrical system...
Page 242: ...Electrical system 240 Page left intentionally blankf...
Page 256: ...Technical specifications 254 This page has been left blank intentionally...
Page 262: ...260 Alphabetical index...


