


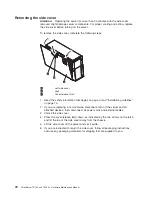


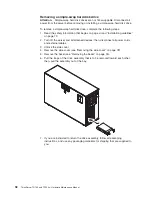


Removing an adapter
To remove an adapter, complete the following steps.
1. Read the safety information that begins on page vii and “Installation guidelines”
on page 73.
2. Turn off the server and all attached devices; then, disconnect all power cords
and external cables.
3. Unlock and remove the side cover (see “Removing the side cover” on page 78).
4. Disconnect any cables to the adapter or any cables that impede access to the
adapter.
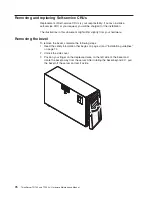
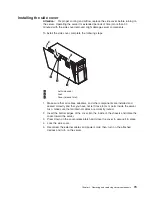
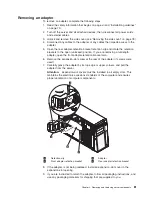
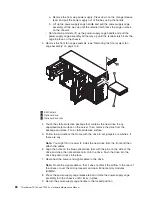
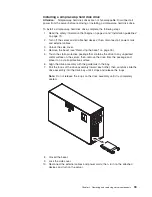
5. Open the rear adapter-retention bracket retention clip and rotate the retention
brackets to the open (unlocked) position. If you are removing a full-length
adapter, open the front adapter-retention bracket also.
6. Remove the expansion-slot screw at the rear of the adapter (if screws were
used).
7. Carefully grasp the adapter by its top edge or upper corners, and pull the
adapter from the server.
Attention:
Expansion-slot covers must be installed in all empty slots. This
maintains the electronic emissions standards of the computer and ensures
proper ventilation of computer components.
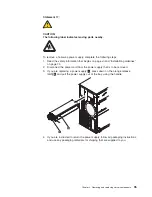
1
Retention clip
3
Adapter
2
Front adapter retention bracket
4
Rear adapter retention bracket
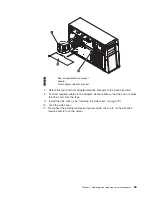
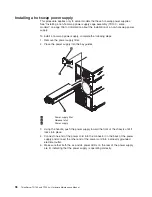
8. If the adapter is not being replaced, install an expansion-slot cover in the
expansion-slot opening.
9. If you are instructed to return the adapter, follow all packaging instructions, and
use any packaging materials for shipping that are supplied to you.
Chapter 4. Removing and replacing server components
81
Summary of Contents for ThinkServer TD100
Page 2: ......
Page 18: ...xvi ThinkServer TD100 and TD100x Hardware Maintenance Manual ...
Page 42: ...24 ThinkServer TD100 and TD100x Hardware Maintenance Manual ...
Page 238: ...220 ThinkServer TD100 and TD100x Hardware Maintenance Manual ...
Page 253: ......
Page 254: ...Part Number 46U0860 Printed in USA 1P P N 46U0860 ...