


v
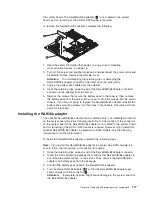
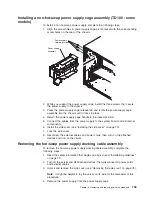
Non-hot-swap models, lift up the power-supply cage handle and pull the
power-supply cage assembly all the way up until the retainer latch locks the
cage in place on the chassis.
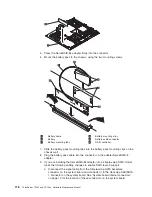
5. Remove the front fan-cage assembly (see “Removing the front system fan
cage assembly” on page 108.
6. Remove the simple-swap hard disk drives that are installed in the hard disk
drive cage (see “Removing a simple-swap hard disk drive” on page 92).
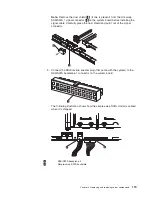
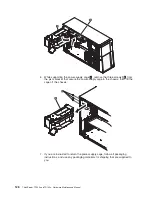
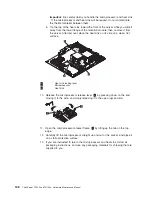
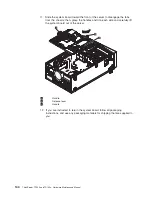
7. Disconnect the combination signal/power cable from the simple-swap
backplate.
8. Lift up on the spring-release latch on the side of the drive cage and rotate the
simple-swap backplate away from the drive cage until the backplate tabs at the
bottom of the drive cage disengage from the chassis.
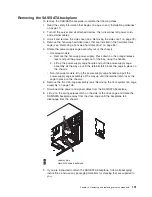
1
Locator pins
2
Spring-release latches
3
Hard disk drive backplate
9. Remove the simple-swap backplate and set it aside.
10. If you are instructed to return the simple-swap backplate, follow all packaging
instructions, and use any packaging materials for shipping that are supplied to
you.
Chapter 4. Removing and replacing server components
129
Summary of Contents for ThinkServer TD100
Page 2: ......
Page 18: ...xvi ThinkServer TD100 and TD100x Hardware Maintenance Manual ...
Page 42: ...24 ThinkServer TD100 and TD100x Hardware Maintenance Manual ...
Page 238: ...220 ThinkServer TD100 and TD100x Hardware Maintenance Manual ...
Page 253: ......
Page 254: ...Part Number 46U0860 Printed in USA 1P P N 46U0860 ...