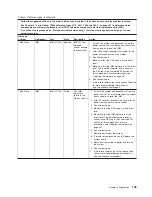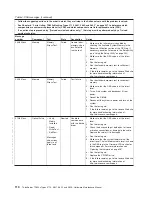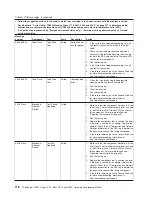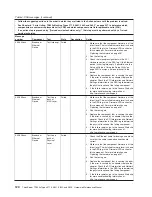
Table 4. DSA messages (continued)
v
Follow the suggested actions in the order in which they are listed in the Action column until the problem is solved.
v
See Chapter 8, “Parts Listing, TD200x Machine Types 3719, 3821, 3822, and 3823,” on page 237 to determine which
components are customer replaceable units (CRU) and which components are field replaceable units (FRU).
v
If an action step is preceded by “(Trained service technician only),” that step must be performed only by a Trained
service technician.
Message
number
Component
Test
State
Description
Action
215-902-xxx
Optical Drive
v
Verify
Media
Installed
v
Read/
Write Test
v
Self-Test
Messages
and actions
apply to all
three tests.
Failed
Read
miscompare.
1. Insert a CD/DVD into the drive or try a new
media, and wait for 15 seconds.
2. Run the test again.
3. Check the drive cabling at both ends for loose
or broken connections or damage to the cable.
Replace the cable if it is damaged.
4. Run the test again.
5. Replace the CD/DVD drive.
6. If the failure remains, go to the Lenovo Web site
for more troubleshooting information at
http://www.lenovo.com/support.
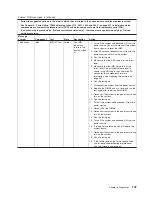
215-903-xxx
Optical Drive
v
Verify
Media
Installed
v
Read/
Write Test
v
Self-Test
Messages
and actions
apply to all
three tests.
Aborted
Could not
access the
drive.
1. Insert a CD/DVD into the drive or try a new
media, and wait for 15 seconds.
2. Run the test again.
3. Check the drive cabling at both ends for loose
or broken connections or damage to the cable.
Replace the cable if it is damaged.
4. Run the test again.
5. Make sure that the DSA code is at the latest
level.
6. Run the test again.
7. Replace the CD/DVD drive.
8. If the failure remains, go to the Lenovo Web site
for more troubleshooting information at
http://www.lenovo.com/support.
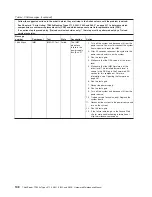
215-904-xxx
Optical Drive
v
Verify
Media
Installed
v
Read/
Write Test
Messages
and actions
apply to both
tests.
Failed
A read error
occurred.
1. Insert a CD/DVD into the drive or try a new
media, and wait for 15 seconds.
2. Run the test again.
3. Check the drive cabling at both ends for loose
or broken connections or damage to the cable.
Replace the cable if it is damaged.
4. Run the test again.
5. Replace the CD/DVD drive.
6. If the failure remains, go to the Lenovo Web site
for more troubleshooting information at
http://www.lenovo.com/support.
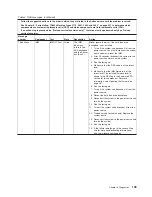
217–800–000
SAS/SATA
Hard Drive
Disk Drive
Test
Aborted
Test aborted.
Run the test again.
116
ThinkServer TD200x Types 3719, 3821, 3822, and 3823: Hardware Maintenance Manual
Summary of Contents for THINKSERVER 3719
Page 1: ...ThinkServer TD200x Machine Types 3719 3821 3822 and 3823 Hardware Maintenance Manual ...
Page 2: ......
Page 3: ...ThinkServer TD200x Types 3719 3821 3822 and 3823 Hardware Maintenance Manual ...
Page 12: ...4 ThinkServer TD200x Types 3719 3821 3822 and 3823 Hardware Maintenance Manual ...
Page 22: ...14 ThinkServer TD200x Types 3719 3821 3822 and 3823 Hardware Maintenance Manual ...
Page 28: ...20 ThinkServer TD200x Types 3719 3821 3822 and 3823 Hardware Maintenance Manual ...
Page 34: ...26 ThinkServer TD200x Types 3719 3821 3822 and 3823 Hardware Maintenance Manual ...
Page 244: ...236 ThinkServer TD200x Types 3719 3821 3822 and 3823 Hardware Maintenance Manual ...
Page 258: ...250 ThinkServer TD200x Types 3719 3821 3822 and 3823 Hardware Maintenance Manual ...
Page 282: ...274 ThinkServer TD200x Types 3719 3821 3822 and 3823 Hardware Maintenance Manual ...
Page 286: ...278 ThinkServer TD200x Types 3719 3821 3822 and 3823 Hardware Maintenance Manual ...
Page 296: ...288 ThinkServer TD200x Types 3719 3821 3822 and 3823 Hardware Maintenance Manual ...
Page 303: ......
Page 304: ...Part Number XXXXXX Printed in USA 1P P N XXXXXX ...


