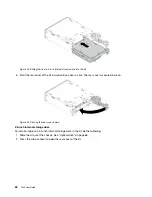

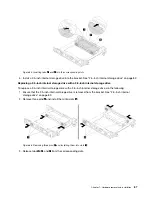

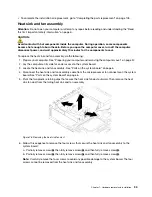


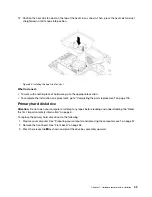
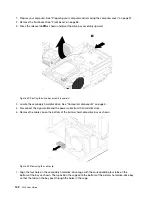


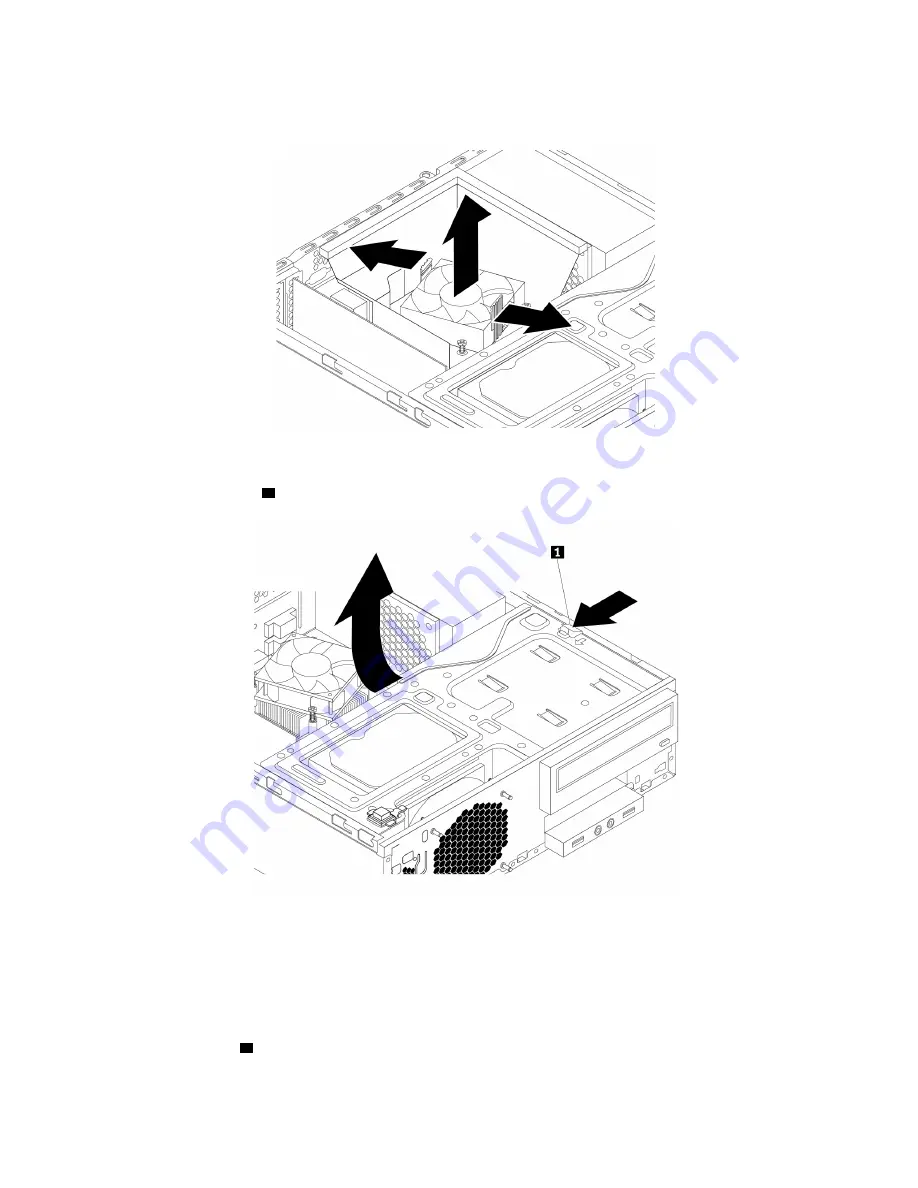
3. Gently pivot the two plastic retaining clips that secure the heat sink fan duct outward, and then lift the
heat sink fan duct out of the chassis.
Figure 79. Removing the heat sink fan duct
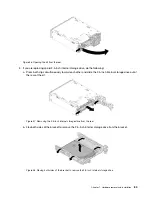
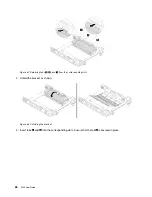
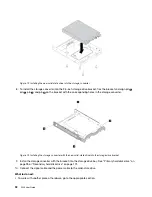
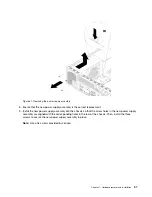
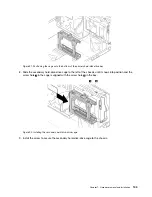
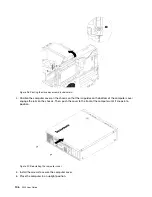
4. Press the release tab
1
as shown and pivot the drive bay assembly upward.
Figure 80. Pivoting the drive bay assembly upward
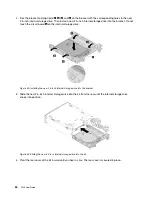
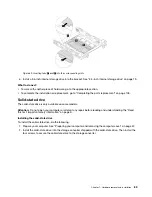
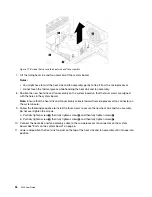
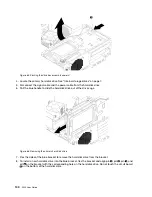
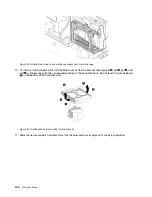
5. Record the cable routing and cable connections. Then, disconnect the power supply assembly cables
from all drives and from the system board. See “Parts on the system board” on page 6.
6. Release the power supply assembly cables from any cable clips or ties.
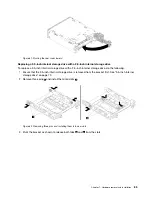
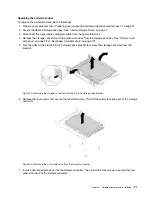
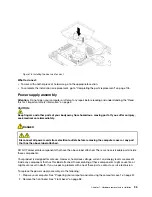
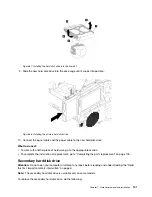
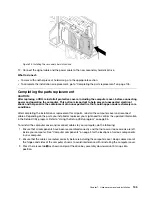
7. At the rear of the computer, remove the three screws that secure the power supply assembly. Press the
power supply clip
1
downward to release the power supply assembly and then slide the power supply
assembly to the front of the computer. Lift the power supply assembly out of the computer.
96
P320 User Guide
Summary of Contents for 30BG
Page 1: ...P320 User Guide Machine Types 30BJ 30BK and 30BS ...
Page 12: ...x P320 User Guide ...
Page 28: ...16 P320 User Guide ...
Page 40: ...28 P320 User Guide ...
Page 46: ...34 P320 User Guide ...
Page 56: ...44 P320 User Guide ...
Page 120: ...108 P320 User Guide ...
Page 124: ...112 P320 User Guide ...
Page 126: ...114 P320 User Guide ...
Page 128: ...116 P320 User Guide ...
Page 136: ...124 P320 User Guide ...
Page 140: ...4 Follow the instructions on the screen 128 P320 User Guide ...
Page 142: ...130 P320 User Guide ...
Page 144: ...132 P320 User Guide ...
Page 145: ......
Page 146: ......