


82
Backing Sequence operating mode
Transport controls
12. BACKING SEQUENCE OPERATING MODE
The
Backing
Sequence
mode
lets
you
record
a
live
per
‐
formance
with
the
Styles.
The
front
panel
controls
work
mostly
as
in
Style
Play
mode,
but
here
you
are
recording
what
you
are
playing.
After
recording,
the
result
is
a
new
Song
made
of
the
Realtime
tracks
and
the
Style
tracks.
TRANSPORT CONTROLS
When
in
Backing
Sequence
mode,
use
SEQ1
transport
controls
(PLAY/STOP,
PAUSE…).
See
for
more
information).
THE BACKING SEQUENCE, SONG AND
SONG PLAY MODES
The
Backing
Sequence
and
Song
modes
are
linked
together:
go
to
Backing
Sequence
mode
to
record
a
Song,
and
switch
to
Song
mode
to
edit
it.
Since
they
use
the
same
sequencer
and
memory
area,
recording
a
new
Song
in
Backing
Sequence
mode
deletes
the
Song
loaded
in
Song
mode.
Note:
The
Song
is
kept
in
RAM,
so
save
it
before
turning
the
instrument
off,
or
it
will
be
lost.
Warning:
When
switching
to
Song
Play,
the
Song
is
deleted,
since
Backing
Sequence,
Song
and
Song
Play
share
the
same
sequencer
(Sequencer
1).
The
“Erase
Song?”
message
appears.
Press
ENTER
to
confirm,
EXIT
to
stay
in
Backing
Sequence
mode,
and
avoid
deleting
the
Song.
HOW TO PLAYBACK A SONG
You
can
load
a
Standard
MIDI
File,
and
play
it
back
while
in
Backing
Sequence
mode.
Note:
When
in
the
Main
page
(Backing
Sequence
Play)
the
keyboard
doesn’t
play.
1.
Enter
the
Backing
Sequence
mode.
The
Backing
Sequence
Playback
page
appears
(see
83).
2.
Press
one
of
the
B
(Load
Song)
VOLUME/VALUE
buttons
to
load
a
Song
(see
You
can
load
any
Standard
Midi
File
(files
with
the
“.MID”
or
“.KAR”
extension).
3.
Press
PLAY/STOP
to
start
the
playback.
4.
Press
PLAY/STOP
again
to
stop
the
playback.
The
playback
is
automatically
stopped
at
the
end
of
the
Song.
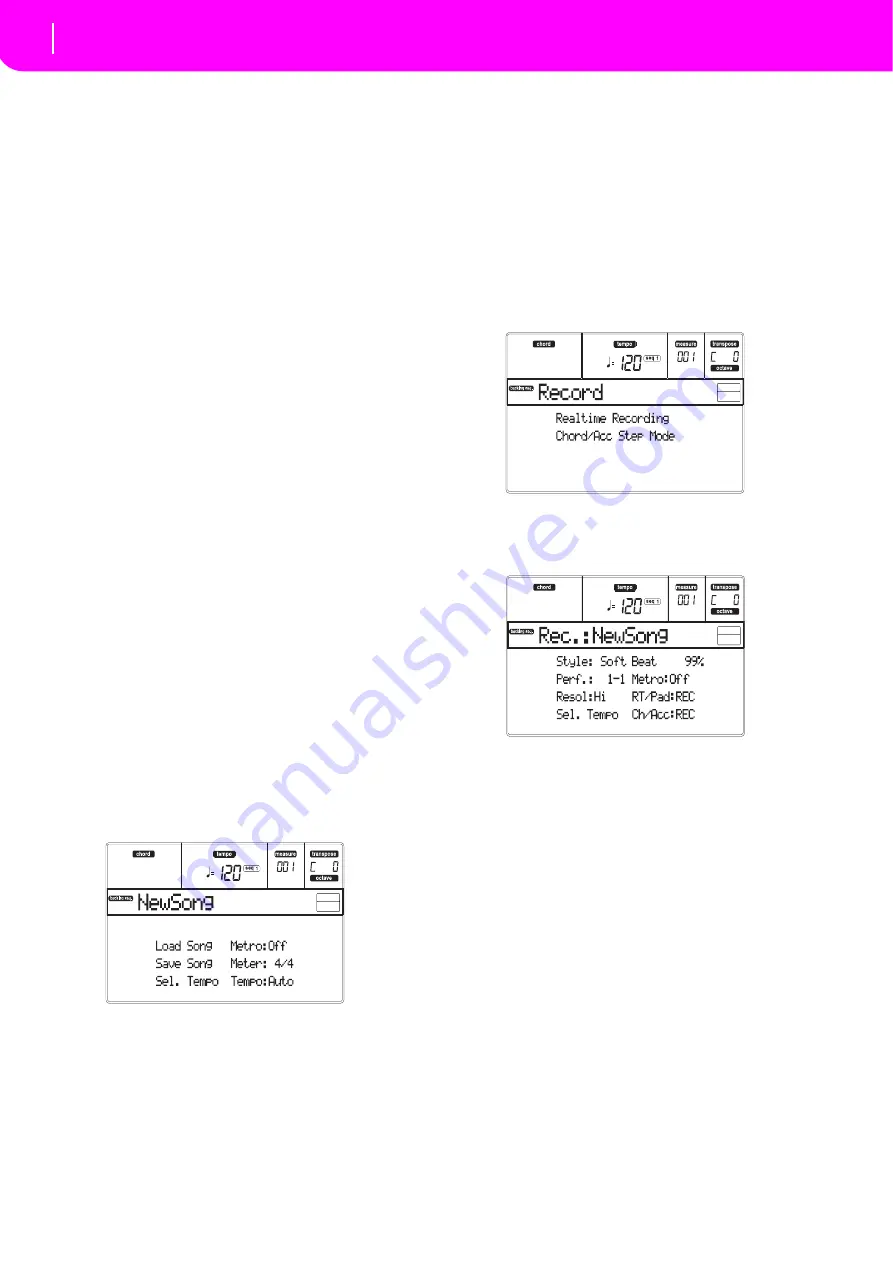
REALTIME RECORDING MODE
While
in
Backing
Sequence
mode,
you
can
record
a
new
Song
in
realtime
mode
(i.e.,
recording
exactly
what
you
play).
Realtime
(Keyboard)
tracks
will
be
Song
tracks
1–4,
Pads
will
be
Song
tracks
5–8,
while
Style
tracks
will
be
Song
tracks
9–16.
1.
Enter
the
Backing
Sequence
mode.
2.
Press
RECORD.
You
will
be
prompted
to
select
the
Realtime
Recording
mode,
or
the
Chord/Acc
Step
Mode.
3.
Press
one
of
the
A
VOLUME/VALUE
buttons
to
select
the
Realtime
Recording
mode.
The
Realtime
Recording
page
appears
(see
4.
The
last
selected
Style
is
currently
selected.
Should
it
not
be
the
right
one,
select
a
different
Style
to
start
recording
with.
(See
26).
5.
The
last
selected
Performance
or
STS
is
currently
selected.
If
you
prefer,
select
a
different
Perfor
‐
mance
or
STS.
(See
and
6.
Select
the
status
of
the
Backing
Sequence
tracks,
using
the
G
(RT)
and
H
(Ch/Acc)
button
pairs.
(RT
stays
for
Realtime/Keyboard;
Ch/Acc
stays
for
Chord/Accompaniment,
i.e.
the
Style
tracks).
To
record
all
you
play
on
the
keyboard,
plus
the
auto
‐
matic
accompaniment,
leave
their
status
to
REC
(see
85).
Warning:
Tracks
set
to
REC
are
automatically
deleted
when
starting
recording.
Set
a
track
to
the
PLAY
sta
‐
tus,
when
you
don’t
want
to
delete
it.
For
example,
if
you
are
recording
a
Realtime
(Keyboard)
part
on
and
existing
Style
track,
set
the
Ch/Acc
parameter
to
PLAY,
and
the
RT
track
to
REC.
7.
Start
recording
by
pressing
the
left
PLAY/STOP
button
(or
the
START/STOP
button).
After
a
count
‐
in
(see
you
can
start
recording.
Summary of Contents for microARRANGER
Page 1: ...Owner s Manual E 1...
Page 9: ...INTRODUCTION...
Page 25: ...BASIC GUIDE...
Page 41: ...REFERENCE GUIDE...
Page 145: ...APPENDIX...
Page 244: ...2011 KORG INC 4015 2 Yanokuchi Inagi city Tokyo 206 0812 Japan...


