Factory Reset
Factory Reset returns the px6-300d to its original state. This feature is useful if you give your px6-300d to
someone else.
Factory Reset provides two options for returning your px6-300d to its original state:
●
Quickly delete all data — permanently deletes all record of existing or deleted data, users, and
passwords.
●
Securely delete all data — this option takes significantly longer, but provides an added security
benefit by overwriting all drives with random data in addition to permanently erasing all data on the
drives to prevent recovery of existing or deleted data, users, and passwords. The secure delete
operation renders all data irrecoverable.
You can use the factory reset feature only to erase the drives internal to the px6-300d. You cannot
use this feature to reset any external storage devices that may be connected.
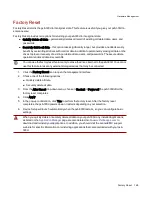
1. Click the Factory Reset icon to open the management interface.
2. Choose one of the following options:
●
Quickly delete all data
●
Securely delete all data
3. From the After Reset drop-down menu, choose to Restart or Power off the px6-300d after the
factory reset completes.
4. Click Apply.
5. In the pop-up confirmation, click Yes to perform the factory reset. After the factory reset
completes, the px6-300d powers down or restarts depending on your selection.
6. Device Setup will launch automatically when the px6-300d restarts, so you can configure basic
settings.
When you quickly delete or securely delete all data on your px6-300d, any installed applications,
as listed on the
Application Manager
page, are also deleted. Go to
www.lifelineapps.com
to
download and reinstall your applications. In addition, you should visit the LenovoEMC support
web site for specific information on reinstalling applications that came preloaded with your px6-
300d.
Hardware Management
Factory Reset
148
Summary of Contents for StorCenter px6-300d
Page 1: ...px6 300d Network Storage with LifeLine 4 1 User Guide ...
Page 11: ...Setting up Your px6 300d Network Storage Setting up Your px6 300d Network Storage 1 CHAPTER 1 ...
Page 24: ...Setting up Your px6 300d Network Storage 14 Device Setup ...
Page 25: ...Device Configuration Options Device Configuration Options 15 CHAPTER 2 ...
Page 45: ...Users and Groups Users and Groups 35 CHAPTER 4 ...
Page 53: ...Using Active Directory Domain Using Active Directory Domain 43 CHAPTER 5 ...
Page 59: ...Sharing Files Sharing Files 49 CHAPTER 6 ...
Page 80: ...Drive Management Drive Management 70 CHAPTER 7 ...
Page 85: ...Storage Pool Management Storage Pool Management 75 CHAPTER 8 ...
Page 102: ...Backing up and Restoring Your Content Backing up and Restoring Your Content 92 CHAPTER 10 ...
Page 131: ...Sharing Content Using Social Media Sharing Content Using Social Media 121 CHAPTER 13 ...
Page 137: ...Media Management Media Management 127 CHAPTER 14 ...
Page 156: ...Hardware Management Hardware Management 146 CHAPTER 17 ...
Page 163: ...Additional Support Additional Support 153 CHAPTER 18 ...
Page 166: ...Legal Legal 156 CHAPTER 19 ...


