


Note:
All scheduled times are based on the 24-hour clock. Ensure that the correct
time zone and daylight saving time settings have been configured in
Configuration
>
System
>
System Settings
.
8. Click
to copy the schedule to other days by selecting the corresponding check
box next to the day.
9. Click
Save
to save changes.
10. Click the
Actions
tab to specify the linkage method for when an event occurs.
Select one or more response methods for the system when an alarm is triggered.
See “Linkage methods” on page 37 for details.
11. Click
Save
to save changes.
Schedule settings
Recording schedule
Use the Record Schedule window to define a recording schedule for the camera. The
recording is saved to the SD card or the NAS in the camera. The camera’s SD card
provides a backup in case of network failure.
The selected recording schedule applies to all alarm types.
To set up a recording schedule:
1. From the menu toolbar, click
Configuration
>
Storage
>
Schedule Settings
>
Record Schedule
.
2. Select the
Enable
check box to enable recording.
Note:
To disable recording, deselect the option.
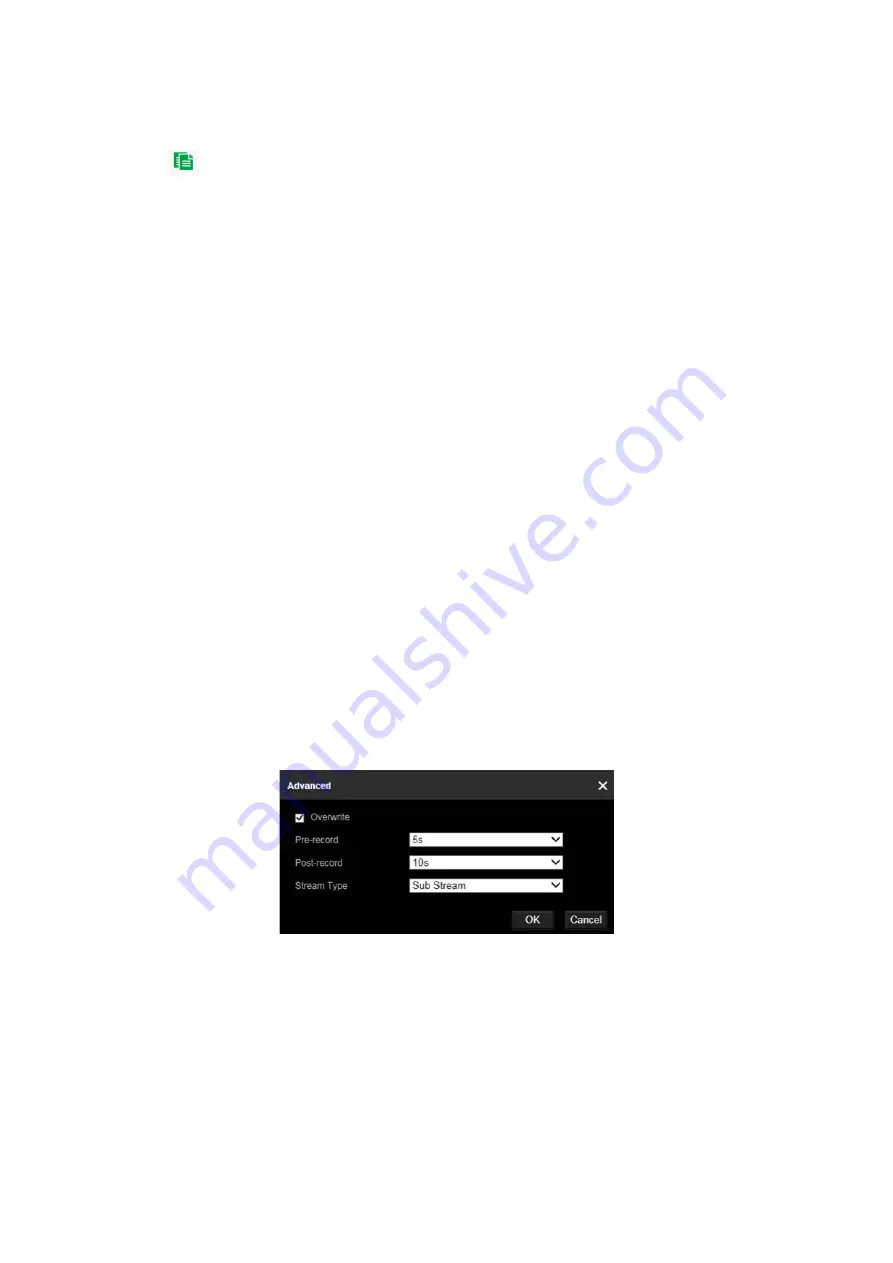
3. Click
Advanced
to set the camera record parameters. Select
Overwrite
to
overwrite the recording. Configure
Pre-record
,
Post-record
, and
Stream Type
.
Pre-record time
The pre-record time is set to start recording before the scheduled time or event. For
example, if an alarm triggers recording at 10:00, and the pre-record time is set as 5
seconds, the camera starts to record at 9:59:55. The pre-record time can be
configured as
No Pre-record
,
5s
,
10s
,
15s
,
20s
,
25s
,
30s
, or
Not Limited
.
50
TruVision Stainless Steel PTZ Camera Configuration Manual


