background image


Labfors 5 – Version for Microorganisms 


General Information 


Page 

10

 of 

205


22 January 2019 


WARNING 

The signal word “WARNING” indicates a potentially dangerous 

situation that may result in severe or even fatal injuries if not 

avoided. 


CAUTION 

The signal word “CAUTION” indicates a potentially dangerous 

situation that may result in minor injuries if not avoided.


1.2.2  Other Notices 


ATTENTION 

The word “ATTENTION” on a blue bar indicates a situation that 

may result in significant damage to property if not avoided.


INFORMATION 

Texts located below a grey bar bearing the notice “INFOR-

MATION” provide useful tips and recommendations for ensuring 

efficient, fault-free operation of the equipment.


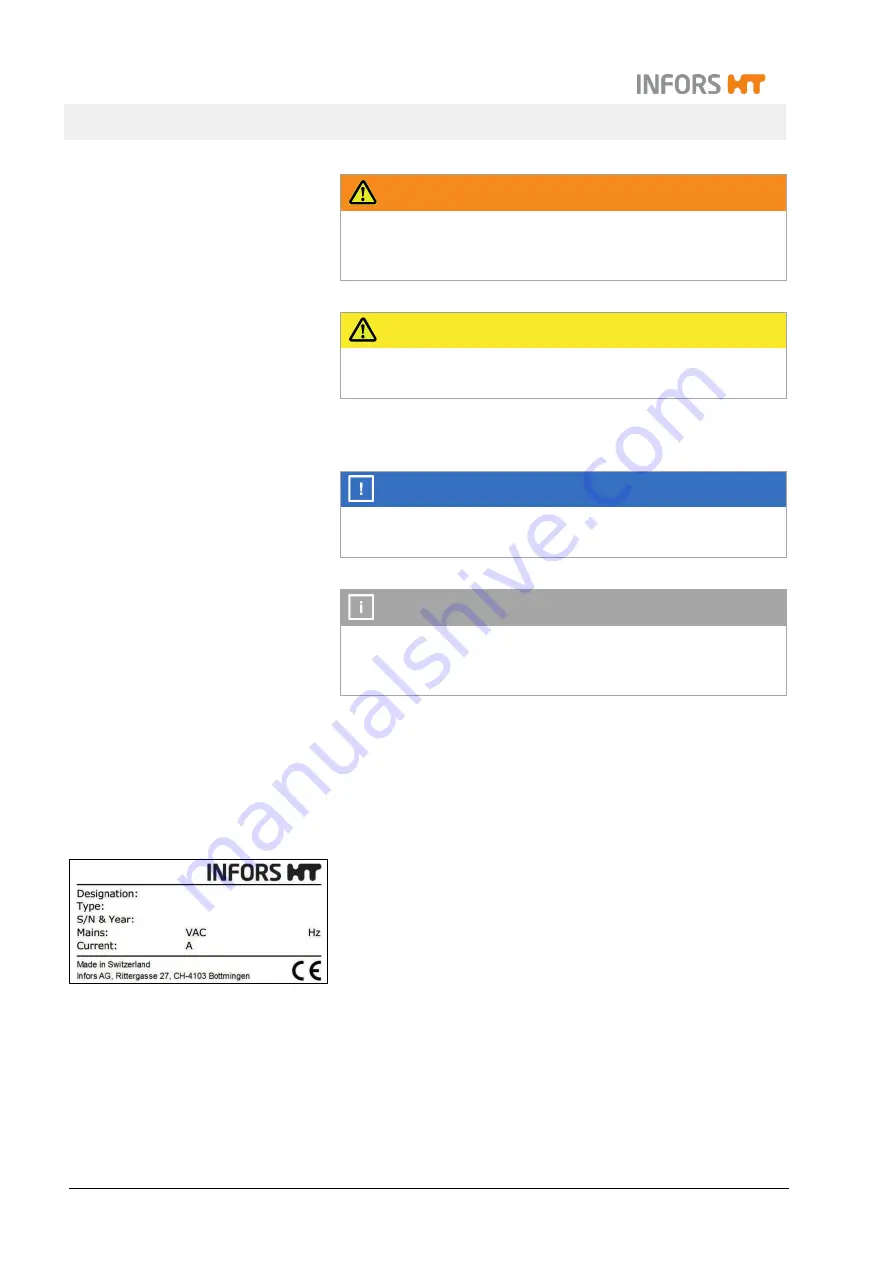
1.3  Equipment Identification (Standard Identification Plate) 

The identification plate is designed to allow clear identification of 

the equipment. It contains the following information: 


Manufacturer name 


Designation 

Category of equipment 


Type 

Equipment type (name) 

  S/N 

Serial number 

  Year 

Year of manufacture 

  Mains 

Nominal voltage and frequency 

  Current 

Current consumption 

  Manufacturer address 


CE marking 


Summary of Contents for Labfors 5

Page 1: ...Operating Manual 2019 01 22 Labfors 5 Bench Top Bioreactor Version for Microorganisms Dok ID 76561 V 02 00 Original ...

Page 2: ...USA Inc 9070 Junction Drive Suite D Annapolis Junction MD20701 T 1 301 362 3710 T 1 855 520 7277 toll free USA F 1 301 362 3570 infors usa infors ht com www infors ht us Infors Canada 8350 rue Bombardier Anjou Quebec Canada H1J 1A6 T 1 514 352 5095 F 1 514 352 5610 infors ca infors ht com Infors Bio Technology Beijing Co Ltd Room 505C Building 106 Lize Zhongyuan Wangjing New Industrial Zone Chaoya...

Page 3: ...5 2 4 Responsibility of the Provider 15 2 5 General Hazards 15 2 5 1 Electrical Current 16 2 5 2 Unauthorised Spare Parts and Accessories 16 2 6 Particular Hazards 16 2 6 1 Hot Surfaces 17 2 6 2 Dangerous Gases 17 2 6 3 Flammable or Explosive Substances 17 2 6 4 Corrosive or Toxic Substances 17 2 6 5 Bioactive Substances or Pathogenic Organisms 18 2 6 6 Overpressure or Vacuum 18 2 7 Warning Symbol...

Page 4: ... 3 3 Top Plate 33 3 3 4 Ports in the Vessel Top Plate and their Configuration 33 3 3 5 Top Plate DN 115 34 3 3 6 Top Plate DN 150 35 3 3 7 Top Plate DN 200 36 3 4 Temperature Control System 36 3 4 1 Water Temperature Control 37 3 4 2 Temperature Control with Heater Pad and Cold Finger 37 3 5 Stirrer 38 3 6 Gassing System 39 3 6 1 Gassing Strategy 40 3 6 2 Gasmix System 40 3 6 3 Gas Entry 40 3 7 Ex...

Page 5: ...ecifications 54 4 7 Permissive Measurement 54 4 8 Redox Measurement 55 4 8 1 Measuring Systems Sensors 55 4 8 2 Calibration 55 4 8 3 Mounting the Sensor 56 4 9 pCO2 Measurement 56 4 10 Pressure Control 57 4 11 LabCIP CIP SIP Unit 59 5 Accessories 61 5 1 Base Tray 62 5 2 Reagent Bottle and Pump Holder 62 5 3 Sampling System Super Safe Sampler 64 5 4 Sparger 66 5 5 Impellers 68 5 6 Pocket for Temper...

Page 6: ...7 7 1 Preparation Test Run 99 7 7 2 Filling the Water Circuit 102 7 7 3 Stirring 103 7 7 4 Heating and Adjusting Temperature 103 7 7 5 Gassing 104 7 7 6 End of Test 104 8 Before Fermentation Cultivation 106 8 1 Preparing and Autoclaving the Culture Vessel 106 8 1 1 Checking Gaskets O Rings 106 8 1 2 Mounting the Impellers 107 8 1 3 Mounting Dip Tubes and Spargers 108 8 1 4 Mounting the Baffles 109...

Page 7: ...ic Unit 129 8 1 21 Calibrating the Pumps 129 8 1 22 Preparing the Reagent Bottles Pumps and Hoses 130 8 1 23 Sterile Hose Connections 133 8 1 24 Removing the Pump Heads 133 8 1 25 Checklist Before Autoclaving 134 8 1 26 Autoclaving 135 8 2 Connecting the Culture Vessel and Preparing the Cultivation 137 8 2 1 Connecting a Single Walled Vessel 137 8 2 2 Connecting a Double Walled Culture Vessel 139 ...

Page 8: ...Cleaning 160 10 3 Removing the Vessel Top Plate and Accessories 162 10 3 1 Removing the Exit Gas Cooler 162 10 3 2 Removing the Sensors 162 10 3 3 Removing Hoses Filters and Pump Heads 163 10 3 4 Removing Blanking Plugs 164 10 3 5 Removing Threaded Adapters 164 10 3 6 Removing the Inoculation Needle Septum Collar and Septum 164 10 3 7 Removing Addition Port Adapters 165 10 3 8 Removing the Vessel ...

Page 9: ...11 7 Interferences Antifoam or Level Sensor and Antifoam Pump 184 11 8 Interferences Feed and Pump 185 11 9 Returning for Repair 186 12 Disassembly and Disposal 187 12 1 Disassembly 187 12 2 Disposal 187 13 Technical Data 189 13 1 Dimensions 1 Unit 189 13 2 Dimensions Master Unit and Satellite Units 191 13 3 Dimensions of Culture Vessels in Vessel Holder 192 13 4 Weights net 194 13 5 Connection Va...

Page 10: ...on for Microorganisms Table of Contents Page 8 of 205 22 January 2019 13 6 11 Heater Pads for Single Walled Vessels 204 13 7 Operating Conditions 204 13 8 Emissions 204 13 9 Utilities 204 13 10 Auxiliary Supplies 205 ...

Page 11: ...thoroughly and fully un derstand its contents before beginning any work Adhering to all the safety and operating instructions in this manual is essential to ensure that work is carried out safely The scope of delivery may differ from the explanations descrip tions and figures in this operating manual due to special designs additional options specified on ordering and the latest tech nical mechanic...

Page 12: ... that may result in significant damage to property if not avoided INFORMATION Texts located below a grey bar bearing the notice INFOR MATION provide useful tips and recommendations for ensuring efficient fault free operation of the equipment 1 3 Equipment Identification Standard Identification Plate The identification plate is designed to allow clear identification of the equipment It contains the...

Page 13: ...is at your disposal for technical advice and specialist enquiries For contact information see page 2 Due to their familiarity with the potential applications of the equip ment the Customer Service team is able to provide information on whether the equipment can be used for a specific application or modified to handle the planned process Experience of working with the equipment will be published se...

Page 14: ...s of the associated risks 2 1 Intended Use Incorrect Use and Misuse The bench top bioreactor Labfors 5 from INFORS HT is de signed especially for running bio processes with microorgan isms or animal cells for research and development in a bio technology laboratory The equipment is designed and constructed exclusively for the in tended use described above Intended use also includes following all th...

Page 15: ...he necessary infrastructure available These persons may also be included in the group of people known as users though this is not always the case Irrespective of whether a provider is a member of the company s board of management or a supervisor they bear a special level of responsibility with regard to the processes and the qualification and safety of the users 2 2 2 User General The term user ap...

Page 16: ...who have been trained for working in a biotech nology laboratory can be considered for the role of operator These include Process technicians in the fields of biotechnology and chemis try Biotechnologists biotechnicians Chemists with a specialisation in biochemistry chemists in the field of organic chemistry or biochemistry Life scientists biologists with special education in cytology bacteriology...

Page 17: ...equirements relating to occupational health and safety in a biotechnology laboratory In particular The provider is responsible for ensuring that the work and en vironmental regulations applicable in a biotechnology labora tory are observed The provider must ensure that the equipment remains in safe and proper working condition throughout its entire term of use The provider must ensure that all saf...

Page 18: ...cir cuit 2 5 2 Unauthorised Spare Parts and Accessories Incorrect or imitated spare parts and accessories as well as spare parts or accessories that have not been authorised by the manu facturer represent a significant safety risk As such we recommend procuring all spare parts and accessories from an authorised dealer or directly from the manufacturer For the contact details of the manufacturer s ...

Page 19: ... the equipment must be checked be fore any cultivation processes using dangerous gases are initi ated The gaskets on the equipment must be checked at regular intervals and replaced if necessary Siphon off exit gas safely 2 6 3 Flammable or Explosive Substances The use or production of flammable or explosive substances is not covered under intended use of the equipment as the equipment is not explo...

Page 20: ... vessels may break or shatter when subjected to overpres sure or vacuums 2 7 Warning Symbols on the Equipment The following warning symbols stickers are attached to the equip ment Position Motor WARNING Illegible or missing warning symbols on the equipment will lead to the user being exposed to risks that the warning symbols in question were designed to make him or her aware of It is the provider ...

Page 21: ...out a declaration of decontamination and have it signed by the person responsible The declaration of decontamination must be affixed on the outer packaging in which the equipment is sent back These forms can be obtained from the licensed dealer or the manufacturer See address on page 2 Important notice If the return shipment is not accompanied by a signed and com plete declaration of decontaminati...

Page 22: ...c Unit 1 Holder for operating unit manometers and pressure reduction valves 2 Main switch 3 Sensor cables 4 Holder for gassing unit s 1 and optional pres sure control 5 Pumps 6 Console 7 Base plate 1 depending on the chosen gassing strategy this can be rotameter s mass flow controller s solenoid valve s 1 2 3 4 5 6 7 ...

Page 23: ...lled with POWER and it is illuminated as soon as it is switched on 3 1 2 Pumps Corrective reagent and feed solutions are added via four peristaltic pumps The pumps are driven by stepper motors The drive shafts of the pumps are situated on the upper front side of the console on the basic unit Direction of rotation is clockwise by default Rocker switches for manual operation of the pumps are provide...

Page 24: ...utoclavable cover plate made of plexiglass highlighted in red in the picture on the left can be inserted into the holder of the mounting plate for protection during operation 3 1 3 Identification Plate The identification plate is located on the rear of the basic equip ment The data provided on the identification plate is specified in the main chapter General Information chapter Equipment Identific...

Page 25: ...ear side at the bottom of the con sole They are labelled with corresponding symbols Left Water outlet Right Water inlet 3 1 6 Gas Connections The connection s for gas is are located at the top on the back of the basic unit Each connection is labelled accordingly e g Air IN etc A pressure reduction valve is installed after each connection The factory settings of the pressure reduction valves must n...

Page 26: ...ns socket from top to bottom 1 25 pin Dsub Multi I O for connecting analogue and digital in put and output signals 0 4 20 mA 2 9 pin RS232 for connecting a balance or a switchbox with up to 7 balances 3 2 x iDDC bus for connecting the touch screen operating unit and one or two satellites 3 1 8 Connections for Single or Double Walled Vessels Depending on the present temperature control system diffe...

Page 27: ... 1 8 1 Connections for Single Walled Vessels The socket for cable connection of the electrical heater pad is la belled and the water connectors for the cold finger are labelled with symbols 1 Mains connection heater pad Heating mat 2 Water inlet cold finger 3 Water outlet cold finger 1 2 3 ...

Page 28: ...n Page 26 of 205 22 January 2019 3 1 8 2 Connections for Double Walled Vessels The water connectors for the vessel jacket are labelled with corre sponding symbols 1 Water overflow vessel jacket 2 Water inlet vessel jacket 3 Water outlet vessel jacket 1 2 3 ...

Page 29: ...r Cables The basic unit is equipped and configured by default for measure ment of temperature pH pO2 and antifoam This means the tem perature sensor Pt100 and the cables for connecting these sen sors are always present The appropriate sensors for pH pO2 and antifoam are separately available they are not included in the standard package From left to right pH Antifoam Temperature Pt100 pO2 INFORMATI...

Page 30: ...ted on the left front side of the basic unit The connectors are closed with plugs and the valve is covered with a cap on delivery Connections and valve are labelled with symbols 1 Water flow regulation 2 Water outlet exit gas cooler 3 Water inlet exit gas cooler The valve is factory adjusted If needed water flow can be manu ally adjusted here Open turn it counter clockwise Close turn it clockwise ...

Page 31: ... 1 Monitor Keys Four monitor keys are situated on the upper left side of the touch screen operating panel 1 ON OFF key 2 DECREASE brightness key to set the display illumination darker 3 INCREASE brightness key to set the display illumination brighter 4 DISPLAY key to switch the display on off Special details about the ON OFF key The touch screen operating panel is switched on and off at the main s...

Page 32: ... ON OFF key when the bioreactor fermenta tion is stopped a dialogue box for shutting down the system appears 3 2 2 Operating Panel Connections Six connectors labelled with different symbols are situated on the rear side of the operating panel 1 USB2 0 x 2 for backups and service pur poses1 2 USB2 0 x 2 Reserve 3 Ethernet for Ethernet cable1 to connect with a network 4 COM2 Reserve 5 COM1 for iDDC ...

Page 33: ...system used For details see the chapter Temperature Control System 3 3 1 Double walled Culture Vessels 1 Handhold top plate 2 Handhold vessel holder 3 Water overflow vessel jacket 4 Water outlet vessel jacket 5 Glass vessel 6 Water inlet vessel jacket 7 Vessel holder 8 Top plate The picture above shows a double walled culture vessel with a to tal volume of 3 6 L and DN diameter nominal inner diame...

Page 34: ...vessel holder 3 Glass vessel 4 Vessel holder 5 Top plate The picture above shows a single walled culture vessel with a total volume of 3 6 L and DN diameter nominal inner diameter of 115 mm Single walled culture vessels need an electrical heater pad and a cold finger for temperature control For details see the chapter Temperature Control System 5 3 4 1 2 ...

Page 35: ...ve hub and motor coupling are lo cated in the middle of the vessel top plate 3 3 4 Ports in the Vessel Top Plate and their Configuration The vessel top plate has different ports of different sizes to mount the different components such as sparger blanking plugs sensors etc The number of ports in the top plate and its configuration de pends on the diameter nominal inner diameter of the culture vess...

Page 36: ... 5 Exit gas cooler 3 Ø 12 mm Pg13 5 Sparger 4 Ø 19 mm Addition port adapter quadruple for reagents feed 5 Ø 12 mm Pg13 5 pO2 sensor 6 Ø 12 mm Pg13 5 pH sensor 7 Ø 12 mm Pg13 5 Inoculation needle 8 Ø 12 mm Pg13 5 Dip tube for sampling 9 Ø 19 mm Spare 10 Ø 10 mm Antifoam sensor 11 Ø 10 mm Temperature sensor Pt100 12 Fixation of baffle 12 11 10 9 8 7 6 5 4 3 2 1 ...

Page 37: ...mperature sensor Pt100 4 Ø 10 mm Antifoam sensor 5 Ø 19 mm addition port adapter quadruple re agents feed 6 Ø 12 mm Pg13 5 Sparger 7 Ø 12 mm Pg13 5 Spare 8 Ø 12 mm Pg13 5 Dip tube for sampling 9 Ø 19 mm Inoculation needle 10 Ø 12 mm Pg13 5 pH sensor 11 Ø 12 mm Pg13 5 pO2 sensor 12 Ø 12 mm Pg13 5 Exit gas cooler 13 Fixation of baffle bact cult 13 12 11 10 9 8 7 6 5 4 3 2 1 ...

Page 38: ...t adapter quadruple corrective reagent feed 11 Ø 12 mm Pg13 5 pH sensor 12 Ø 12 mm Pg13 5 pO2 sensor 13 Ø 12 mm Pg13 5 Exit gas cooler 14 Ground connector antifoam sensor 3 4 Temperature Control System The following two temperature control systems are available Water temperature control for double walled vessels Temperature control with electrical heater pad and cold finger for single walled vesse...

Page 39: ... circuit for cooling The overflow in this open system prevents a dangerous overpressure in the circuit and allows pres sure equalisation of the vessel jacket during sterilisation in the au toclave 3 4 2 Temperature Control with Heater Pad and Cold Finger An electrical heater pad is put around the vessel and connected to the basic unit for heating The water cooling is effected via a cold finger whi...

Page 40: ...e stirrer shaft is screwed on the drive hub in the vessel top plate and is sealed by a single mechanical seal ATTENTION Manipulation on the mechanical seal may lead to its damage The mechanical seal must be lubricated at any time For this two nozzles fitted with a piece of silicone hose are located on the drive hub For details see chapter Lubricating the Mechanical Seal in the main chapter Cleanin...

Page 41: ...b on the vessel top plate Two Rushton impellers with six blades are provided as a standard for bacterial cultures They are fixed by the means of grub screws to the shaft 3 6 Gassing System The basic unit is equipped with the appropriate gassing units rota meter solenoid valves mass flow controllers and configured ac cording to the chosen gassing strategy The following gases can be used Air Oxygen ...

Page 42: ...ailed description of the touch screen software can be found in the separate manual 3 6 3 Gas Entry The gas or the gas mixture is led via a silicone hose from the gas sing connection on the basic unit via sparger directly into the me dium in the culture vessel For details about the sparger see the main chapter Accessories chapter Sparger 3 7 Exit Gas Pressure in the culture vessel may be increased ...

Page 43: ...ore the exit gas fil ter as an additional safety precaution For details see main chapter Accessories chapter Exit Gas Cooler 3 8 pH Control pH in the medium is measured by the pH sensor and controlled by addition of reagents acid base Addition of acid and base takes place via the two peristaltic pumps Acid and Base Reagent bottles are filled with acid and base which are connected to an the additio...

Page 44: ...general rule Calibration of a pH sensor always must be car ried out BEFORE sterilisation This is executed on the touch screen operating unit For details refer to the separate operating manual of the touch screen software 3 8 3 Mounting of the Sensor pH sensors are mounted into a 12 mm Pg13 5 port by the means of an electrode holder For details see main chapter Accessories chapter Electrode Holder ...

Page 45: ... METTLER TOLEDO Polarographic pO2 sensors must be polarised at initial operation or after disconnection from the voltage source This means that the pO2 sensor must be polarised after sterilisation in the autoclave For details refer to the separate documentation from the manufac turer Variant HAMILTON pO2 sensor with integrated optical electronics Type Visiferm DO ARC Manufacturer HAMILTON HAMILTON...

Page 46: ...eparate operating manual of the touch screen software 3 9 3 Mounting of the Sensor pO2 sensors are mounted into a 12 mm Pg13 5 port by the means of an electrode holder For details see main chapter Accessories chapter Electrode Holder 3 10 Antifoam Control Foam hinders the exchange of gas between the medium and the gas phase in the head space The exit gas filter can become clogged with foam which c...

Page 47: ...e pumps are available These are mounted to the side of the basic unit Control is the same as for the standard analogue pump it is adjustable within a range of 0 and 100 4 2 Servomotor High Torque For high speed requirements a powerful servomotor is available and can be used instead of the standard brushless DC motor 1 Signal connector for orange signal cable 2 Power connector for green power cable...

Page 48: ...330 W Nominal torque 1 05 Nm Range of rotation speed with 2 impellers Standard 13 L DN 200 vessel 10 up to 1250 min 1 All other vessels 10 up to 1500 min 1 Range of rotation speed with 3 impellers Option 13 L DN 200 vessel 10 up to 1000 min 1 All other vessels 10 up to 1500 min 1 Accuracy Measurement 5 min 1 at 100 1000 min 1 1 setpoint at 1000 min 1 Control 5 min 1 at 100 1000 min 1 1 setpoint at...

Page 49: ... into the vessel or to extract liquid from the vessel Customized configurations are available on request Level Sensor The type of level sensor with clamping adapter without O ring for mounting in a Ø 12 mm Pg13 5 port in the vessel top plate is sup plied as standard An additional appropriate adapter is supplied for mounting in a 19 mm port in a vessel top plate with DN200 mm 1 Connection for banan...

Page 50: ... and O2 sensors of the type BlueInOne Ferm BlueInOne Cell or BlueVary Measurement ranges gas sensors Type gas sensor Vol O2 Vol CO2 Gas Analyser 0 1 25 1 0 10 BlueInOneFerm BlueVary 1 0 50 1 0 10 or 0 25 BlueInOneCell BlueVary 0 1 100 2 0 10 or 0 25 1 only suitable for use in aerobic bioprocesses 2 suitable for use in aerobic and anaerobic bioprocesses For details on the safety technical data usag...

Page 51: ...connect the sensor the plug connector is plugged into the socket marked Port A on the gas sensor Due to the length of the sensor cable the gas sensor can be posi tioned in a large number of possible locations Establishing the hose connection 3 m of pressure hose D 8 x 14 5 and a hose clamp are provided with the equipment in order to establish the hose connection be tween gas sensor and culture ves...

Page 52: ... gas sensor cartridge must be replaced by the sensor manufacturer For detailed information refer to the separate documentation from the sensor manufacturer 4 5 Multiplexer Gas Switching Module To be able to measure exit gas values usually O2 and CO2 while bio processes are running in parallel every single bioreactor usu ally has to be equipped with the corresponding measuring system see chapter Ex...

Page 53: ...12 N sensors supply a non linearised turbidity measure ment for the culture This can be linearised manually using the soft sensor in eve for example in order to determine correlation with factors such as the biomass concentration or optical density INFORMATION The Optek ASD sensors are designed exclusively for use as tur bidity sensors for liquids and gases in accordance with the tech nical data S...

Page 54: ...t in the near infrared range NIR of 840 nm to 910 nm 4 6 2 Calibrating the Zero Point Optek sensors are pre calibrated in the factory Inserts are availa ble for reference measurement Due to the different light absorption of different media zero point calibration should be performed before each cultivation process This can be done on the operating panel either before or after autoclaving depending ...

Page 55: ...d for de posits before each use and cleaned if necessary If necessary store the Optek sensor in a clean dry place at a tem perature of between 20 C and 70 C 4 6 5 Interferences Turbidity Measurement Interference Displayed measured value is not plausible unusual Possible Cause Remedy By Sensor cable is twisted or kinked or not properly connected Check and ensure that the sensor cable is not kinked ...

Page 56: ...ature of the sensor in the medium exceeds 50 C during operation thermal shutdown Once the medium has cooled down measurement auto matically continues 4 7 Permissive Measurement The sensor with the corresponding transmitters must be purchased directly from the manufacturer ABER INFORS HT offers a connec tion to the transmitter on the basic unit Calibration is performed according to the manufacturer...

Page 57: ... To use the sensor the basic unit must be equipped with a corre sponding connection HAMILTON version digital Classic combined sensor oxidation reduction potential meas urement against a reference with integrated electronics Type Easyferm Plus ORP ARC Manufacturer HAMILTON Measures the reduced potential in the medium in the range from 1 500 mV to 1 500 mV If the basic unit is configured for Hamilto...

Page 58: ... in the vessel top plate by the means of an electrode holder An additional adapter is necessary for mounting the sensor into a 19 mm port For details about the electrode holder see chapter Accessories Electrode Holder 4 9 pCO2 Measurement Measures saturation of dissolved carbon dioxide CO2 in the cul ture in hPa Measurement is done by a digital CO2 sensor with in tegrated temperature sensor Measur...

Page 59: ...seen WARNING Overpressure in the glass vessel may cause the vessel to burst or break Any build up of pressure must be avoided without the pressure control option Pressure control consists of a solenoid valve proportional valve and a piezo resistive pressure sensor with fixed O ring the O ring is not visible in the picture to the left Depending on the equipment configuration the solenoid valve is s...

Page 60: ...he steel membrane from damage A screwed on steel cap protects the female cable plug during auto claving 1 Threaded steel cap 2 Hollow screw 3 Protective cap plastic Before autoclaving The pressure sensor is mounted into a 19 mm port in the vessel top plate and autoclaved with the culture vessel Proceed as follows for the mounting Procedure 1 Fit a threaded adapter into the 19 mm port in the vessel...

Page 61: ...talled on site by the provider The sensor cable must be connected to the pressure sensor too Proceed as follows Procedure 1 Fit the pressure hose from the solenoid valve to the exit gas filter 2 Unscrew the steel cap from the cable plug on the sensor 3 Plug the male plug of the sensor cable into the female plug on the sensor To do so the red mark on each plug must be aligned Maintenance Basically ...

Page 62: ...ganisms Options Page 60 of 205 22 January 2019 All information regarding safety setup and function operation maintenance and technical data of the LabCIP is available in the separate operating manual from the equipment manufacturer ...

Page 63: ... Pg13 5 port 5 5 5 5 4 Blanking plug for Ø 19 mm port with fixed O ring 1 1 2 2 5 Addition port adapter quadruple for Ø 19 mm port 1 1 1 1 1 Inoculation needle and septum collar for Ø 12 mm Pg13 5 port 1 1 Inoculation needle and septum collar for Ø 19 mm port 1 1 1 Clamping adapter for Ø 12 mm Pg13 5 port with inside Ø 6 mm for sparger 1 1 1 1 1 Dip tube straight Ø 6 mm for Ø 12 mm Pg13 5 port 1 1...

Page 64: ...ls with DN NW 200 437 mm x 612 mm for vessels combined with a scale under neath the vessel 5 2 Reagent Bottle and Pump Holder The culture vessel is autoclaved along with reagent bottles hoses and pump heads For easy handling a holder for reagent bottles and pump heads is available There are two types available for 250 mL reagent bottles purchased with vessels with DN 115 and 150 for 500 mL reagent...

Page 65: ...an be fitted to the vessel holder The mounting plate with the pump heads can be fitted to the reagent bottle and pump holder The holder for 500 mL reagent bottles can be modified using the centering rings which can be obtained as an optional modification set The holder can be used then with 250 mL reagent bottles too ...

Page 66: ...ampler prevents the culture vessel from contamination when sampling Content of the set The set consists of a completely pre assembled group of valves with hoses and two syringes It is connected via silicone hose with a dip tube Valve assembly 1 Sterile filter 2 Check valve 3 Luer activated sample valve 4 T piece 5 Hose The valve assembly consists of a T piece two check valves a Luer activated auto...

Page 67: ...ing line this sampling system can save culture volume which is particularly important with small vessels and or frequent sampling The dead volume of the culture remaining in the group of valves after flushing with sterile air amounts to a few µl and is negligibly small If the withdrawal of a very small sample volume is required with minimum possibility of falsification a small quantity of culture ...

Page 68: ...ringe Before fitting the syringe disinfect the sample valve Fort this spray a commercially available disinfectant onto the valve After spraying and after each sampling close the the sample valve with a sterile Luer Lock cap Dead End Cap to keep the valve and sample sterile The caps are not included in the kit Very convenient to use are so called combi caps that fit on male and female connectors al...

Page 69: ...fors 5 Version for Microorganisms Accessories 22 January 2019 Page 67 of 205 Sparger L shaped Inside Ø 4 0 mm Outside Ø hose connection 6 0 mm Ring sparger Inside Ø 4 0 mm Outside Ø hose connection 6 0 mm ...

Page 70: ...to chapter Setup and Function Stirrer 5 6 Pocket for Temperature Sensor Pt100 The pocket is a pipe with a sealed bottom end and is used to in sert the temperature sensor Pocket Ø 10 mm Fitted with fixed O ring Two slotted screws are used for fixing in the 10 mm The picture on the left does not show the full length of the pocket ...

Page 71: ... Accessories 22 January 2019 Page 69 of 205 5 7 Baffles Culture vessels are equipped with three baffles by default Baffle 3 pieces Must be fitted with O ring before mounting A hexalobular screw is used for mounting in the vessel top plate ...

Page 72: ...5 22 January 2019 5 8 Lock Nut If no baffles are used lock nuts must be fitted into the vessel top plate instead They are disposable in a set of 3 pieces Must be fitted with an O ring before mounting A hexalobular screw is used for mounting in the vessel top plate ...

Page 73: ...are used to seal open ports There are different blanking plugs for the different types of port Blanking plug Ø 10 mm Fitted with fixed O ring Two slotted screws are used for fixing in 10 mm port Blanking plug Ø 12 mm Must be fitted with an O ring before being mounted in the 12 mm Pg13 5 port Mounted using a thread ...

Page 74: ...e mounted in a port in the vessel top plate and end in the headspace of the vessel They have one or several hose connections and various models are available The following can be connected to addition port adapters Reagent bottles with feed solution antifoam agent or correc tive reagent base acid If appropriate exit gas line Addition port adapter quadruple Ø 19 mm Inside Ø 3 0mm Outside Ø hose con...

Page 75: ... 0 mm Fitted with fixed O ring Threaded adapter is used for mounting in 19 mm port 5 11 Inoculation Needles Inoculation needles are used for feeding liquids into the culture vessel which cannot be autoclaved with the culture vessel These liquids may be e g the inoculum or heat sensitive reagents If using an inoculation needle then a septum inoculation mem brane must be fitted along with a septum c...

Page 76: ...ilitate the piercing The hose connection and the very sharp needle tip are covered with non autoclavable protective caps INFORMATION For addition of autoclavable liquids addition port adapters or in oculation needles without septum and without septum collar are suitable too These must be mounted in the ports and con nected to the reagent bottles before autoclaving Inoculation needle Ø 12 mm Inside...

Page 77: ...Ø 19 mm Inside Ø 2 5 mm Outside Ø hose connection 4 5 mm Fitted with fixed O ring Thread is used for mounting in septum collar in 19 mm port Inoculation needle 19 mm Inside Ø 4 0 mm Outside Ø hose connection 6 0 mm Fitted with fixed O ring Thread is used for mounting into septum collar in 19 mm port ...

Page 78: ... 5 12 Septum Collars Septum collars are either used in combination with the correspond ing inoculation needle with septum piercing membrane or with a syringe with injection needle and a septum Inoculation needles are always supplied including a septum collar but septum collars are separately available too Septum collar Ø 12 mm With internal thread A septum must be inserted in the 12 mm Pg13 5 port...

Page 79: ...mounted in a vessel top plate port with a clamping adapter Dip tubes are used for a variety of purposes For filling the culture vessel after autoclaving Using a dip tube prevents foaming For adding inoculum For sampling The aseptic Super Safe Sampler system can be used for sampling For harvesting For siphoning off medium during continuous cultivation For draining the culture vessel Depending on th...

Page 80: ...l The illustration on the left shows only the upper section of the dip tubes Dip tube straight Ø 12 mm Inside Ø 10 mm Hose connection outside Ø 12 mm The dip tube does not reach as far as the bottom of the vessel The illustration on the left shows only the upper section of the dip tube Dip tube curved with horizontal tip Ø 6 mm Inside Ø 4 0 mm Hose connection outside Ø 6 0 mm The dip tube does rea...

Page 81: ...am level sensors The clamping adapter fixes the component part in place and can be used to adjust its mounting depth The clamping adapter must match the outside diameter of the part to be mounted and the size of the port Clamping adapter Ø 6 mm 10 mm Fitted with fixed O ring B Two slotted screws are used for mounting in 10 mm port After loosening the slotted screw A the component part with Ø 6 mm ...

Page 82: ...e inserted into pulled out from the clamping adapter The component part is fixed in the clamping adapter by fastening the hollow screw Clamping adapter Ø 8 mm 12 mm Must be fitted with O ring before mounting Thread is used for mounting in 12 mm Pg13 5 port After loosening the hollow screw A the component part with Ø 8 mm can be inserted into pulled out from the clamping adapter The component part ...

Page 83: ... and a hollow screw The wrench for the grub screw is also included in the scope of supply 1 Sheath 2 Grub screw 3 Guide bar 4 Fork 5 Hollow screw 5 16 Threaded Adapter The threaded adapter has an inside thread and is used for mount ing blanking plugs or clamping adapters with Ø 19 mm in thread less 19 mm ports in the vessel top plate Two slotted screws are used for mounting 5 17 Adapter The adapte...

Page 84: ...ies Page 82 of 205 22 January 2019 5 18 Heater Pad The electrical heater pad is needed for heating up single walled vessels It is fitted around the vessel and held together with the tensioning springs 1 Power cable 2 Hook 3 Tensioning spring 1 2 3 ...

Page 85: ...led vessels for cooling pur poses 1 Connection water inlet basic unit 2 Connection water outlet basic unit The cold finger is already equipped with pressure hoses for water inlet upper connector and water outlet lower connector Appro priate hoses with rapid couplings and plug in nozzles for connec tion to the basic unit are included 1 2 ...

Page 86: ... of 205 22 January 2019 Cold finger Ø 19 mm Fitted with fixed O ring Threaded adapter is used for mounting in 19 mm port Cold finger Ø 12 mm Adjustable mounting depth Must be fitted with O ring before mounting Thread is used for mounting in 12 mm Pg13 5 port ...

Page 87: ...s already equipped with pressure hoses for water inlet lower connector and water outlet upper connector Appropriate hoses with rapid couplings and plug in nozzles for con nection to the basic unit are included Another piece of pressure hose is fitted onto the exit gas pipe and equipped with a disposable exit gas filter Hose connections and the filter are secured with hose clamps The hose clamp sec...

Page 88: ...ting in 12 mm Pg13 5 Port Exit gas cooler Ø 19 mm With fixed O ring A threaded adapter is needed for mounting in 19 mm port Exit gas cooler with needle Ø 19 mm Separately autoclavable Only available for vessel top plates with DN 50 and DN200 Exit gas cooler swivelling sideways Ø 19 mm With fixed O ring A threaded adapter is needed for mounting into 19 mm port ...

Page 89: ...5 mm 2 10 000 mL 3 x 5 mm 2 1 Thes two bottle sizes fit into the reagenbt bottle and pump holder The reagent bottles are already equipped on delivery 1 Cable tie 2 Silicone hose 3 Filter Reagent bottles with two hose connectors are provided as stand ard Two hose connectors are situated on the lid One is equipped with a short piece of silicone hose with filter for pressure equalisation The second c...

Page 90: ...05 22 January 2019 The individual parts of the reagent bottle are 1 Threaded cap PBT 2 Plate with two hose nozzles PVDF 3 Flat gasket silicone 4 Laboratory bottle Borosilicate The picture to the left shows the reagent bottle type with 3 1 hose connectors 1 2 3 4 ...

Page 91: ...sor is equipped with two NON autoclavable pro tective caps Models for Ø 12 mm Pg13 5 or 19 mm ports with appropriate clamping adapters are available too Port Inside Ø Outside Ø hose connection Ø 10 mm 2 mm 4 mm Ø 12 mm Pg13 5 3 mm 4 mm Ø 19 mm 3 mm 4 mm 5 23 Pump Heads The autoclavable pump heads are fitted with PharMed pump hoses prior to delivery Three different hose diameters are available for ...

Page 92: ...th an open short section of hose with a filter All the sterile filters in the scope of supply are autoclavable dispos able filters with PTFE diaphragms INFORMATION Sterile filters must be clean and dry at all times and should thus ideally be replaced after each use Ø 37 mm marked red Application Supply air Retention rate 0 2 µm Ø 37 mm marked green Application Exit gas Retention rate 0 3 µm dry 1 ...

Page 93: ...kets Description Ø mm Utilisation O ring EPDM 1 5 x 7 5 Gasket port size 10 mm O ring EPDM 2 62 x 10 77 Gasket port size 12 mm Pg13 5 O ring EPDM 2 5 x 15 0 Gasket port size 19 mm O ring EPDM 1 78 x 6 07 Drive shaft O ring EPDM 2 5 x 9 0 Baffles O ring EPDM 3 53 x 123 42 Top plate gasket culture ves sel DN115 O ring EPDM 3 53 x 158 34 Top plate gasket culture ves sel DN 150 O ring EPDM60 5 0 x 208...

Page 94: ...00 ml 2000 ml 5000 ml 10 000 ml hose lines for reagents Silicone hose 60 Shore 10 x 16 Water connections vessel jacket double walled culture vessels Attachment Ø mm Application Hose clamp 1 screw INOX 14 Attachment hose s gas in let s Hose clamp INOX 17 Attachment hose water inlet Hose clamp INOX 19 Attachment hose water outlet Hoffmann pinchcock nickel plated brass 12 For clamping off hose lines ...

Page 95: ...12 7 hose nozzle 1 2 water overflow hose of vessel jacket double walled culture vessels 5 27 Inoculation Accessories and Tools Description Application Hexagon socket spanner WAF 17 For blanking plugs in 12 mm Pg13 5 ports Allen key WAF 2 DIN911 For grub screws on impellers Septum inoculation diaphragm Ø 16 mm MVQ Silicone trans parent For 12 mm Pg13 5 ports Septum inoculation diaphragm Ø 19 mm MVQ...

Page 96: ...amage The following points must be observed when transporting the equipment internally relocation Always work in pairs and use suitable auxiliary equipment when transporting the equipment The entire equipment basic unit and culture vessel contains delicate glass parts Especially when using auxiliary tools it is important to observe that the equipment s centre of gravity is not in the middle WARNIN...

Page 97: ... and its components clean dry and pro tected against dust dirt and liquids Store the equipment and its components in a cool place with low air humidity but protected against frost Storage temperature 5 C 55 C Relative air humidity non condensing 10 95 Protect the equipment from aggressive media direct sunlight and mechanical vibrations 1 Maintain and store sensors produced by other manufacturers i...

Page 98: ...rovider Exception The basic functions of the bioreactor are tested and demonstrated at the same time to the operator in form of a short test run on site during installation by the qualified personnel In order to become familiar with the basic functions of the bioreac tor before the first cultivation or after a longer period of non use of the equipment the operator may afterwards carry out this sho...

Page 99: ...B on the customer s side 7 4 Water Supply and Return The in house water supply to the equipment as well as the drain age of the water must meet the following requirements Very soft or soft water quality CaCO3 concentration 0 mmol L 1 to 1 5 mmol L 1 ATTENTION Not observing the water quality requirements may lead to dam age or failure of the equipment The heating system has protection against dry r...

Page 100: ...r DIN ISO 8573 1 Class 1 2 3 4 ATTENTION The use of impure gases can lead to blockage of the sterile filter and damage the mass flow controller Only use dry clean and oil free gases Hoses Only use pressure resistant and intact hoses Only use appropriate hoses use adaptors as necessary Secure hoses with the appropriate clamps WARNING The use of inappropriate or damaged hoses and or inappropri ate f...

Page 101: ...cooling heating Stirring Gassing Normal compressed air is used for gassing To avoid calcium de posits demineralised water is recommended for filling the vessel The following description of the test run does not detail handling of individual components e g stirrer sparger etc Detailed descrip tions of their handling are given in the corresponding chapters of the main chapter Before Fermentation Cul...

Page 102: ... Mechanical Seal INFORMATION Lubrication of a new equipment is not necessary When carrying out a test run on equipment which has not been in use for a longer period of time controlling the lubrication of the mechani cal seal and if applicable its lubrication is imperative If an exit gas cooler is used 6 Screw the exit gas cooler into the port on the vessel top plate port The exit gas cooler is equ...

Page 103: ...he heater pad around the vessel and connect it to the basic unit Double walled jacketed vessel a Connect the water inlet water outlet and overflow of the vessel jacket to the basic unit follow the symbols on the basic unit INFORMATION In order that the hose connections can be disconnected easily again slightly moisten the rapid couplings on the silicon hoses prior to connecting them 10 Equip the s...

Page 104: ...quipment 15 Switch the equipment on at the main switch and wait until the system is booted 7 7 2 Filling the Water Circuit To fill the water circuit proceed as follows Procedure 1 Set a low setpoint for parameter temperature e g 10 C in order to activate the water supply into the vessel jacket or cold finger 2 Start the bioreactor All parameters except for Temperature remain switched off switch th...

Page 105: ...o test the stirrer proceed as follows Procedure 1 On the operating panel for the parameter Stirrer set a low set point For further information about the different ranges of rotation speed refer to the specification in main chapter Technical Data 2 Switch the parameter on For the rest of the procedure allow the bioreactor to run with the temperature switched on and the stirrer running 7 7 4 Heating...

Page 106: ... setpoint in the appropriate parameter Flow depending on the configuration and switch the parame ter on 3 If applicable ensure that all other gas parameters e g Gasmix GM Flow etc are switched off If the gassing is working air bubbles now form in the water in the culture vessel 7 7 6 End of Test After all parameter setpoints have been reached the test can end here Proceed as follows Procedure 1 St...

Page 107: ...ation 22 January 2019 Page 105 of 205 CAUTION Risk of minor burns if the motor is touched during operation or its cooling phase When the motor has cooled down 5 Uncouple the motor from the vessel and place it on a clean and dry work surface 6 Empty the culture vessel ...

Page 108: ...d the basic unit Filling the vessel if necessary Preparing sensors and other accessories 8 1 Preparing and Autoclaving the Culture Vessel All accessories required for later cultivation must be prepared and mounted accordingly and autoclaved together with the culture ves sel 8 1 1 Checking Gaskets O Rings O rings are used to seal all openings on the vessel and top plate The top plate and all intern...

Page 109: ... to the left shows a blanking plug with fixed O ring for mounting into a 19 mm port with mounted threaded adapter If mounting parts have to be fitted into other mounting parts clamping adapter an O ring must be placed between them too INFORMATION Septum collars are sealed with a septum No O ring is used 8 1 2 Mounting the Impellers To mount the impellers to the stirrer shaft proceed as follows Pro...

Page 110: ...the vessel top plate Mounting to the inside of the vessel top plate is described here This means that the vessel top plate is still removed During mounting ensure that the sparger or the dip tube does not come into contact with other mounting parts stirrer The sparger is positioned below the stirrer shaft Proceed as follows Procedure 1 Equip the clamping adapter with an O ring and screw it into th...

Page 111: ...9 of 205 3 Insert the sparger dip tube into the clamping adapter from be low 4 Set the desired mounting depth 5 Tighten the slotted screw 8 1 4 Mounting the Baffles To mount the baffles proceed as follows Procedure 1 Fit an O ring to the baffles 2 Fix the baffles with their hexalobular screws ...

Page 112: ...the additional component parts are mounted Note the following about filling the culture vessel before autoclav ing Before autoclaving only top up with heat resistant media During autoclaving evaporation may result in a loss of volume and thus to increased salt concentration in the medium If nec essary top up with sterile water INFORMATION Development of steam is not possible when autoclaving an em...

Page 113: ...fore Fermentation Cultivation 22 January 2019 Page 111 of 205 8 1 6 Fitting the Vessel Top Plate Proceed as follows to fit and fix the vessel top plate ProProcedure 1 Place the top plate carefully and with the correct alignment into position ...

Page 114: ...am aged which can result in failure of the equipment The screws may not be tightened with a tool under any circumstances This applies to all screw connections where the instructions specify that they must be tightened by hand 8 1 7 Mounting a Threaded Adapter To mount a threaded adapter into a 19 mm port proceed as fol lows Procedure 1 Position the threaded adapter correctly aligned on the 19 mm p...

Page 115: ...r mounting the different blanking plugs proceed as follows Ø 10 mm Ports Procedure 1 Insert the blanking plug with fixed O ring into the port 2 Fix it with both slotted screws Ø 12 mm ports Procedure 1 Insert an O ring into the port 2 Insert the blanking plug and screw it in by hand 3 Tighten it with the hexagon socket spanner hand tight ...

Page 116: ...e 1 Screw the blanking plug with fixed O ring into the threaded adapter 2 Tighten it by hand 8 1 9 Mounting Addition Port Adapters Proceed as follows for mounting Addition port adapter quadruple for Ø 19 mm port Procedure 1 Insert the addition port adapter with fixed O ring into the port 2 Fix it with the two slotted screws ...

Page 117: ...ails is the same as for blanking plugs into their corresponding ports That is why their mounting is not repeatedly described here 8 1 10 Mounting the Pocket for Temperature Sensor Pt100 Proceed as follows Procedure 1 Insert the pocket with the fixed O ring into the 10 mm port 2 Fix it with both slotted screws 8 1 11 Preparing an Inoculation Needle To prepare an inoculation needle for later inocula...

Page 118: ...culation is to be carried out by means of a dip tube or addition port adapter proceed as follows Procedure 1 Fit the dip tube with the clamping adapter or addition port adapter in the port 2 Place a piece of silicon hose onto the dip tube addition port adapter 3 Equip the hose for a sterile hose connection Depending on the application rapid coupling sterile connector or weldable hose with sterile ...

Page 119: ...ing fit one if necessary 5 Screw the blanking plug into the septum collar by hand If necessary tighten it with the hexagon socket spanner hand tight 8 1 14 Mounting and Preparing the Exit Gas Cooler To mount the exit gas cooler and prepare it for the autoclave pro ceed as follows Procedure 1 Mounting the exit gas cooler into the port in the vessel top plate a Mounting in Ø 12 mm Pg13 5 port Fit an...

Page 120: ...way that it cannot slip ALWAYS keep the exit gas line hose at the exit gas cooler with secured exit gas filter open CAUTION If pressure equalisation does not take place via a top plate opening or the mounted exit gas cooler overpressure or vac uum in the culture vessel may occur during autoclaving Connecting the hoses for the exit gas cooler to the basic unit In order to connect the exit gas coole...

Page 121: ...2 Insert the cold finger with fixed O ring into the threaded adapter and tighten it with by hand 8 1 16 Checking Lubrication of the Mechanical Seal The mechanical seal must be lubricated at any time Therefore it must be ensured that the silicone hose on the bottom of the drive hub is always entirely filled with glycerine Top it up if necessary For details refer to chapter Cleaning and Maintenance ...

Page 122: ...ds of METTLER pH sensor and pO2 sensors with aluminium foil during autoclaving pH sensor pO2 sensor HAMILTON ATTENTION Risk of damage to the HAMILTON pH and pO2 sensor Cover ing the sensor heads with aluminium foil during autoclaving may lead to water gathering under the film thus damage the contacts on the sensor head pH and pO2 sensor heads should NOT be covered with alumin ium foil during autoc...

Page 123: ... detailed de scription in the operating manual of the touch screen software 8 1 17 2 Mouting a Sensor into a 12 mm Port Depending on sensor length and vessel volume sensors can be directly screwed into 12 mm Pg13 5 ports To do so proceed as follows Procedure 1 Slide the O ring onto the sensor 2 Insert the sensor into the port 3 Screw the sensor on its thread into the port by hand 8 1 17 3 Mounting...

Page 124: ...tation Cultivation Page 122 of 205 22 January 2019 Procedure 1 On the electrode holder lightly loosen the grub screw in the support guide with the key 2 Pull the support guide from the guide bar 3 Insert the sensor into the support guide and tighten it ...

Page 125: ...h the thread pointing in the downward direction 5 Fit the fork of the guide bar into the groove of the hollow screw 6 Push the hollow screw and the guide bar together upwards and insert the guide bar into the hole of the support guide 7 Slide the O ring onto the sensor and insert the sensor into the port 8 Adjust the sensor to the desired height ...

Page 126: ...nsulation that must be intact as otherwise a continuous signal Foam liquid detected may be generated ATTENTION If the sensor is fixed too tightly in the clamping adapter or the mounting depth of the sensor is changed while the screw on the clamping adapter is tightened the sensor insulation may be damaged The sensor head must not touch the clamping adaptor other wise a continuous short circuit is ...

Page 127: ...e the clamping adapter is equipped with an O ring fit one if necessary 3 Insert the sensor into the port 4 Fix the clamping adapter with the two slotted screws 5 Loosen the slotted screw at the clamping adapter 6 Set the desired mounting depth of the sensor carefully 7 Tighten the slotted screw carefully Mounting in 12 mm Pg13 5 or 19 mm port Proceed as follows ...

Page 128: ...amping adapter 2 Ensure the clamping adapter or port is equipped with an O ring fit place one if necessary If 19 mm port mount a threaded adapter 3 Insert the sensor into the port and screw it in by hand 4 Loosen the hollow screw on the clamping adapter 5 Set the desired mounting depth of the sensor carefully 6 Tighten the hollow screw on the clamping adapter carefully by hand ...

Page 129: ... for general purposes of comprehen sion In order to prepare the Super Safe Sampler sampling system for autoclaving proceed as follows Procedure 1 Attach the hose of the valve group on the dip tube 2 Secure the hose with a cable tie 3 Tighten the sample valve carefully by hand in a clockwise di rection This ensures that the non return valve sample valve screw connection is tight ...

Page 130: ...5 Cover the valve group loosely with aluminium foil 6 Clamp off the hose on the dip tube 8 1 19 Mounting the Sparger Hose and the Inlet Air Filter The sparger must be equipped with the hose and inlet air filter be fore autoclaving To do so proceed as follows Procedure 1 Cut a short piece of silicone hose 2 Place the inlet air filter marked in red onto the hose end in the direction of the air flow ...

Page 131: ...roceed as follows Procedure 1 Cut a piece of thick walled silicone hose Ø 5 x 8 mm in the starter kit Choose its length so that the hose connection between sparger and gas supply on the basic unit does not have any tension or kinks 2 Fit the hose to the hose nozzle of the gassing unit s on the basic unit 3 Secure the hose with cable ties 8 1 21 Calibrating the Pumps Not calibrated pumps show the d...

Page 132: ...tached The following sections contain a detailed description of how rea gent bottles are equipped properly and connected to the pumps and culture vessel Connecting the reagent bottles to the pumps and culture ves sel Proceed as follows Procedure 1 Cut two long silicone hoses with appropriate diameter refer to table with hoses in chapter Accessories Reagent Bottles per pump reagent bottle INFORMATI...

Page 133: ...m with cable ties 2 Attach the silicone hose of the antifoam pump to the mounted antifoam sensor in the culture vessel and secure it with a ca ble tie Connection between reagent bottles and pumps Proceed as follows Procedure 1 Ensure that a hose is fitted inside the reagent bottles at the exposed hose connection without sterile filter fit one if not a the end of the hose does not touch the bottom ...

Page 134: ...agents only Sterilise non heat resistant feed solution separately and only transfer it to the reagent bottle after sterilising 4 Place the reagent bottles in reagent bottle and pump holders 5 Attach the correct silicone hoses to available hose connec tions of each reagent bottle and secure them with cable ties 6 Close silicone hoses with clamps as close as possible to the hose connections of the r...

Page 135: ...onnection pieces must be fitted to the appropriate hoses be fore autoclaving Rapid couplings are connected after autoclaving in a sterile workbench Sterile connectors and hose welding de vices allow sterile connecting without a sterile workbench 8 1 24 Removing the Pump Heads To remove the pump heads from the basic unit proceed as fol lows Procedure 1 Pull up the pump cover plate and remove it fro...

Page 136: ...chanical seal is lubricated Drive hub is lightly capped with aluminium foil Double walled culture vessels The water overflow hose of the vessel jacket is open it is NOT kinked or clamped off Reagent bottles hoses and pumps Reagent bottles are exclusively filled with autoclavable reagents correctly labelled and connected with the culture vessel and the pump heads via hoses Reagent bottles are equip...

Page 137: ...he gassing system sparger are clamped off with hose clamps The exit gas hose is NOT clamped off The hoses are undamaged the hose lines show no kinks and are not able to kink Sensors All sensors required are mounted and if necessary calibrated The antifoam sensor is mounted set for the correct mounting depth and connected to the correct reagent bottle The temperature sensor of the autoclave is inse...

Page 138: ...e culture vessel to from the autoclave note the following Always transport the culture vessel in the vessel holder Always transport the culture vessel to from the autoclave in pairs and use suitable auxiliary equipment when transporting the culture vessel WARNING Depending on the design accessories and fill level the culture vessel may be too heavy to be carried by one person alone Proceed as foll...

Page 139: ...vessels connect the vessel jacket to the water connectors on the basic unit Single walled vessels connect the cold finger to the water connectors on the basic unit fit the heater pad around the vessel and connect it to the basic unit 8 2 1 Connecting a Single Walled Vessel To connect a single walled vessel to the basic unit proceed as fol lows Connecting the cold finger Procedure 1 Push the pressu...

Page 140: ...the cable connection for damages cracks breaks kinks etc and ensure the pad is dry Dry or replace the heater pad if necessary DANGER Danger of fatal electric shock The use of a damaged or wet damp heater pad can be perilous Procedure 1 Fit the heater pad around the culture vessel and hook the ten sioning springs 2 Plug the cable into the connector labelled Heating mat ...

Page 141: ...ble walled vessel to the basic unit the hoses for water inlet outlet and overflow of the vessel jacket must be plugged into the appropriate connectors on the basic unit accord ing the symbols INFORMATION In order that the hose connections can be disconnected easily after cultivation slightly moisten the rapid couplings on the sili con hoses prior to connecting them ...

Page 142: ...e Reagent Hoses In order to prepare the reagent hoses for operation they must be filled with reagent using the rocker switches on the basic unit WARNING When using heavily corrosive reagents acids and bases it is particularly important only to use suitable and undamaged hoses They must also be securely fastened Furthermore the exit gas filter must not be blocked This en sures that no pressure buil...

Page 143: ...d is sucked in from the culture vessel and is pumped in the direction of the reagent bottle Release the rocker switch just before liquid visibly enters the addition port adapter s respectively the dosing needle of the antifoam sensor so that no corrective reagent can enter the culture vessel It is acceptable and time saving to fill the reagent hoses automati cally and simultaneously when operating...

Page 144: ...hoses of the exit gas cooler and the basic unit together via the rapid couplings according the symbols on the basic unit 3 If necessary adjust the standard setting for water flow on the manual control valve on the basic unit The exit gas cooler only works with activated temperature control Parameter Temperature switched ON If no exit gas cooler is used close the manual control valve for wa ter flo...

Page 145: ...d after auto claving To prevent foam formation during filling add the medium via a dip tube To do so proceed as follows Procedure 1 Sterilise the medium separately 2 If necessary pump off any water that remains in the culture vessel 3 Establish a sterile hose connection between the culture vessel and the medium container 4 Pump the desired quantity of medium into the culture vessel 5 Clamp off the...

Page 146: ...s far as it will go CAUTION Risk of burns and loss of property due to overheating of the tem perature control circuit The temperature control circuit will overheat without an inserted temperature sensor and without liquid in the vessel This can lead to burns and loss of property 8 2 10 Connecting the Antifoam Sensor To connect the antifoam sensor the two banana connectors of the sensor cable must ...

Page 147: ... connect the pH sensor proceed as follows METTLER pH sensor Procedure 1 Remove the protective cap or the aluminium foil from the sen sor 2 Place the connector of the sensor cable onto the sensor head 3 Turn the ring on the connector and screw it tight Ensure the sensor cable is not twisted or buckled ATTENTION The cable shield can be damaged by buckling or twisting This may lead to faulty measurem...

Page 148: ...e cap from the sensor cable 2 Place the connector of the sensor cable onto the sensor head and screw into place Ensure the cable is not twisted or buckled 8 2 12 Connecting the pO2 Sensor To connect the pO2 sensor proceed as follows METTLER pO2 sensor Procedure 1 Align the orange mark on the connector of the sensor cable with the orange mark on the sensor ...

Page 149: ...bration For polarisation the sensor cable must simply be connected to the pO2 sensor and the equipment must be switched on at the main switch Duration of polarisation polarisation time depends on how long the pO2 sensor has been disconnected from the voltage source depolarisation time As a general rule if depolarisation time 30 minutes the minimum polarisation time is 360 minutes More details abou...

Page 150: ...e Connections Check and ensure the following items before each cultivation Hoses show no kinks and are not able to kink Hoses are undamaged and show no weaknesses Gas hoses and connections do not show any leaks Hose lines are as short as possible Hoses are secured with cable ties and or hose clamps Only the pressure hoses supplied by the equipment manufac turer are connected as supply lines water ...

Page 151: ...connected to the basic unit All cable and hose connections between the equipment and the culture vessel including the reagent bottles are present pump heads are mounted and the reagent hoses are filled Depending on the user specifications the pO2 sensor is already calibrated 9 1 Preparing the Medium Before the first sampling which usually takes place as a zero sam ple before inoculation and before...

Page 152: ...nalysis The method of sampling can vary due to the different analyses carried out by the operator The sampling procedure using the standard sampling system Su per Safe Sampler is described below Before starting observe the following WARNING Culture solution could emerge from the vessel if the sample valve mechanically fails This could lead to serious health risks in the event of applications with ...

Page 153: ...pling Proceed as follows Procedure 1 Check that all screw connections of the valve group are tightly screwed in If necessary gently tighten the screw connections with two fingers 2 Remove the clamp from the sampling hose 3 If present Remove the closing caps 4 If desired Disinfect the sample valve 5 Screw open the Luer Lock syringe on the sample valve 6 Pull back the syringe plunger to remove the d...

Page 154: ...d its sampling hose can be filled with sterile air af ter taking a sample INFORMATION Only use a clean and dry syringe to avoid blocking the sterile fil ter This syringe can be reused as often as desired since air is provided via a sterile filter To do so proceed as follows Procedure 1 Insert the syringe onto the hose at the sterile filter and push air through The remaining liquid in the hose and ...

Page 155: ...with one hand unscrew the syringe with the other 3 If desired Place the closing caps on the sample valve and on the syringe with the sample 9 3 Inoculation Check and ensure the following items before inoculation Medium has been filled Heat labile separately sterilised substances are present The reagent bottles are connected with the pumps and the culture vessel and are filled with a sufficient amo...

Page 156: ...ent bottle a sterile hose connec tion is required for this method These methods are described in the following sections The implements for inoculation with inoculation needle are stand ard accessories for the equipment This inoculation method is par ticularly suitable for all vessel sizes of the equipment If separate addition of several different solutions is necessary a second inocu lation needle...

Page 157: ... the syringe with the required amount of inoculum 2 Unscrew the blanking plug from the septum collar As a possible additional protection against contamination Before piercing drop a few drops of ethanol 70 on the septum 3 Pierce the septum and inject the inoculum 4 Remove the needle from the septum and close the septum collar with a blanking plug 9 3 3 Inoculation Using Dip Tube Addition Port Adap...

Page 158: ...s of the vessel to another container in a laminar flow cabinet b Pump down via a sterile hose connection To do so proceed as follows Procedure 1 Make a sterile connection between the hose at the dip tube for harvest and the new vessel 2 Connect the hose to one of the pumps on the equipment or to an external pump 3 Pump the desired amount of culture into the new vessel INFORMATION Only switch on th...

Page 159: ...t Hoses Before autoclaving the culture vessel with accessories all reagent hoses must be completely emptied using the corresponding pump This can either be done manually and individually for each pump using the rocker switch on the basic unit or all pumps are emptied time controlled at once via the operating unit It is also recommended to thoroughly rinse the hoses with water after emptying and be...

Page 160: ...letely dry and observe the same safety regulations as when auto claving before cultivation Before starting ensure There is liquid in the culture vessel autoclavable medium or approx 10 mL water per litre working volume Reagents and feed solution have been pumped back out of the hoses The equipment is switched off The motor has cooled down Proceed as follows to prepare the culture vessel and access...

Page 161: ...from basic unit from the inlet air filter on the sparger 4 Lightly cover all filters and the drive hub with aluminium foil ATTENTION HAMILTON pH and pO2 sensors Do not cover with aluminium foil 5 Open the pump cover 6 Remove the mounting plate with pump heads from the drive shafts on the basic unit and place on the pump holder 7 Check and ensure that the exit gas filter is free and dry and the exi...

Page 162: ...ial washing agent for industry and lab use Cleaning agent for dena turation of proteins e g exit gas cooler 0 1 N NaOH Cleaning agent for smaller component parts e g exit gas cooler dip tube Ultrasonic bath Cleaning agent for sur faces Water Disinfectant for surfaces Ethanol 70 Decalcifier for the equip ment Phosphoric acid or citric acid max 5 10 2 Cleaning the Culture Vessel Routine Cleaning The...

Page 163: ...he side for separate cleaning according to the manu facturer guidelines 2 Completely fill the culture vessel with 0 1 N NaOH 3 Fit the top plate on the vessel and secure it 4 Connect the culture vessel to the basic unit vessel jacket or cold finger and heater pad 5 Couple the motor 6 Switch on the equipment at the main switch 7 At the operating panel in the touch screen software start the bioreact...

Page 164: ...nsure that the O ring does not get lost 2 Gently release the hose clamp with the hand wheel pull off the exit gas filter and dispose of it 3 Remove the pressure hose piece to thoroughly clean the exit gas cooler For details see the chapter Cleaning the Exit Gas Cooler 10 3 2 Removing the Sensors Sensors are either mounted directly into the ports or by means of an electrode holder or clamping adapt...

Page 165: ...tion on the sensor does not get dam aged 10 3 3 Removing Hoses Filters and Pump Heads To later clean reagent hoses and pump heads they must be re moved from the reagent bottles and from components of the cul ture vessel INFORMATION To avoid damage never dismantle the pump heads Always re place a damaged pump head along with the pump hose and vice versa Proceed as follows Procedure 1 Remove cable t...

Page 166: ...on socket spanner and remove it by hand Ensure that the O ring does not get lost Blanking plugs in 19 mm ports Procedure 1 Loosen the blanking plug with the hexagon socket spanner in the threaded adapter in the port and remove it by hand Ensure that the O ring does not get lost 10 3 5 Removing Threaded Adapters Proceed as follows Procedure 1 Loosen both slotted screws next to the threaded adapter ...

Page 167: ...on port adapter Ensure the O ring on the adapter does not get lost INFORMATION The removal procedure of further models of addition port adapt ers refer to main chapter Accessories for details is the same as for blanking plugs in their corresponding ports That is why their removal is not repeatedly described here 10 3 8 Removing the Vessel Top Plate Proceed as follows to remove the vessel top plate...

Page 168: ...ents can no longer come into contact with the glass vessel ATTENTION If the vessel top plate presses against long components they could bend because of the weight of the top plate Always position the vessel top plate so that it does not lie on top of components 4 If necessary now remove components that have not yet been removed 5 Check the glass vessel for damage cracks fissures scratches and repl...

Page 169: ...only be removed from the inside of the vessel top plate Since this equipment uses ring spargers and straight dip tubes removal from the inside of the vessel top plate is described here This means that the vessel top plate is already removed Proceed as follows Procedure 1 Loosen the slotted screw on the clamping adapter 2 Carefully pull the sparger dip tube from the bottom out of the clamping adapt...

Page 170: ...o remove Procedure 1 Loosen the grub screws on the impeller with an Allen key do not remove 2 Carefully remove the impeller from the stirrer shaft 10 3 13 Removing the Stirrer Shaft If needed the stirrer shaft can be removed for cleaning Particular care shall be taken to do so ATTENTION The mechanical seal is sensitive to applied forces Manipulation on it may lead to its damage To remove the stirr...

Page 171: ...n adjustable spanner on the two recesses on the up per end of the stirrer shaft 3 Unscrew the stirrer shaft with the spanner counter clockwise from the drive shaft 4 Check the O ring on the drive shaft for damages replace as necessary 10 4 Cleaning and Storing Individual Parts The procedure described here applies to the following individual parts Vessel Accessories such as blanking plugs spargers ...

Page 172: ...c unit and the exit gas cooler are described in separate sec tions Proceed as follows for cleaning Procedure 1 Clean parts with distilled water and a soft sponge or in the dishwasher except for the vessel top plate Ensure that the deposits in the dip tubes are removed Use 0 1 N caustic soda solution followed by distilled water as nec essary For this see the Cleaning the Culture Vessel sec tion 2 D...

Page 173: ...smantle the pump heads Always re place a damaged pump head along with the pump hose and vice versa 10 7 Cleaning the Super Safe Sampler ATTENTION Risk of damage to the sampling system from unsuitable clean ing methods or cleaning agent such as acids bases or sol vents for example Only use water or a mild soap solution for cleaning The sterile filter must remain dry at all times Proceed as follows ...

Page 174: ...f foam has entered the exit gas cooler during cultivation it must be cleaned thoroughly To do so proceed as follows Procedure 1 Put the exit gas cooler into 0 1 N NaOH for 4 hours 2 Rinse the exit gas cooler thoroughly with water 3 Put the exit gas cooler into an ultrasonic bath for 2 to 5 minutes 4 Flush the exit gas cooler with ethanol 70 5 Thoroughly rinse the exit gas cooler with distilled wat...

Page 175: ...a dry cloth If necessary use a damp cloth water only ATTENTION Cleaning the heater pad with soap or aggressive detergents may damage the silicone sheathing 3 Let the heater pad completely dry after cleaning with a damp cloth 4 Check the heater pad and cable for damages cracks kinks etc replace as necessary 10 11 Maintenance Plan WARNING Non compliance of this maintenance plan contains a high risk ...

Page 176: ...ssary calibrate the sensors Single walled vessels check heater pad and its cable connection on visi ble damages replace the heater pad if necessary Check lubrication of mechanical seal and lubricate as necessary After every fermentation culti vation Autoclave and clean the culture vessel and accessories As required Clean the basic unit and operating panel Single walled vessels clean the heater pad...

Page 177: ...quately lubricated is destroyed when running dry Proceed as follows for lubrication Procedure 1 Pull off the longer piece of hose from the coupling on the shorter piece 2 Fill a syringe with glycerine and plug it onto the open hose end 3 Fill Glycerine into the hose 4 Plug the longer piece of hose onto the coupling of the shorter piece If Glycerine has come off the tubing wipe off as necessary 10 ...

Page 178: ... unit use a chiller or a water bath and an external pump During decalcification the decalcifier flows in a circuit between the basic unit and the chiller water bath Proceed as follows Procedure 1 If applicable mount the exit gas cooler into the port of the ves sel top plate and connect to the basic unit 2 If applicable mount the cold finger 3 Connect the culture vessel to the basic unit 4 Let the ...

Page 179: ...uipment in this case Prepare the following things and note the following points before begin of the procedure Use phosphoric or citric acid max 5 as decalcifying agent Prepare a funnel and piece of hose for connection to the water overflow of the vessel jacket Be sure to respect the in chapter Technical Data specified inlet pressure Proceed as follows Procedure 1 Completely empty the vessel jacket...

Page 180: ...eck fuses of mains connection Check fuses of basic unit Qualified elec trician Break in power connections Check power plug Check power cable on damages or kinks Check socket and cable on basic unit Qualified elec trician Interference Power indicator of the main switch is illuminated monitor of the operating unit remains dark Possible cause Remedy By Monitor of operating unit is switched off Switch...

Page 181: ...gular or stops Possible cause Remedy By PID settings of parameter Stirrer are not correct Reset to default settings Operator Interference Unusual sounds when the stirrer is activated Possible cause Remedy By Stirrer is in contact with other vessel built in components Stop the bioreactor Shutdown the system and turn off the equipment Correctly mount the mounting parts of the culture vessel while ob...

Page 182: ...ustically then enter a higher setpoint to heat up Fully open the water supply for a moment Check whether there is sufficient primary pressure on the water supply adjust as necessary Operator Cooling valve is blocked Decalcify the equipment Operator Interference No cooling or inadequate cooling Possible cause Remedy By No water supply or inadequate flow Check the water supply and turn the supply ta...

Page 183: ...not activated Slowly open the rotameter needle valve s And or Activate the Flow parameter s And or Set the setpoint s in the Flow parameter s 0 Or Set parameter GMFlow 0 and activate parameter GasMix Operator Hose connection s between the basic unit and the culture vessel is are kinked or clamped Check whether the hose connection s is are clamped if necessary open the clamp s Check hose connection...

Page 184: ...or cable not connected or not properly connected Connect properly if necessary Operator Measuring system METTLER ana logue Function Temperature compensation is not activated Activate this function in option Setpoint of parameter pH1 Operator pH drift during long cultivation Recalibrate pH with offline values Refer to the sepa rate operating manual of the touch screen software for details Analogue ...

Page 185: ...fts up and down over time or acid and base are added almost continuously in turn Possible cause Remedy By Incorrect PID setting in pH parame ter Check the PID settings and adjust as necessary Change the special proportional factor Prop Term or Dead band setting Operator Incorrect strength of reagents Con centration is too weak or too strong Check the strength of reagents Adjust if necessary 0 1 mo...

Page 186: ...settings PID parameter option and adjust as necessary Special proportional factor Prop Term and dead band Dead band value must be 0 zero Operator 11 7 Interferences Antifoam or Level Sensor and Antifoam Pump Interference Foam medium is not detected Possible cause Remedy By Sensor is not properly connected Check connections and connect properly as neces sary Operator Interference Foam medium is alw...

Page 187: ...rator The pump hose is damaged Replace pump head Operator Incorrect hose type connected Replace if necessary Operator 11 8 Interferences Feed and Pump Interference No feed solution or inadequate feed solution Possible cause Remedy By Parameter Feed is not activated Activate the parameter Operator Setpoint of parameter Feed 0 Set setpoint 0 Operator Reagent bottle empty Refill if necessary Operator...

Page 188: ...ice depart ment of the local dealer or the manufacturer on site diagnosis and or repair is not possible INFORMATION When returning the equipment the component part or acces sory for repair it is required for the safety of all parties involved and because of legal provisions that a lawful declaration of de contamination is present Refer to main chapter Safety and Re sponsibility chapter Declaration...

Page 189: ...ior to disassembly Switch off the equipment and lock any isolation switch in the off position Physically disconnect the main energy supply from the equip ment and wait for components to fully discharge Remove and dispose of all additional consumable items auxil iary components and or spent processing material in an envi ronmentally acceptable manner Clean and disassemble component parts profession...

Page 190: ...sal firms For disposal the system units are to be disassembled and disman tled into individual material groups These materials are to be dis posed of according to the applicable national and local legislation Local authorities or specialist disposal firms can provide infor mation regarding environmentally acceptable disposal If no special arrangements have been made for return INFORS HT units with...

Page 191: ...ment with operating unit holder for up to 2 gassing units 5 pumps and standard base tray Middle equipment with operating unit holder for up to 4 gassing units 5 pumps and base tray for vessels with DN1 200 mm To the right satellite unit holder for up to 4 gassing units 5 pumps and standard base tray 1 DN diameter nominal inner diameter Dimensions in mm ...

Page 192: ...2019 Top view and side view To the left equipment with holder for up to 2 gassing units and standard base tray Middle equipment with holder for up to 4 gassing units and base tray for vessels DN200 To the right equipment with operating unit and standard base tray Dimensions in mm ...

Page 193: ...5 13 2 Dimensions Master Unit and Satellite Units Front view master unit with 5 satellite units Above 6 units with holder for up to 4 gassing units 5 pumps and standard base tray Below 6 units with holder for up to 4 gassing units and base tray for vessels with DN200 Dimensions in mm ...

Page 194: ...ove show top view of the culture vessel with stand ard exit gas cooler and with swivelling exit gas cooler and with without reagent bottle und pump holder Ø Total volume L diameter nominal of vessels mm 2 115 3 6 115 3 6 150 7 5 150 13 200 Dimensions in mm D1 330 330 335 335 365 D2 300 300 320 320 365 D3 340 340 355 355 420 D4 365 365 380 380 435 D1 D2 D3 D4 ...

Page 195: ...ssel with standard exit gas cooler left and with swivelling exit gas cooler right both with reagent bottle and pump holder Ø and height Total volume L diameter nominal of vessels mm 2 115 3 6 115 3 6 150 7 5 150 13 200 Dimensions in mm D1 250 250 250 250 290 H1 373 538 405 635 616 H2 453 618 487 717 700 H3 514 679 546 776 760 ...

Page 196: ...ouble walled culture vessels in delivery state equipped with default mounting parts 13 5 Connection Values 13 5 1 Electrical Description Type 230 V Type 115 V Unit Value Voltage 230 115 V Frequency range 50 60 60 Hz Current 4 8 A 13 5 2 Water IN Description Value Unit Connection pressure 2 1 bar Inlet temperature 10 20 C Connection OD of hose nozzle 8 3 mm Max flow cooling vessel 1 6 L min Max flo...

Page 197: ...ion pressure No back pressure Temperature up to 80 C Connection OD of hose nozzle 10 mm 13 5 4 Gas es IN Description Value Unit Connection pressure 2 0 5 bar Connection OD of hose nozzle 7 mm General gas quality Dry clean and free of oil and dust Recommended compressed air quality Class 1 2 3 4 As per DIN ISO 8573 1 13 5 5 Exit Gas Description Value Unit Connection pressure No back pressure Connec...

Page 198: ...el AISI 316L electro polished O rings EPDM Vessel sizes TV 1 VV max 2 VV min 3 DN 4 mm Height mm 2 0 1 2 0 5 115 205 3 6 2 3 0 5 115 370 3 6 2 3 1 0 150 235 7 5 5 0 1 0 150 465 13 0 10 0 2 2 200 445 1 Total volume in L 2 Min working volume in L 3 Max working volume in L 4 Diameter nominal inner diameter of the vessel Ports in top plate mm Thread Number per diameter nominal of vessel DN 115 DN 150 ...

Page 199: ...0 up to 1500 min 1 3 6 L and 7 5 L NW 150 vessel 80 up to 1000 min 1 13 L NW 200 vessel 80 up to 600 min 1 Accuracy Measurement 5 min 1 at 100 1000 min 1 1 setpoint at 1000 min 1 Control 5 min 1 at 100 1000 min 1 1 setpoint at 1000 min 1 Direction of rotation Counter clockwise top view vessel Bearing Outside of vessel in drive hub INFORMATION Rotation speed is valid for viscosity similar to water ...

Page 200: ...150 54 mm 11 mm 11 mm 13 L NW 200 70 mm 13 mm 19 mm 13 6 4 Temperature Description Value Sensor Type Pt100 1 3 DIN B Heating Double walled vessels Water circulation in vessel jacket Pump and heating 500 W integrated in basic unit Single walled vessels With electrical heater pad Cooling Double walled vessels With tap water via water circuit into vessel jacket Option with circulation chiller Single ...

Page 201: ...and biological reaction 13 6 5 Gassing The entire gas entry takes place via the sparger The specific gassing rate calculated for the max working volume is for each vessel size and each variant 2 min 1 Variant Basic Gas es Gas flow control Accuracy Rotameter Gas mix control Air 1 Rotameter 4 Air O2 1 Rotameter 2 solenoid valves Air N2 1 Rotameter 2 solenoid valves Air O2 N2 1 Rotameter 3 solenoid v...

Page 202: ...uring range Rotameter L min 1 Variant Basic Measuring range MFC L min 1 Variant Standard Measuring range MFC L min 1 Variant High End 1 2 0 25 up to 2 4 0 05 up to 2 5 0 025 up to 2 5 2 3 0 30 up to 4 7 0 10 up to 5 0 0 05 up to 5 0 5 0 0 50 up to 11 0 0 20 up to 10 0 0 10 up to 10 0 10 0 1 00 up to 22 0 0 40 up to 20 0 0 20 up to 20 0 1 Mass flow controllers 2 Working volume 13 6 6 Antifoam Descr...

Page 203: ...against reference with integrated electronics type Easyferm Plus ARC Manufacturer HAMILTON Measuring range pH 0 up to 14 INFORMATION HAMILTON pH sensors are preconfigured before dispatch by the equipment manufacturer INFORS HT Replacement sensors of this type must be reconfigured before use Details on technical data use and maintenance of the pH sensors can be found in the separate documentation o...

Page 204: ... range 0 05 300 air sat uration INFORMATION HAMILTON pO2 sensors are pre configured from the equipment manufacturer INFORS HT Replaced sensors must be config ured again before use Details about technical data use and maintenance of the pO2 sen sors are in the separate documentation from the sensor manufac turers 13 6 9 Pumps Description Value Type Peristaltic Standard Digital 3 pieces Acid Base AF...

Page 205: ...D 2 5 mm Wall thickness 1 0 mm Flow rate 17 2 ml min 1 Flow rates All flow rates at 74 min 1 100 rotation speed 13 6 10 Sterile Filters Description Value All filters Autoclavable Disposable Inlet air filter red label 1 Retention rate 0 2 µm Diameter 37 mm Inlet air filter no label 2 Retention rate 0 2 µm Diameter 25 mm Exit gas filter green label 3 Retention rate 0 3 µm dry 1 0 µm wet Diameter 37 ...

Page 206: ...2 0 115 200 200 370 90 3 6 115 400 400 370 170 3 6 150 400 400 475 140 7 5 150 400 400 475 140 13 200 1000 500 655 250 13 7 Operating Conditions Description Value Temperature range 5 C up to 40 C Relative air humidity non con densing 20 up to 90 Min distance from walls ceil ings and other appliances 150 mm 13 8 Emissions Description Value Units Noise emission 70 dB A 13 9 Utilities Glycerine Lubri...

Page 207: ... for Microorganisms Technical Data 22 January 2019 Page 205 of 205 13 10 Auxiliary Supplies pH Buffers pH buffers are used to calibrate the pH sensors 250 mL bags are available for the following buffers pH 4 04 pH 7 01 ...

Page 208: ......

Reviews: