c.
If you have difficulty with neighboring mounting screws of components
already installed, loosen these mounting screws, then tighten them once all
of the component rails are installed
d.
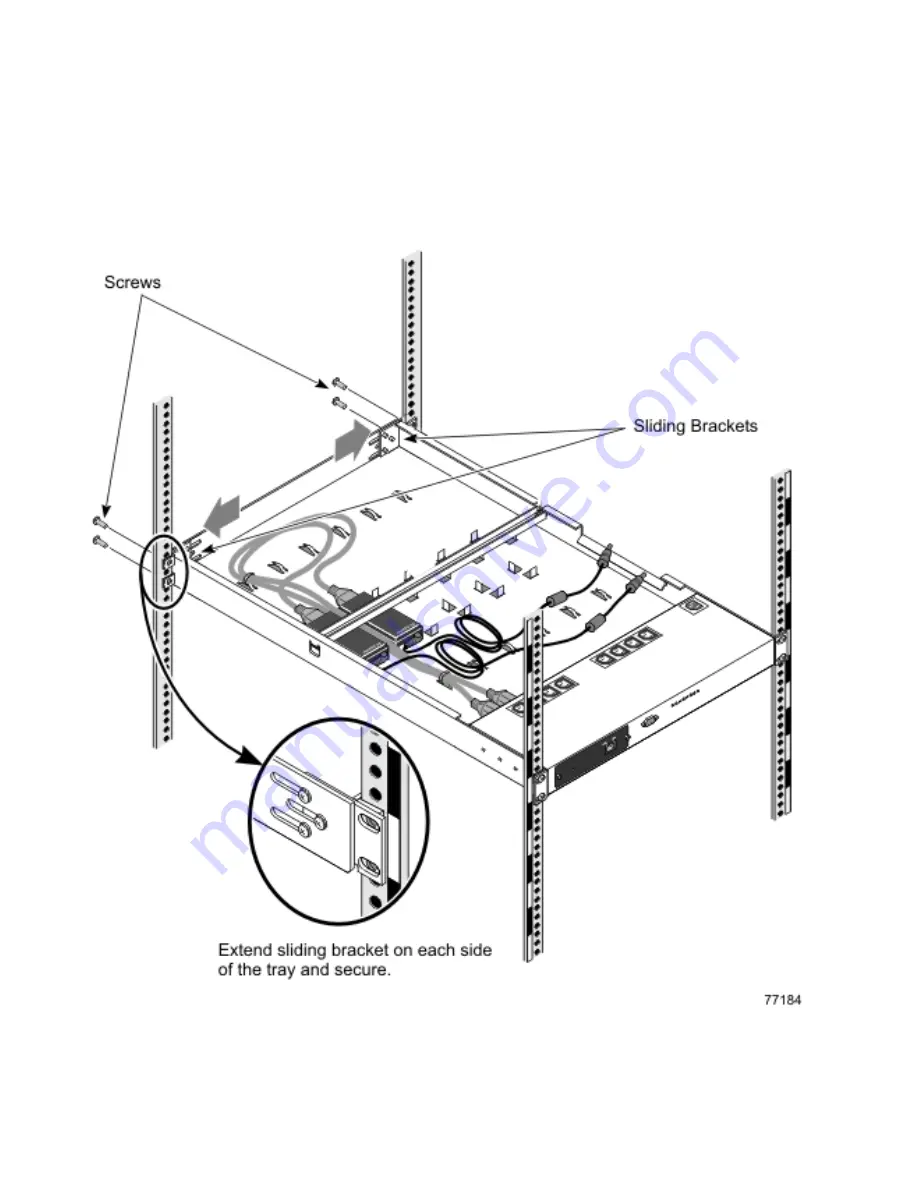
At the front of the cabinet, extend the sliding brackets so that the holes line
up with the front vertical cabinet rails, as shown in the figure below. Insert
the mounting screws in the front vertical cabinet rails.
e.
Tighten the mounting screws in the cabinet vertical rails with a Phillips #3
screwdriver
f.
Tighten the sliding bracket screws
Figure 23. Install Power Management Module tray into cabinet from the rear of the cabinet, part 2
116
Installation and Service
Summary of Contents for System Cluster 1350
Page 1: ...eServer Cluster 1350 Cluster 1350 Installation and Service IBM...
Page 2: ......
Page 3: ...eServer Cluster 1350 Cluster 1350 Installation and Service IBM...
Page 8: ...vi Installation and Service...
Page 10: ...viii Installation and Service...
Page 12: ...x Installation and Service...
Page 20: ...2 Installation and Service...
Page 30: ...12 Installation and Service...
Page 32: ...14 Installation and Service...
Page 52: ...34 Installation and Service...
Page 68: ...50 Installation and Service...
Page 70: ...52 Installation and Service...
Page 72: ...54 Installation and Service...
Page 74: ...56 Installation and Service...
Page 92: ...74 Installation and Service...
Page 96: ...78 Installation and Service...
Page 98: ...80 Installation and Service...
Page 104: ...86 Installation and Service...
Page 110: ...92 Installation and Service...
Page 124: ...106 Installation and Service...
Page 126: ...108 Installation and Service...
Page 138: ...120 Installation and Service...
Page 139: ...Part 4 Appendixes Copyright IBM Corp 2003 121...
Page 140: ...122 Installation and Service...
Page 144: ...126 Installation and Service...
Page 148: ...130 Installation and Service...
Page 154: ...136 Installation and Service...
Page 160: ...142 Installation and Service...
Page 169: ......
Page 170: ...IBMR Printed in U S A...


